Configuring ProcessingHub
ProcessingHub enables bulk processing in FinDock, from bulk collection runs to bank statement parsing.
Activate ProcessingHub in FinDock
Before you can start the ProcessingHub configuration, you need to activate the package first.
To activate the ProcessingHub package:
- Launch the FinDock app and click the Setup tab.
- Click the Activate/Deactivate tab.
- Use the toggle in the STATUS column to activate ProcessingHub.
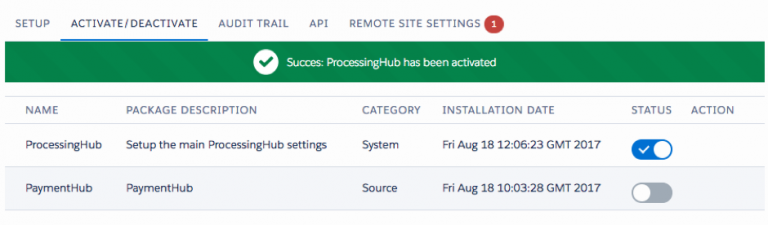
FinDock packages installed before the October 2019 release may use the name ‘StepOrange CPM’ or ‘PaymentHub.’
Connect ProcessingHub and Salesforce
The user account used to connect with the ProcessingHub needs the following permission sets:
- PaymentHub Integration Base
- PaymentHub Operations
- ProcessingHub Operations
Alternatively, the user account can be assigned the FinDock Integration User Group permission group.
To connect Salesforce to ProcessingHub:
- Go to the Setup tab in the FinDock App in Salesforce.
- Click the ProcessingHub tile.
- Click the Connect tab and follow the instructions to connect the ProcessingHub.
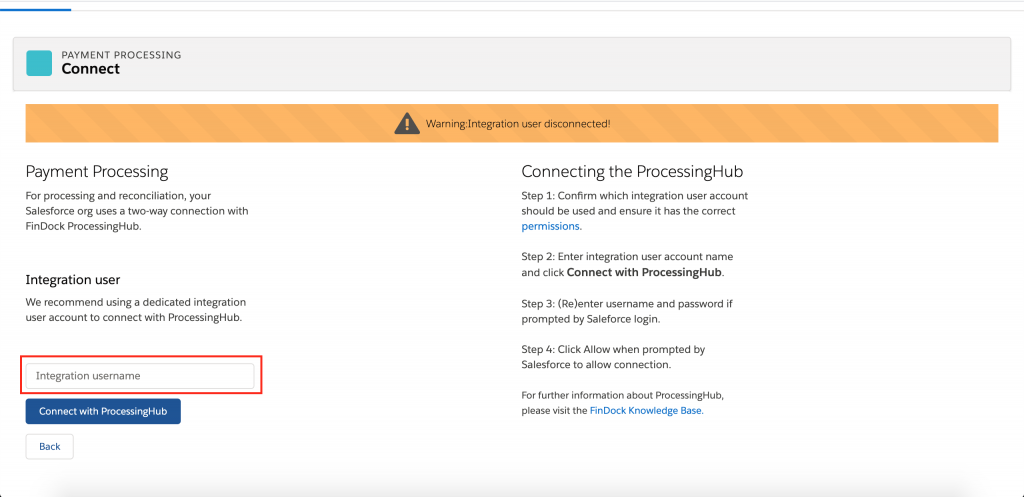
- Click Connect with ProcessingHub.
- If the user account is not yet logged in, you are prompted by Salesforce to enter the Integration User credentials.
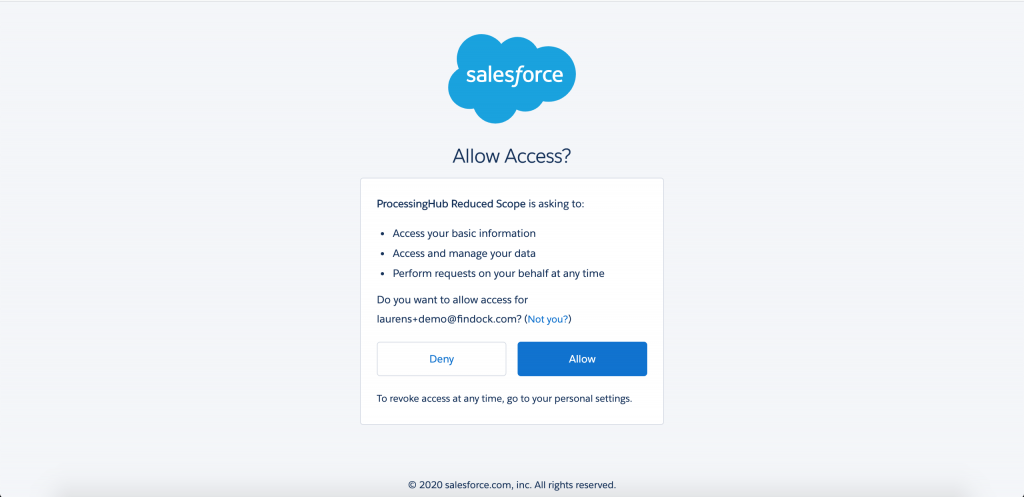
- Once the account is authenticated, Salesforce asks you to grant FinDock access to your Salesforce environment. Click Allow.
- You are redirected back to the ProcessingHub Connect tab where you should see a Green bar saying the connection was set up successfully.
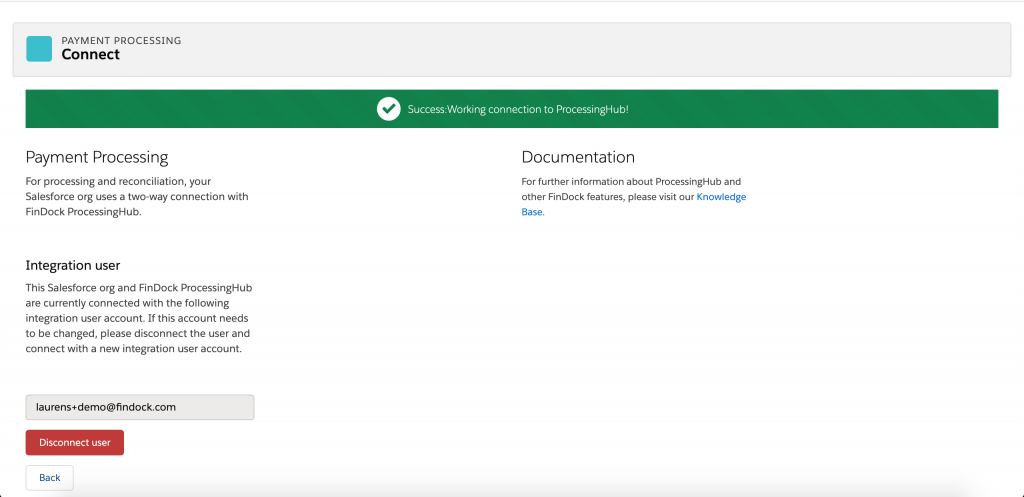
- Please confirm the correct user account was used for the connection. If it was the wrong account, disconnect the user and connect again with the correct account.
If for step 5 you logged in with a different (Integration) user than you have used for an ongoing FinDock setup, you get a Salesforce permission error when clicking the Back button. Please log in again with the initial user account or go to your homepage to browse Salesforce as usual.
Configure file exchanges
Most FinDock implementations include processing bank files, such as camt.053. These files are exchanged between Salesforce and ProcessingHub through a Chatter Group.
Make sure the group you assign for file exchanges is not deleted or archived. FinDock cannot complete file processing with a missing or achived group. Note that Chatter Group auto achiving is enabled by default.
To set up a Chatter Group for file exchanges:
- Open the Salesforce App Launcher, search for “Groups” and click on the Groups search result.
- On the Groups page, click New.
- Enter a name such as “ProcessingHub File Exchange” (we use this name to refer to this group) and description.

- Scroll down to Access type and select “Private.” This limits access to group members and System Administrators. The files exchanged through this group may contain private information, therefore access should be limited.
- Click Save & Next to create the group.
- On the next page, search for the integration user you used for ProcessingHub and click Add to make it a member of this group.
- Add the other users that require access (usually finance staff).
- Click Done when you have added all users.
After the group is created, you need to instruct ProcessingHub to use this group for file exchanges.
To set up ProcessingHub file exchange with Chatter:
- Launch the FinDock app and click on the Setup tab.
- Click on the ProcessingHub tile to open up the ProcessingHub setup page.
- Click General Settings.
- In the Group Id drop-down list, select the ProcessingHub File Exchange Group you just created.
ProcessingHub general settings
At this point you can also define other settings related to ProcessingHub.
- Set the Multiple Installment Handling logic. If you are unsure, leave the default as is.
- Set the Overpaid Installment Handling and Overpaid Installment Handling options as needed. If you are unsure, leave the defaults as is.
NOTE: These settings are only for file-based matching on ProcessingHub. - Select an option for where to add links to generated files. Keep in mind how this impacts file accessibility. The options are:
- Chatter Group
- Chatter Group and PaymentHub File
- Chatter Group, PaymentHub File and Payment/Mandate Schedule
- Configure the Bulk API batch sizes and concurrency modes if necessary. If you are unsure, leave the defaults as is.
- Click Save to store the settings.
For information on the installment handling options, see Automatic matching on ProcessingHub.
Automating file uploads to Chatter
Smaller organizations can usually manage with manually uploading bank files to Chatter for processing. However, larger organizations that have many bank files coming in during the week, even multiple per day, may prefer to automate the Chatter upload process.
There are a couple of options. One very simple way that does not require software coding is to use email. We outline the automatic Chatter file upload with email solution here.
Another option is to leverage the Salesforce REST API for direct Chatter file upload. Use the POST method to upload XML or JSON content to the Chatter group for processing.
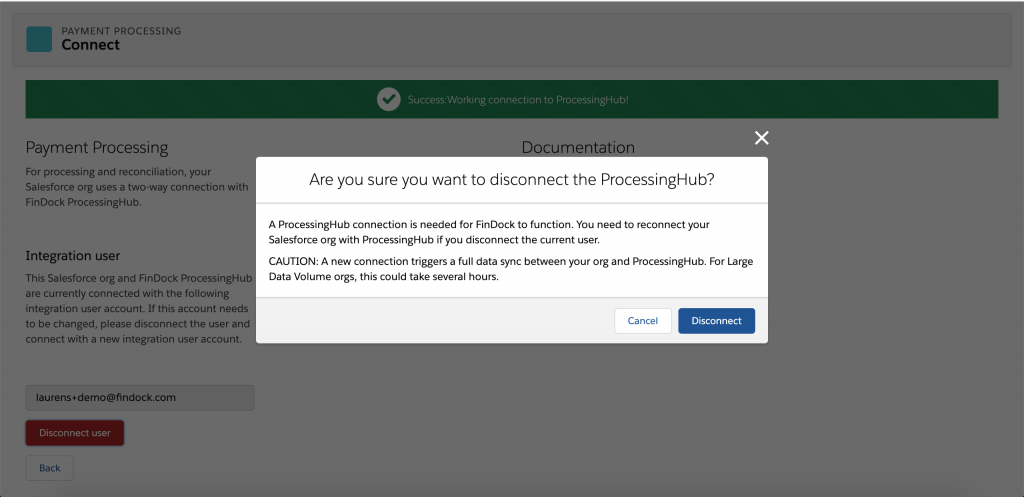
Disconnecting ProcessingHub
FinDock requires a working ProcessingHub connection to function properly. Disconnecting a user should always be done with caution.
Disconnecting and reconnecting, even with the same user, causes FinDock to wipe all data associated with the Salesforce environment in ProcessingHub. A full data sync is performed before processes like Payment Schedules can be run. Especially for Salesforce environments with Large Data Volumes (LDV), this sync could take several hours or longer.
If you wish to disconnect the current user from the ProcessingHub:
- Launch the FinDock app and open the Setup tab.
- Click the ProcessingHub tile.
- Go to the Connect tab.
- Click the Disconnect user button.
- You are prompted to confirm the disconnection. Click Disconnect if you are certain you want to disconnect.
You are redirected back to the Connect tab, and ProcessingHub is disconnected.
Troubleshooting
If the connection with the ProcessingHub has been disconnected, please check the following:
- Is the integration user still active?
- Does the integration user have all the needed permission sets?
Deprecated components & connection process
Several components that were part of the connection process before the May ‘20 release are no longer used by FinDock when you have set up a connection with the new process. This includes:
- The RefreshTokenScheduleSchedule is no longer required to refresh access tokens. Token refresh is now handled automatically.
- The following Remote site settings are replaced with a named credential, which is packaged and shipped with FinDock Core:
https://eu-prod-1.processinghub.iohttps://so-eu-prod-2.herokuapp.comhttps://eu-test-1.processinghub.io