The Tikkie for FinDock extension brings the Tikkie payment service to Salesforce, fully leveraging FinDock's payment request and reconciliation features.
Very popular across the entire Dutch market, "Tikkies" are QR codes or URLs that direct users to simple, hassle-free payments. The payment requests can be used in all types of channels for a wide range of purposes. Payment requests can be sent through the Tikkie app, social media apps, email, SMS, print, etc. They are ideal for campaigns, fundraising drives, or just giving payers a really easy way to pay.
| Payment Method | Currency | One-time | Recurring | Initial Recurring | Refunds |
|---|---|---|---|---|---|
| Tikkie | EUR |
| Payment Method | Online Flow | API | MOTO | Data Entry | Initiate Refund |
|---|---|---|---|---|---|
| Tikkie | Redirect |
- FinDock installed and configured.
- FinDock WebHub is connected.
- You have a Tikkie for Business account.
Follow the standard procedure for installing payment processors to add the Tikkie payment extension and activate the Tikkie payment method.
Check and assign the required permissions. If you are using custom permission set groups, ensure the package-specific permission sets are assigned.
Tikkie is currently only available in the Netherlands, so both the Tikkie Business Portal and some configuration steps are partially in Dutch. You need to use both the Tikkie Business Portal and your Salesforce org to configure the Tikkie extension.
To configure Tikkie:
- Sign in to your Tikkie Business Portal account: business.tikkie.me or business.sbx.tikkie.me if you have a sandbox account with Tikkie.
- Click the cog icon in the top right corner to open the settings.
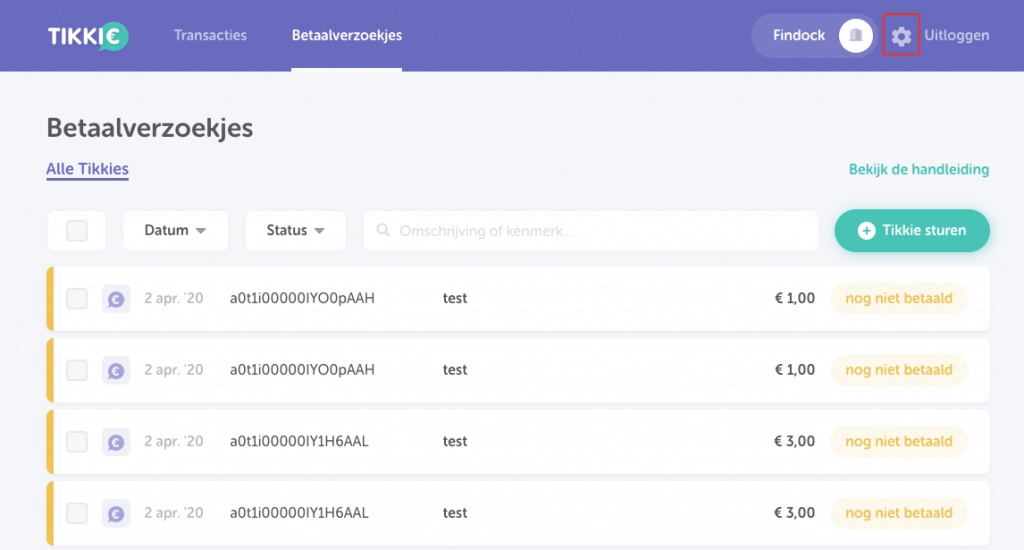
- Click the API tokens tile.
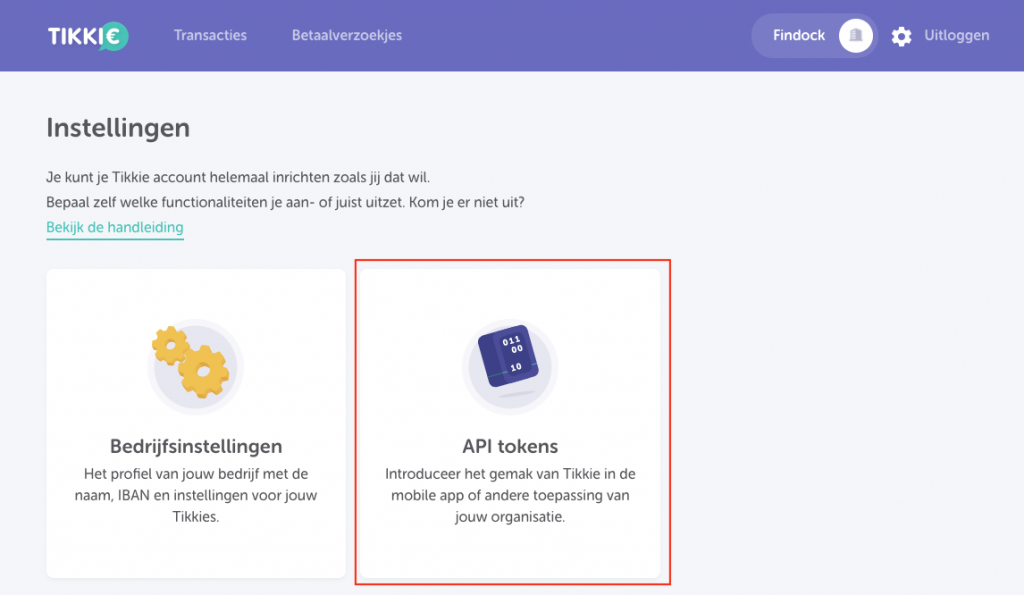
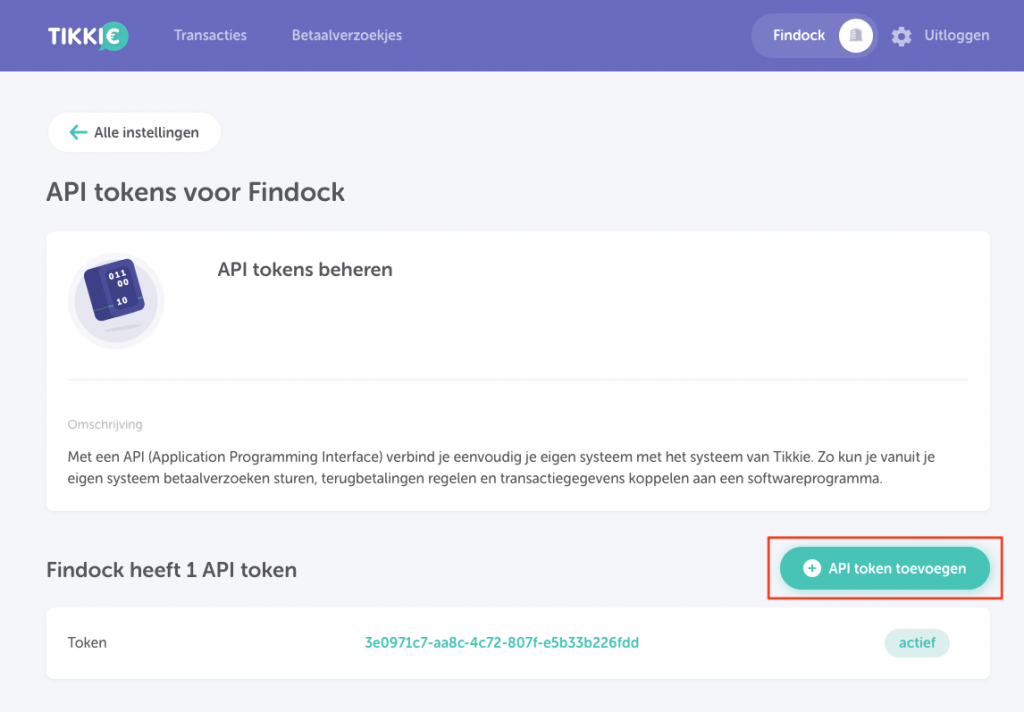
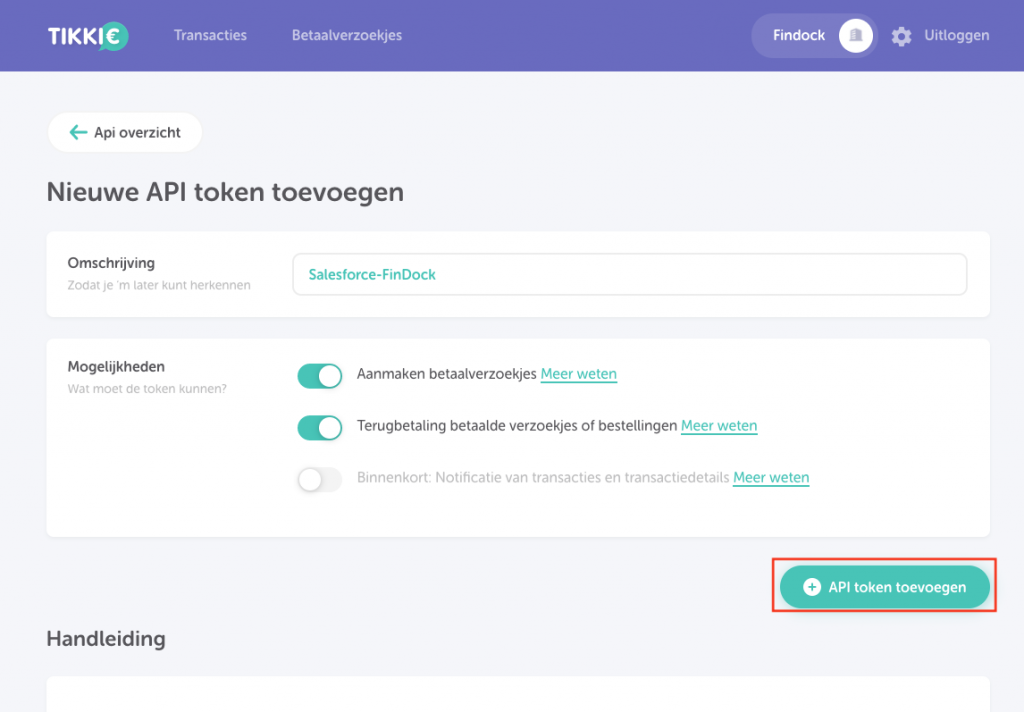
- Click the API token toevoegen button. Do not try to re-use existing API tokens that have been used for applications other than FinDock.
- Select ‘Aanmaken betaalverzoekjes’ and ‘Terugbetaling betaalde verzoekjes of bestellingen’ and enter a ‘omschrijving’ that makes it clear this token will be used for FinDock.
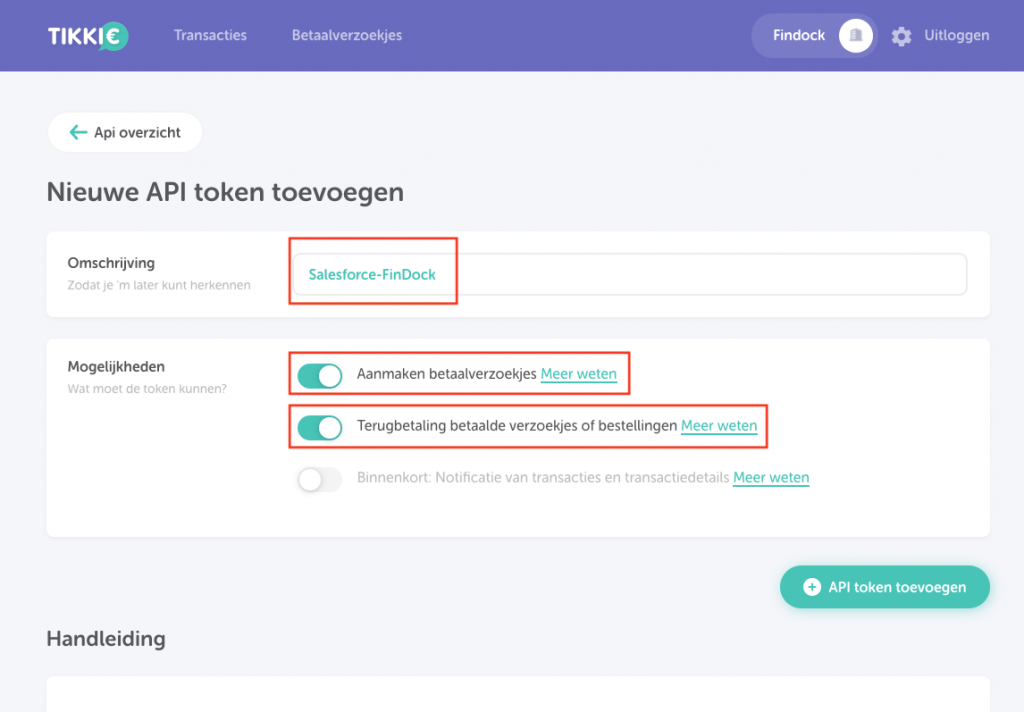
- Click the API token toevoegen button.
- Check if your API token has been added.
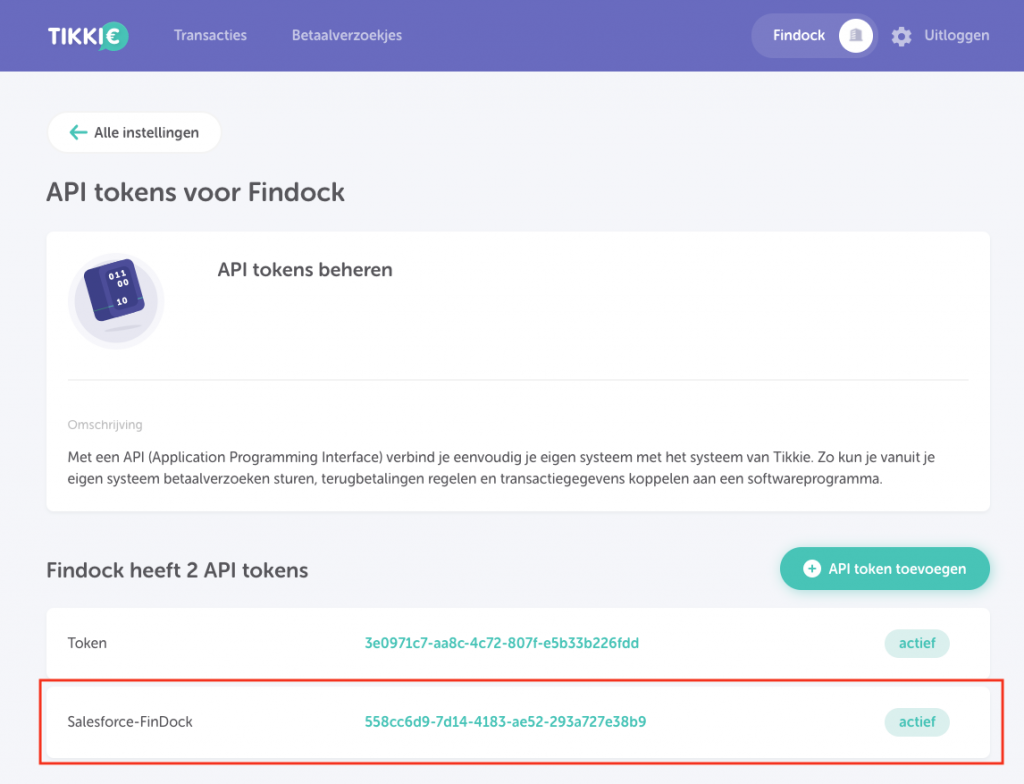
- Click your API token and check if ‘Actief’ has been (automatically) selected.
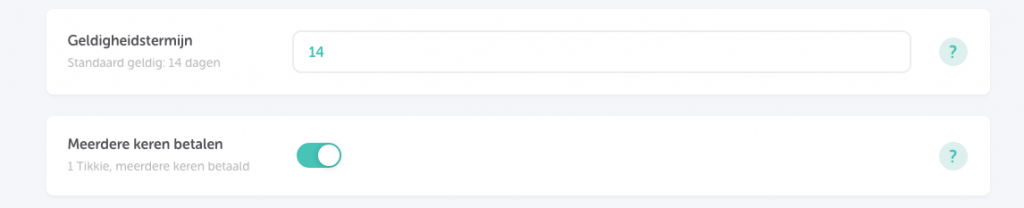
- Click the cog in the top right corner and go to Bedrijfsinstellingen.
- Make sure that ‘Meerdere keren betalen’ has been selected and adjust the standard ‘Geldigheidstermijn’ as needed. This validity period is only used for Tikkies not created through FinDock.
- Launch the FinDock app and click the FinDock Setup tab.
- Click Processors & Methods in the left-hand menu.
- On the Installed tab, click the Tikkie processor entry.
- Click Add Account.
- For the merchant account you want to integrate, add the following details:
- Merchant Account Name: Enter a name for your Swish target (merchant account)
- Default Account: Enable on the account you want used when no account is specified in a payment intent call to the Payment API
- Test Account: Enable if you are setting up a test environment. Only enable if you are using a Tikkie for Business Sandbox account from ABN AMRO at business.sbx.tikkie.me
- Tikkie for Business API Token: your API token created at step 6. (similar to: 1a2345b6-cd7e-8f91-....)
- Days Before Expiration: Set the number of days you want Tikkies to last before they expire. Default is 730 days. If you leave the setting empty, FinDock uses the default Geldigheidstermijn of 14 days.
- Click Save.
You can add multiple merchant accounts to the Tikkie extension by repeating the steps above. Just make sure you use the right tokens for each account.
The FinDock Quick Tikkie feature is implemented as a Salesforce component. All you need to do to be able to use it is add the component to a Lightning Record Page.
To configured Quick Tikkie:
- Open the desired page layout in the Lightning App Builder.
- Search for the "Tikkie" component.
- Drag the component onto the page.
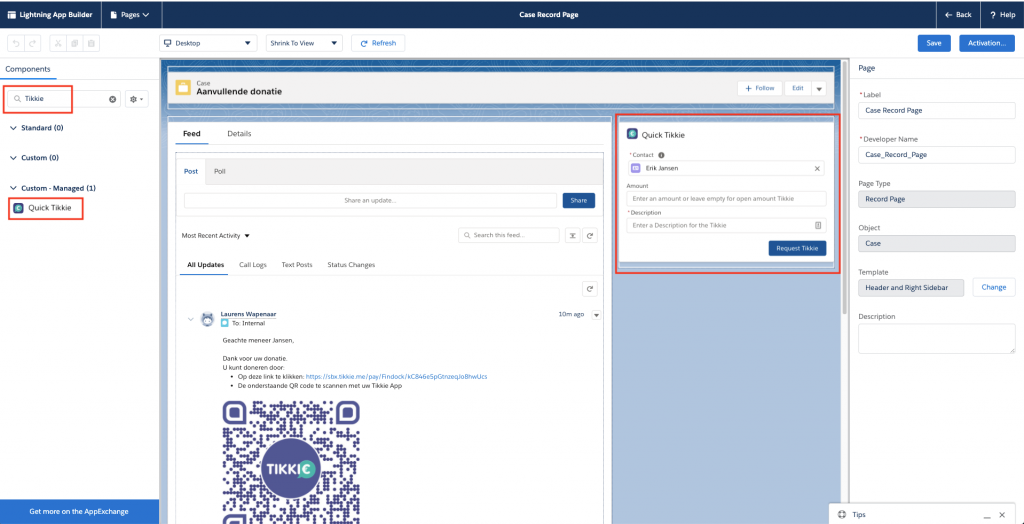
- Click Save , and if necessary, Activate.
You can generate open or closed Tikkies with the Payment Request Generator using the Tikkie reference type.
For the generated Tikkies, you need to create custom fields - preferably Tikkie specific - on the target object to store (output mapping) the following values:
- Payment Reference: Text(22)
- Payment URL: Url(255)
- QR Base 64: Long text Area(32768)
In addition, create a custom Description field (Text(35)) as the input field on Campaign, Campaign Member or other object, where you can provide the text that is shown to the payer on the Tikkie payment page.
You can use the following example message to test if the Tikkie configuration is working as expected.
{
	"SuccessURL": "https://www.example.com/success",
	"FailureURL": "https://www.example.com/error",
	"Payer": {
		"Contact": {
			"SalesforceFields": {
				"FirstName": "Test",
				"LastName": "Payment",
				"Email": "testpayment@findock.com"
			}
		}
	},
	"OneTime": {
		"Amount": "36"
	},
	"PaymentMethod": {
		"Name": "Tikkie",
		"Processor": "FinDock-Tikkie",
		"Parameters": {
			"description": "example description"
		}
	}
}