Creating approval processes for bulk collection runs
It is recommended to always create an approval process to govern the execution of a payment schedule. This enables users to quickly progress to the next stage, and keeps an audit trail on the various stage changes and who approved the run. For more information on how to perform a bulk collection run using the Payment Schedule object, see Introduction to payment schedules The configuration consists of a number of steps:
- Create a queue for the approval processes
- Create the Run Content approval process
- Create the file verification approval process
- Create a Lightning process to submit the record for approval
Create a queue for the approval processes
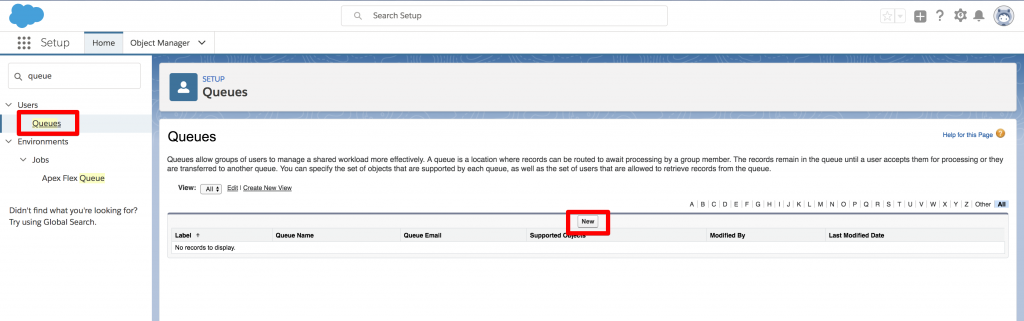
In order to make the approvals in depended of any one user, it is recommended to create a queue to facilitate approvals. You can add all the relevant team members to the queue and even if one person is unavailable, his or her colleagues can still approve the run as required. Please make sure these users have the required FinDock-permission sets. To create a queue in Salesforce, go to the Salesforce Setup page. Enter "queue" in the quick find box and click the "Queues" menu item as it appears. On the resulting screen, click "New".
Next, configure the queue to match the screenshot below:
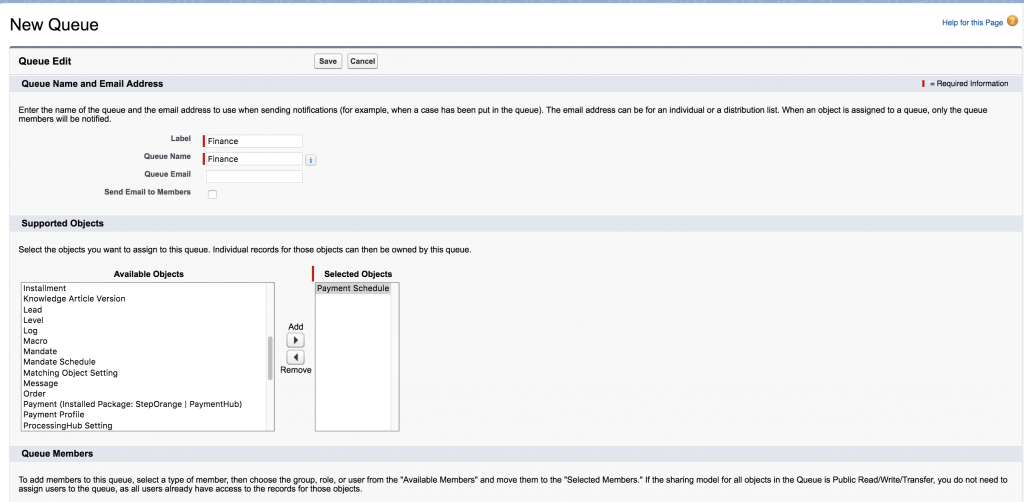
Make sure to add at least the Payment Schedule object to the list of selected objects. Scroll down to add at least one person to the queue. When you're done, click Save. Now that we have configured our queue, lets move on to configuration of the actual approval processes.
Create the Run Content approval process
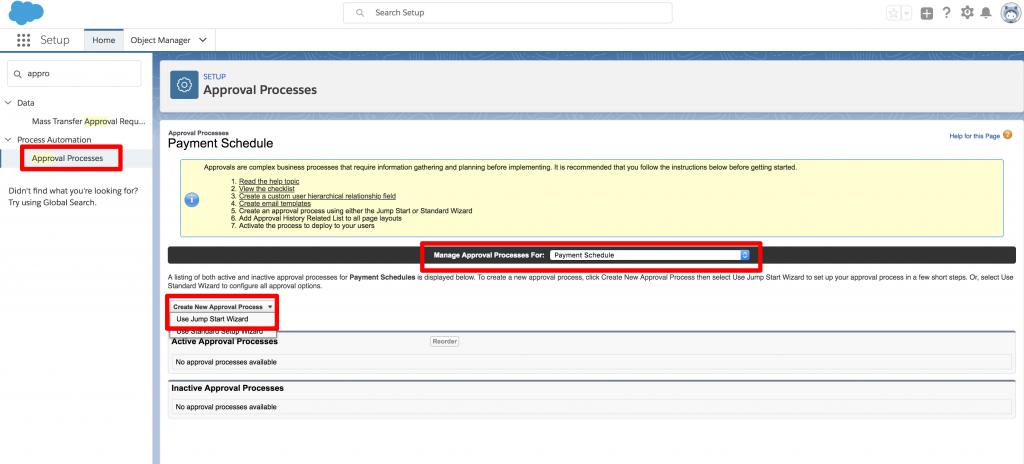
In the Salesforce setup screen, use the quick find and enter "Approval Processes", click the corresponding menu item as it appears. In the "Manage Approval Processes for" picklist, select Payment Schedule. Click "Create New Approval Process" and select the Jump Start Wizard.
Now we can configure the name and entry criteria for this process. Make sure to match the configuration as shown in the screenshot below:
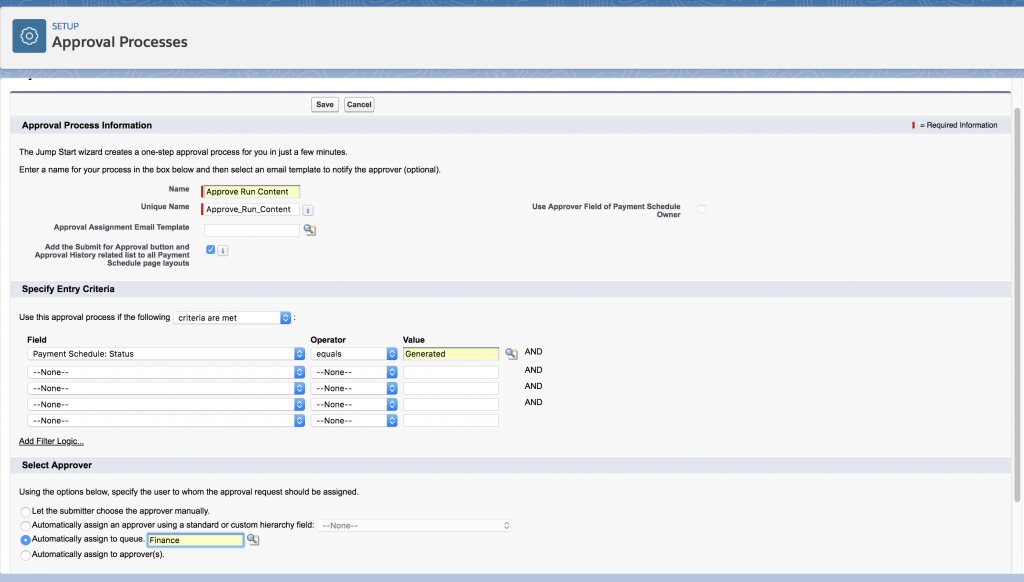
- Name: Approve Run Content
- Entry criteria: Payment Schedule Status equals "Generated"
- Assign to queue "Finance"
When you click Save, you will get a warning stating that you need to activate the process before you can use it. Click Ok to go to the configuration page for this Approval Process. on this page there are a couple of settings we need to get right.
Final Approval Actions
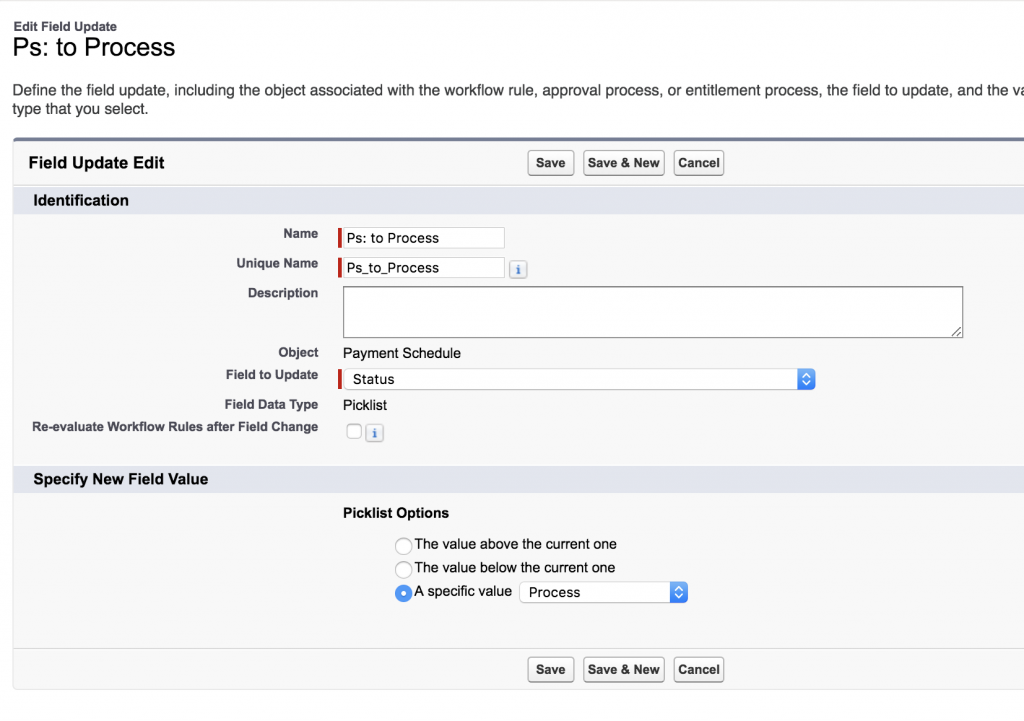
First off, under the "Final Approval Actions" Make sure to set the Record Lock behavio r to "Unlock the record for editing". Next Add a field update to set the status of the Payment Schedule to Process.
When you have added the Field Update, click the activate button to activate your approval process. Your process should look like this:
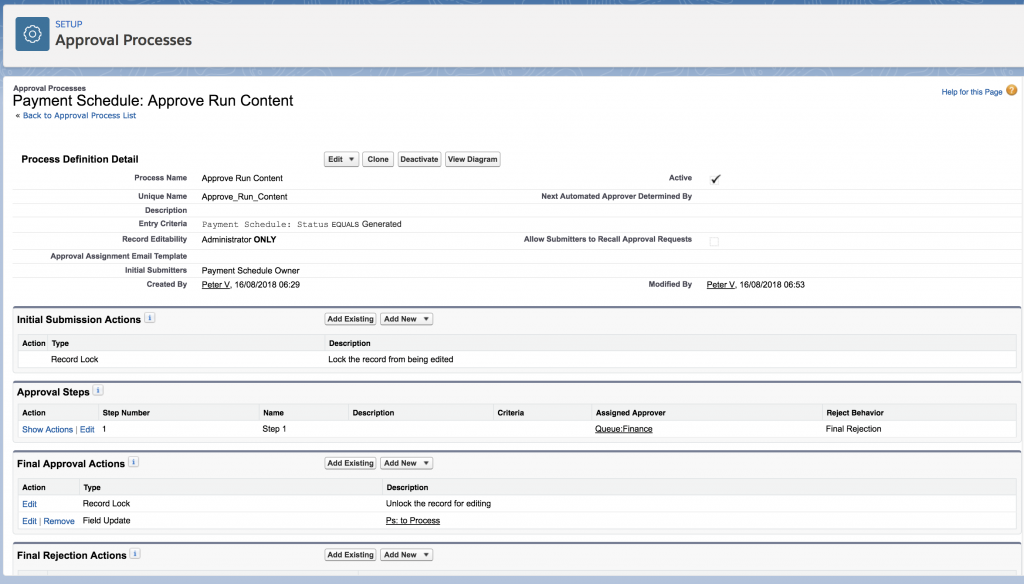
Now that we have configured our first process, lets continue to the next one.
Create the file verification approval process
In the Salesforce setup screen, use the quick find and enter "Approval Processes", click the corresponding menu item as it appears. In the "Manage Approval Processes for" picklist, select Payment Schedule. Click "Create New Approval Process" and select the Jump Start Wizard.
Now we can configure the name and entry criteria for this process. Make sure to match the configuration as shown in the screenshot below:
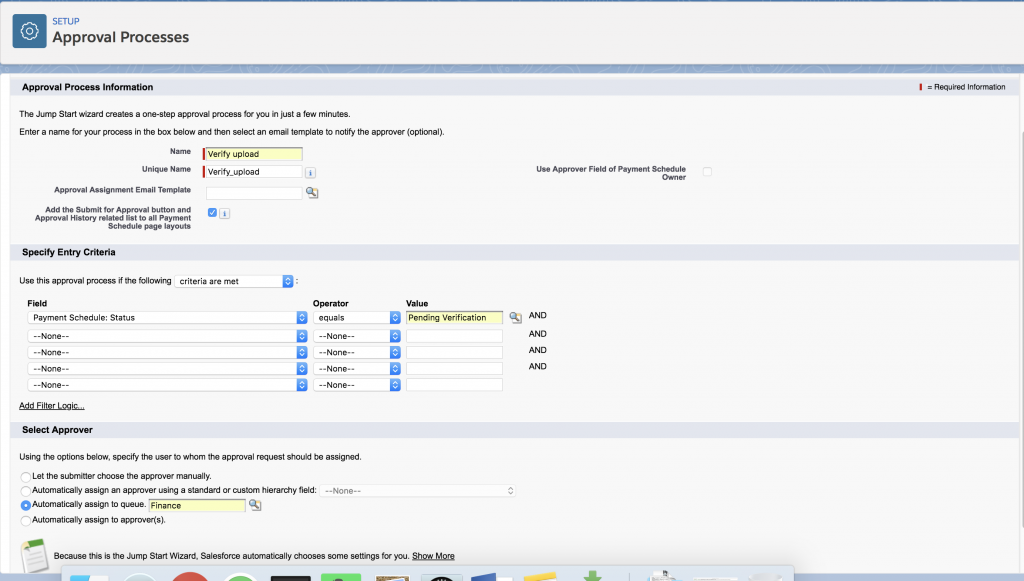
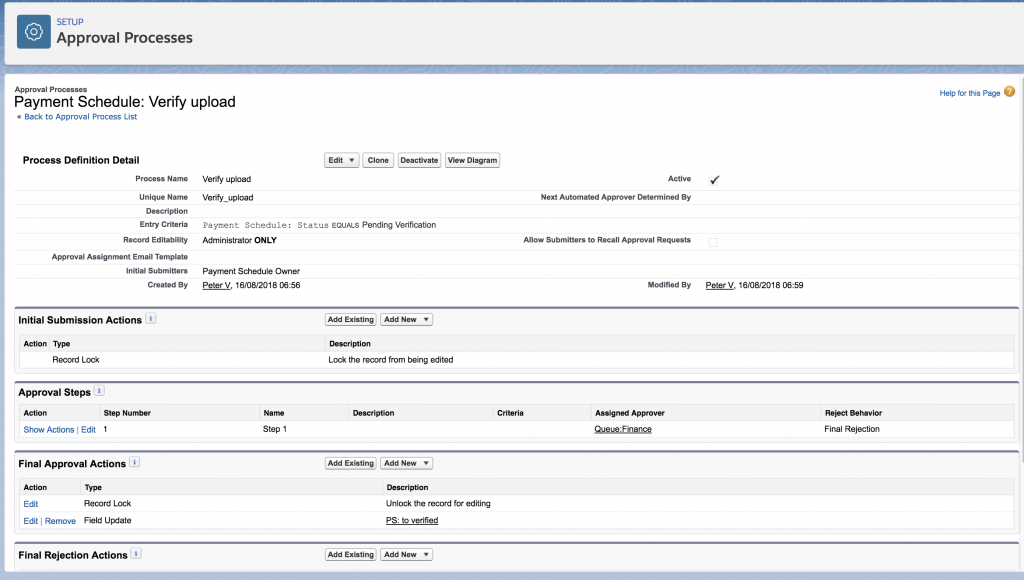
- Name: Verify upload
- Entry criteria: Payment Schedule Status equals "Pending Verification"
- Assign to queue "Finance"
When you click Save, you will get a warning stating that you need to activate the process before you can use it. Click Ok to go to the configuration page for this Approval Process. on this page there are a couple of settings we need to get right.
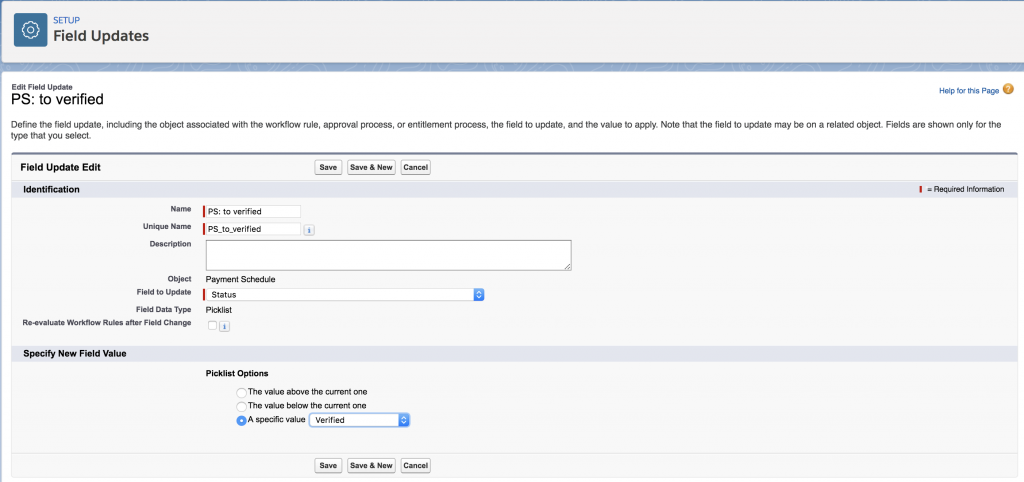
Final Approval Actions
First off, under the "Final Approval Actions" Make sure to set the Record Lock behavior to "Unlock the record for editing". Next Add a field update to set the status of the Payment Schedule to Verified.
When you have added the Field Update, click the activate button to activate your approval process. Your process should look like this:
Now that we have configured both processes, we need to configure the Lightning process to submit the records at the appropriate time.
Create a Lightning process to submit the record for approval
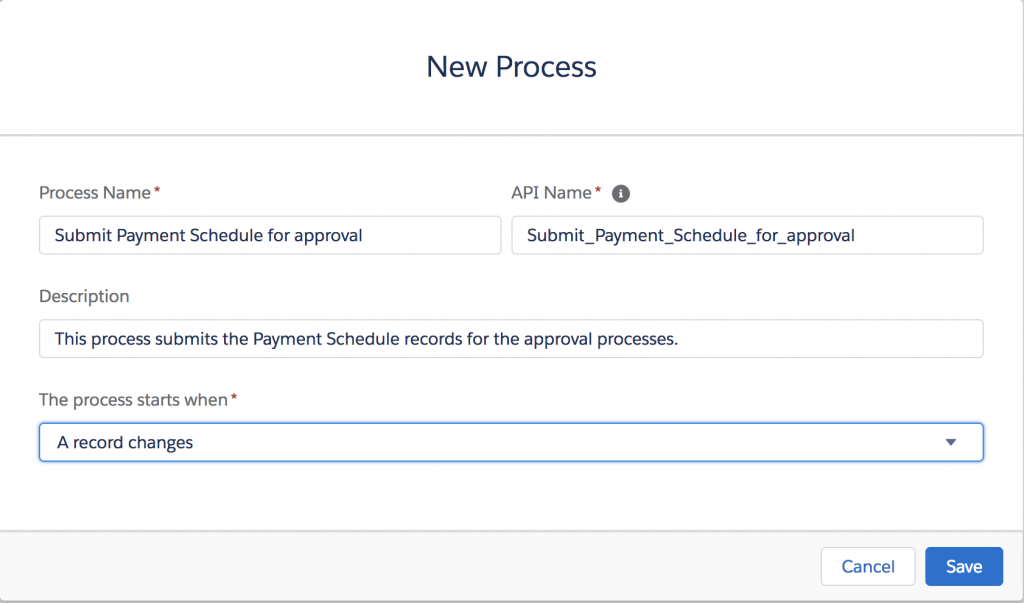
In the Salesforce Setup, enter "Process Builder" int he quick find box and click the "Process Builder" menu item as it appears. This will open a list of the current Lightning processes in your org. click "New" to create a new process. Give your new process a name and description, and make sure the set the 'The process starts when" to "A record changes".
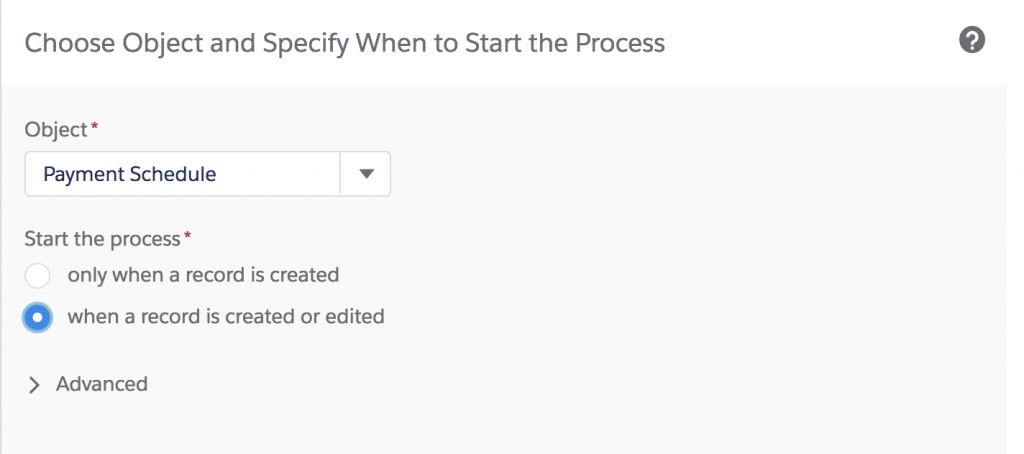
On the next screen click the "Add object" item and select "Payment Schedule". Set the "Start the process" to "when a record is created or edited"
Next, click the first Diamond shaped decision and define the criteria as follows:
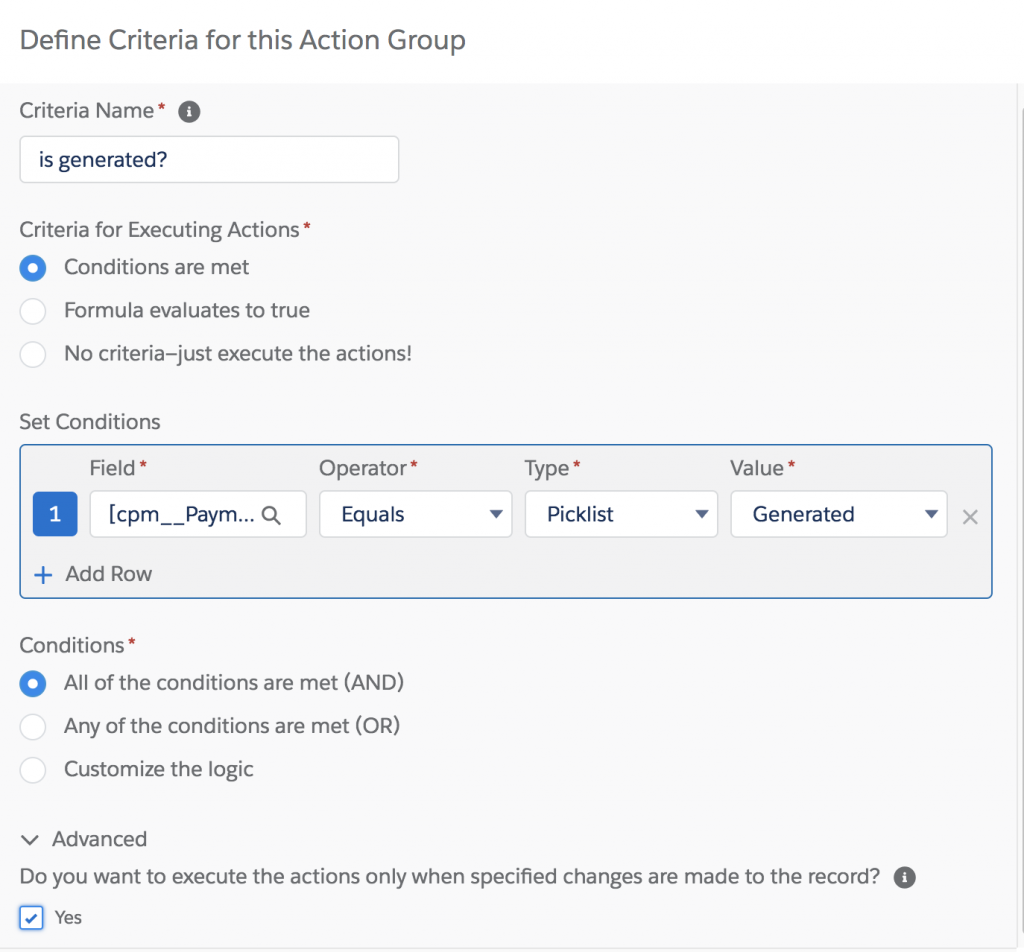
- Name: is generated?
- condition: Payment Schedule status equals picklist value "Generated"
- Execute only when the specified changes are made to the record.
Next click the add action to define the submission action.
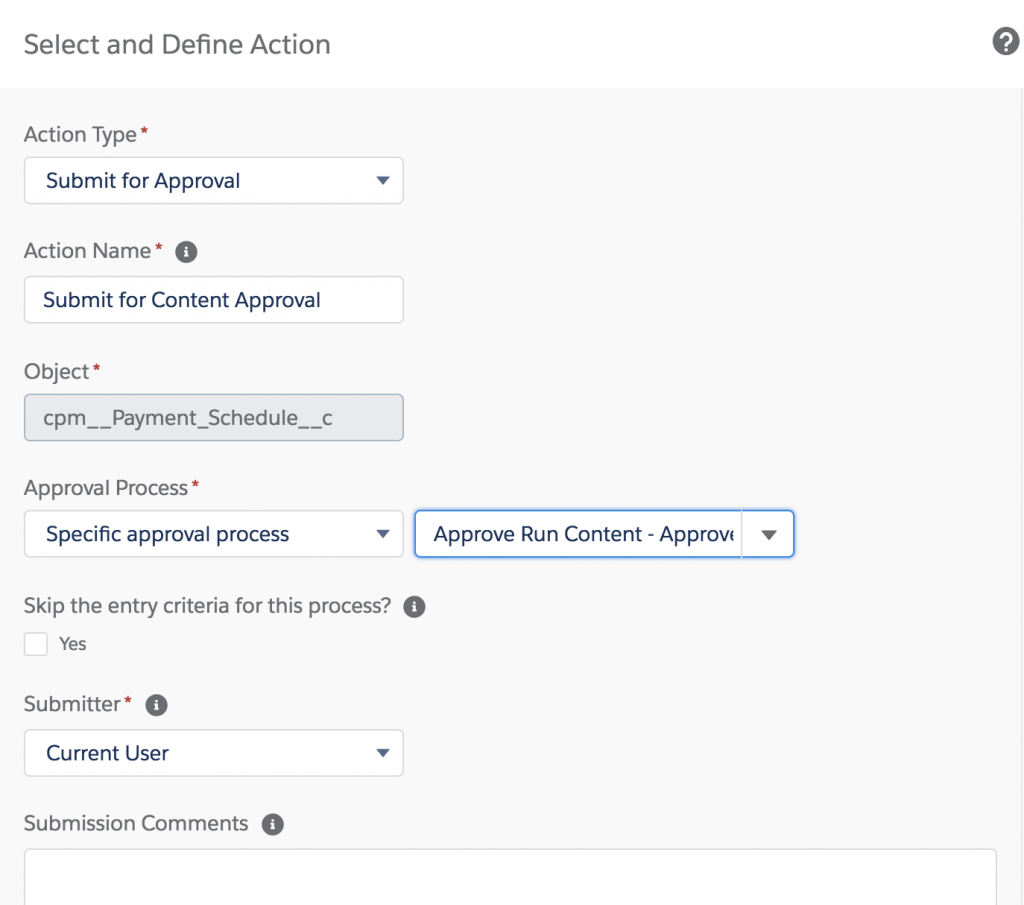
- Action Type: Submit for approval
- Name: "Submit for Content Approval"
- Approval Process: "Specific approval process: Approve Run Content
- Submitter: "Current user"
- Feel free to add submission comments as required.
Hit save when you are done, and click the next diamond shaped decision block.

- Name: is pending verification?
- condition: Payment Schedule status equals picklist value "Pending Verification"
- Execute only when the specified changes are made to the record.
Hit save to save this action. Next click the add action to define the submission action.
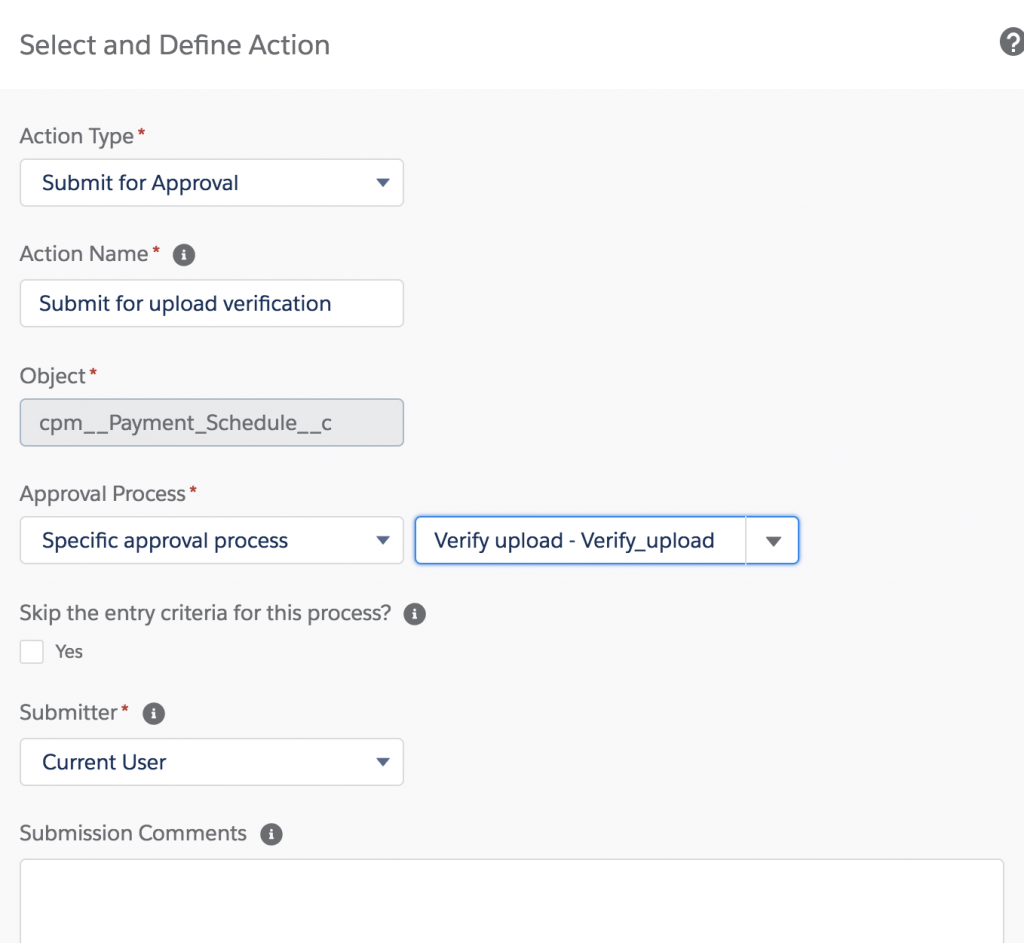
- Action Type: Submit for approval
- Name: "Submit for upload verification"
- Approval Process: "Specific approval process: Verify upload
- Submitter: "Current user"
- Feel free to add submission comments as required.
Hit save to save this action. Your Lightning process now should look like this:
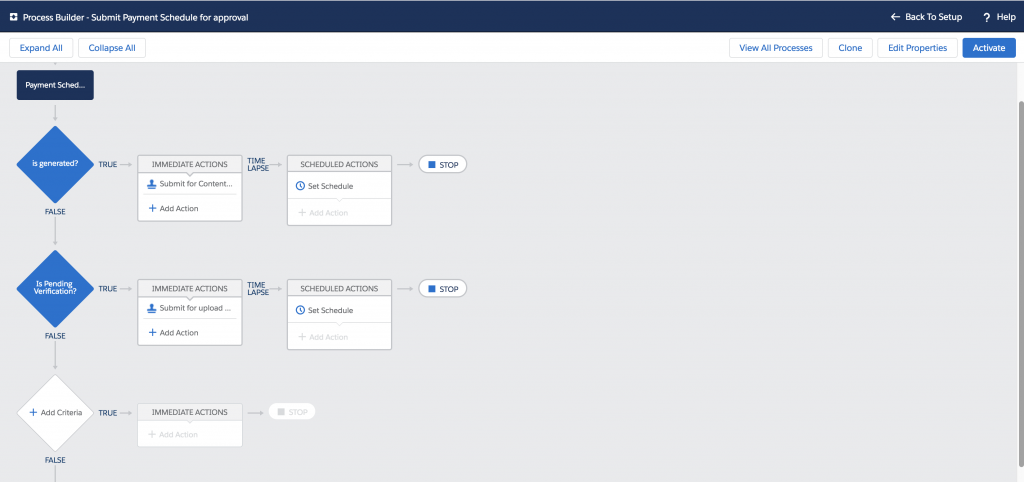
When you are satisfied, click "Activate" and "Confirm" to activate the process. Congratulations, you have just successfully configured the bulk collection file approval processes. Make sure to test the process in your environment to rule out any unwanted interference with other processes in your org.