Configure ProcessingHub
ProcessingHub is an essential component for FinDock, handling bulk processing tasks, bank file parsing, automated matching and other key functions.
In addition to the connection, there are settings related to reconciliation of bank files (uploading and matching) to configure.
Please note ProcessingHub is a connected app, so it must be installed through Salesforce Setup.
Connecting ProcessingHub
ProcessingHub is an app on Heroku that you connect to through FinDock Setup. The user account used to connect ProcessingHub needs to be assigned the FinDock Integration User Group permission set group.
Because ProcessingHub is a connected app, Salesforce security policies require explicit installation through Salesforce Setup. This requires a multi-phased configuration with different users.
The overall procedure is as follows:
- Connect ProcessingHub through FinDock Setup. This creates the connected app instance in Salesforce.
- Install the ProcessingHub connected app in Salesforce Setup. This enables security policies that allow the app to be used by other Salesforce users.
- Reconnect ProcessingHub through FinDock. This is required because the previous step automatically resets active connections.
Install ProcessingHub connected app
The easiest way to do this is as a system administrator. Alternatively, you can add the Approve Uninstalled Connected Apps user permission to your FinDock Administrator user. Apart from the initial setup, though, a FinDock admin does not need to install more connected apps, so that user permission is excessive over the long term.
If the Approve Uninstalled Connected Apps user permission is not available in your org, please reach out to Salesforce Support to activate the permission.
First, you need to create the connected app instance for ProcessingHub by connecting to ProcessingHub.
- Launch the FinDock app and click the FinDock Setup tab.
- Click Connect in the left-hand menu and then click the ProcessingHub tab.
- Enter your admin username and click Connect.
- At the Salesforce prompt, enter the user credentials.
- Once the account is authenticated, click Allow to grant FinDock access to your org.
After ProcessingHub is connected, you need to install the ProcessingHub connected app:
- From the Salesforce Setup, go to Connected Apps OAuth Usage.
- Go to the ProcessingHub entry in the table of connected apps and click Install.
Salesforce Setup redirects to the settings for the ProcessingHub app. Under OAuth Policies, you see Permitted Users is by default set to "All users may self-authorize." You can leave the setting as is and allow all user to access ProcessingHub, or you can change it to limit access.
If you would like to limit access:
- Click Edit Policies at the top of the page. (If you this later, go to Manage Connected Apps and click Edit next to the FinDock app.)
- Under OAuth Policies, change Permitted Users to "Admin approved users are pre-authorized" and click Save.
- Scroll down to Profiles, click Manage Profiles.
- Select the profiles of your Integration User and FinDock Admin in the Application Profile Assignment list and click Save.
Now you can go back to FinDock Setup to reconnect ProcessingHub with the user account (typically a non-person integration user) you planned to use.
Connect ProcessingHub
The connection is established through FinDock Setup, so your integration user needs to have access to the setup (i.e. use the FinDock Administrator permission set group). If you plan on using the Salesforce Integration user license, you need to first connect with a standard role (and FinDock admin permissions), then switch to a role that has the Integration User license.
If you have multi-factor authentication (MFA) enabled for the org, you may need to temporarily waive MFA (through permission sets) while establishing the ProcessingHub connection.
To connect to ProcessingHub:
- Launch the FinDock app and click the FinDock Setup tab.
- Click Connect in the left-hand menu and then click the ProcessingHub tab.
- Enter your integration user for the ProcessingHub connection and click Connect.
- At the Salesforce prompt, enter the user credentials.
- Once the account is authenticated, click Allow to grant FinDock access to your org.
- If needed, change the user profile for the integration user through Salesforce Setup.
If you get a permission error when going back to Salesforce, log out and then log in again with your admin user account to continue.
Configure file exchanges
Most FinDock implementations include processing bank files, such as camt.053. These files are exchanged between Salesforce and ProcessingHub through a Chatter Group.
To set up a Chatter Group for file exchanges:
- Open the Salesforce App Launcher, search for “Groups” and click on the Groups search result.
- On the Groups page, click New.
- Enter a name such as “ProcessingHub File Exchange” (we use this name to refer to this group) and description.
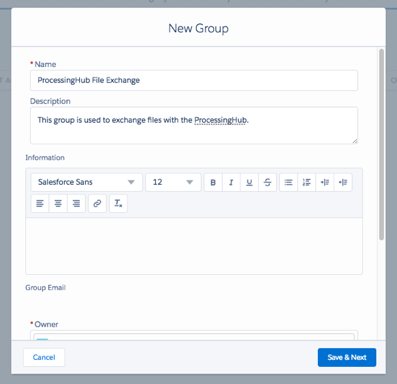
- Scroll down to Access type and select “Private.” This limits access to group members and System Administrators. The files exchanged through this group may contain private information, therefore access should be limited.
- Click Save & Next to create the group.
- On the next page, search for the integration user you used for ProcessingHub and click Add to make it a member of this group.
- Add the other users that require access (usually finance staff).
- Click Done when you have added all users.
Make sure the group you assign for file exchanges is not deleted or archived. FinDock cannot complete file processing with a missing or archived group. Note that Chatter Group auto archiving is enabled by default.
After the group is created, add the group to your ProcessingHub configuration.
To set up ProcessingHub file exchange with Chatter:
- Launch the FinDock app and click the FinDock Setup tab.
- Click to Connect in the left-hand menu.
- On the ProcessingHub tab, under Chatter Group for ProcessingHub files, select the file exchange group you just created.
- Click Save Settings.
ProcessingHub matching and advanced settings
You can adjust the ProcessingHub advanced settings if needed. However, in most cases, the defaults for these settings can be used without modification.
Automated matching: these settings refine how ProcessingHub handles certain matching scenarios. For information on the installment handling options, see Automatic matching on ProcessingHub.
Upload Generated Files: you define where ProcessingHub adds links to generated files. Keep in mind how links impact file accessibility.
Salesforce Bulk API usage: batch sizes and concurrency modes can be adjusted to improve performance in large data volume orgs; these settings are present (or needed) for Bulk API 2.0.
Launch the FinDock app and click the FinDock Setup tab.
Click to Connect in the left-hand menu.
On the ProcessingHub tab, adjust the Automated Matching Settings and Advanced Settings as needed and click Save Settings.
Automating file uploads to Chatter
If you have many bank files coming in on a regular basis, you may want to automate the Chatter upload process There are a couple of options. One very simple way is automatic Chatter file upload with email.
Another option is to leverage the Salesforce REST API for direct Chatter file upload. Use the POST method to upload XML or JSON content to the Chatter group for processing.
Disconnecting ProcessingHub
If you need to disconnect ProcessingHub, for example, to change the integration user for the connection, you can do so from the same setup location as the initial connection procedure outlined above.
However, keep in mind that FinDock requires a working ProcessingHub connection to function properly. Disconnecting should always be done with caution.
Before disconnecting and reconnecting ProcessingHub, please take into consideration the following and plan accordingly:
- The org data on ProcessingHub is wiped when ProcessingHub is disconnected. This means a full data sync is needed on reconnect before processes like payment schedule runs can be completed. Especially for Large Data Volumes (LDV) orgs, the first sync after reconnecting could take several hours or longer.
- When you disconnect ProcessingHub, your existing ProcessingHub Manager history will be cleared, and previously logged events will no longer be accessible.
- While already running processes block disconnecting, any queued or pending processes do not. These processes may not be completed after disconnection, and if not started, they are deleted within 24 hours.
Troubleshooting the ProcessingHub connection
If there is an error with the ProcessingHub connection, please check the following:
- Is the user for the connection still active?
- Did something change with that user's permissions?
- Has anything in the Salesforce Sessions Settings changed?