Configuring Worldpay Business Gateway 350
Worldpay is a credit card processing service of FIS Global. The Business Gateway 350 (BG350) offering supports one-time payments and MOTO transactions.
Worldpay Business Gateway 350 does not support recurring payments. If you need recurring payments with Worldpay, please use our Worldpay Corporate Gateway integration integration with a Corporate Gateway contract from Worldpay.
| Multi-merchant | Multi-currency |
|---|---|
| Payment Method | One-time | Recurring | Refunds |
|---|---|---|---|
| Credit Card |
Pre-requisites
- FinDock is installed and configured.
- A working connection to ProcessingHub and WebHub.
- You have a WorldPay Business Gateway 350 account.
Install and activate Worldpay extension
Follow the standard procedure for installing the Worldpay for Findock package, and then activate the FinDock-WorldPay-BG350 extension.
Check and assign the required permissions for FinDock and Worldpay features. Ensure all package-specific permission sets are correctly assigned.
Set up Business Gateway 350 account
Before configuring the FinDock Worldpay extension, you need to do some configuration in the Worldpay Business Manager portal. Your organization should have a Business Gateway 350 account with Worldpay. Use those account credentials here: Worldpay login.
Testing of the Worldpay integration requires a test setup with Production Mode.
To set up Worldpay integration with FinDock:
- In the left-hand menu, enable Production Mode.
- Click SETUP in the left-hand menu, and then select the Installations tab.
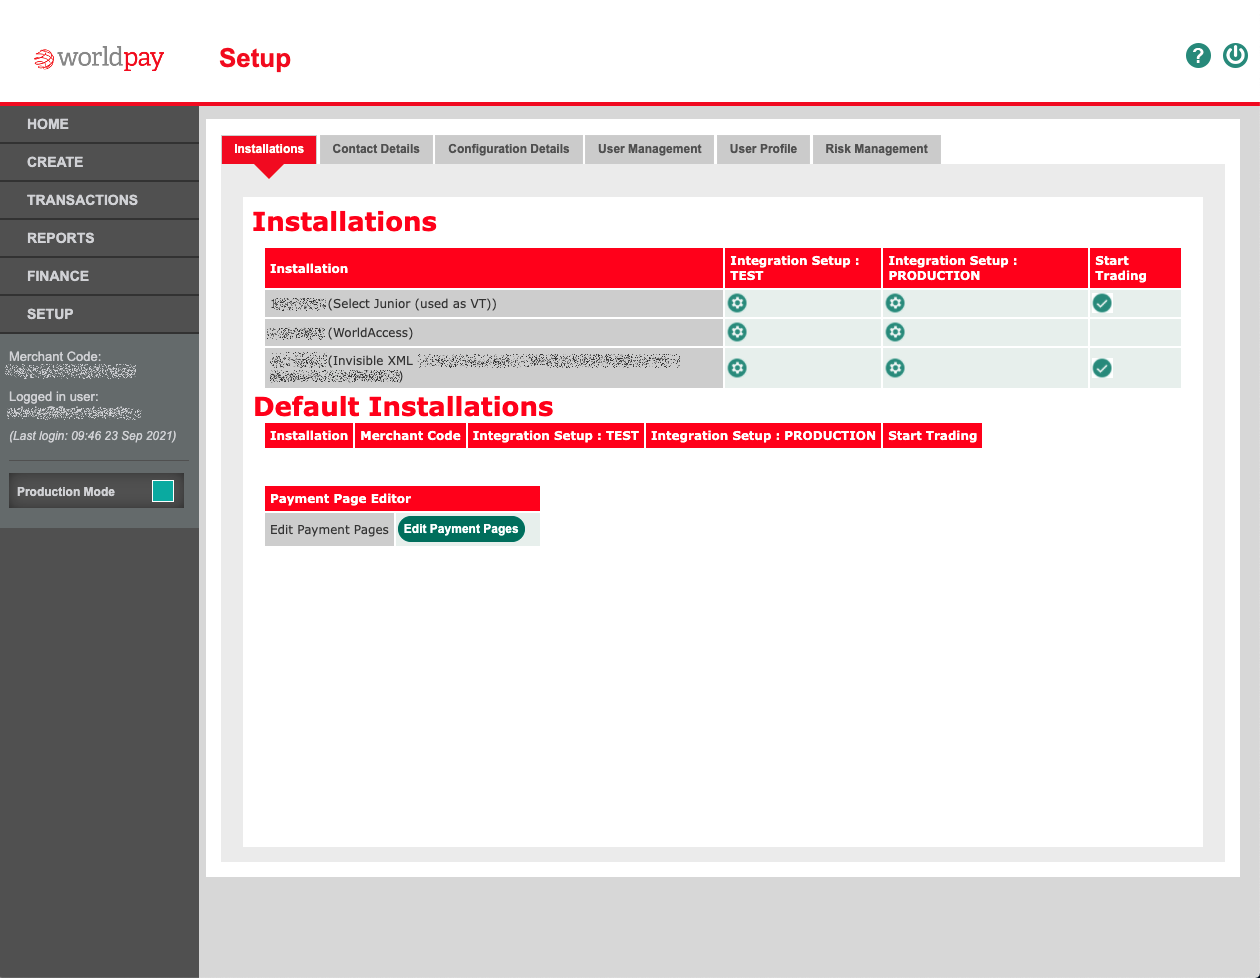
- In the row for Invisible XML, click the cog wheel for the test or production setup (depending on whether you are setting up a sandbox or product org).
- Under Other Actions > Channels click Edit Channels.
- In another browser tab, launch the FinDock app and click Setup.
- Click on the FinDock-Worldpay-BG350 tile under Extensions - PSP, and copy the Notification URL.
- Go back to the Business Manager portal.
- Under Merchant Channels, add the Notification URL from FinDock to the http address field. Then select xml and POST, and make sure the http channel is Active.
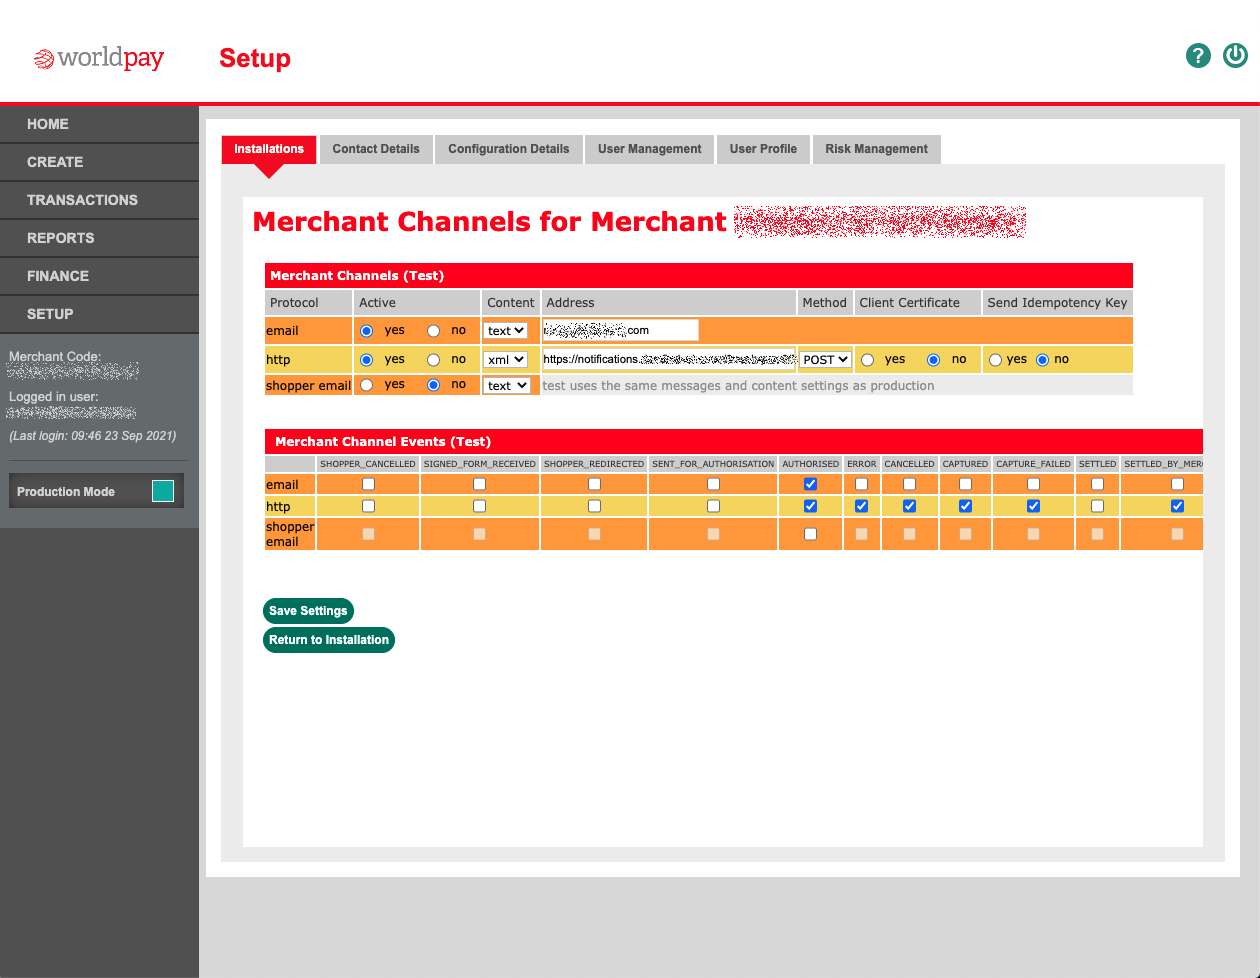
- Click Save Settings when you are done.
Keep the Business Manager portal open while you configure FinDock. Some information from your Worldpay account is needed for the FinDock settings.
Configure Worldpay extension
After you have finished the Worldpay merchant account setup, you can configure the Worldpay extension in FinDock.
To configure the Worldpay extension:
- Launch the FinDock app and click Setup.
- Click on the FinDock-Worldpay-BG350 tile under Extensions - PSP.
- Fill in the settings as described below.
- Notification URL: this value is automaticlaly filled by the Notification Gateway.
- Endpoint: the Worldpay service endpoint for authorizations and transactions. Enter the endpoint depending on whether you are configuring a sandbox (test) or production org.
- Test:
https://secure-test.worldpay.com/jsp/merchant/xml/paymentService.jsp - Production:
https://secure.worldpay.com/jsp/merchant/xml/paymentService.jsp
- Test:
- Merchant Code: enter here your code as shown in the left-hand menu of the Business Manager portal.
- Installation Id: enter the Installation ID under Setup > Installations > Invisible XML > Integration Setup
- Username: enter the username for the Invisible XML installation
- Password: enter the password for the Invisible XML installation
- When you have entered all the details, click Save.
Configure Worldpay MOTO
The BG350 extension also supports WorldPay MOTO (Mail Order / Telephone Order). Customer call center agents can use this to accept one-time credit card payments.
The solution consists of a Lightning Component for the WorldPay MOTO Virtual Terminal HTML redirect solution. The component can be placed on any page related to Installment, Opportunity or Invoice.
Prerequisites
- Your Worldpay merchant account is enabled for MOTO transactions. This requires the "Select Junior - used as VT" installation to be enabled by your Worldpay representative.
- The MOTO component is placed on Lightning pages related to Installment, Opportunity or Invoice objects.
Do not use the Worldpay Virtual Terminal directly from the Worldpay environment to process MOTO payments. FinDock cannot automatically add these payments to Salesforce. Instead, only use the MOTO component in Salesforce.
To configure your Worldpay account for MOTO:
- In the left-hand menu, enable Production Mode.
- Click SETUP in the left-hand menu, and then select the Installations tab.
- In the row for Select Junior (used as VT), click the cog wheel for the test or production setup (depending on whether you are setting up a sandbox or product org).
- Copy and paste the Notification MOTO URL from the FinDock BG350 setup to the the Payment Response URL field in the Installation Administration of Worldpay.
https://notifications.dev.findock.com/xxxxxxxxxx/FinDock-Worldpay-BG350-MOTO?transaction=<WPDISPLAY ITEM=transId>&reference=<WPDISPLAY ITEM=cartId>&name=<WPDISPLAY ITEM=name-urlenc>&transStatus=<WPDISPLAY ITEM=transStatus>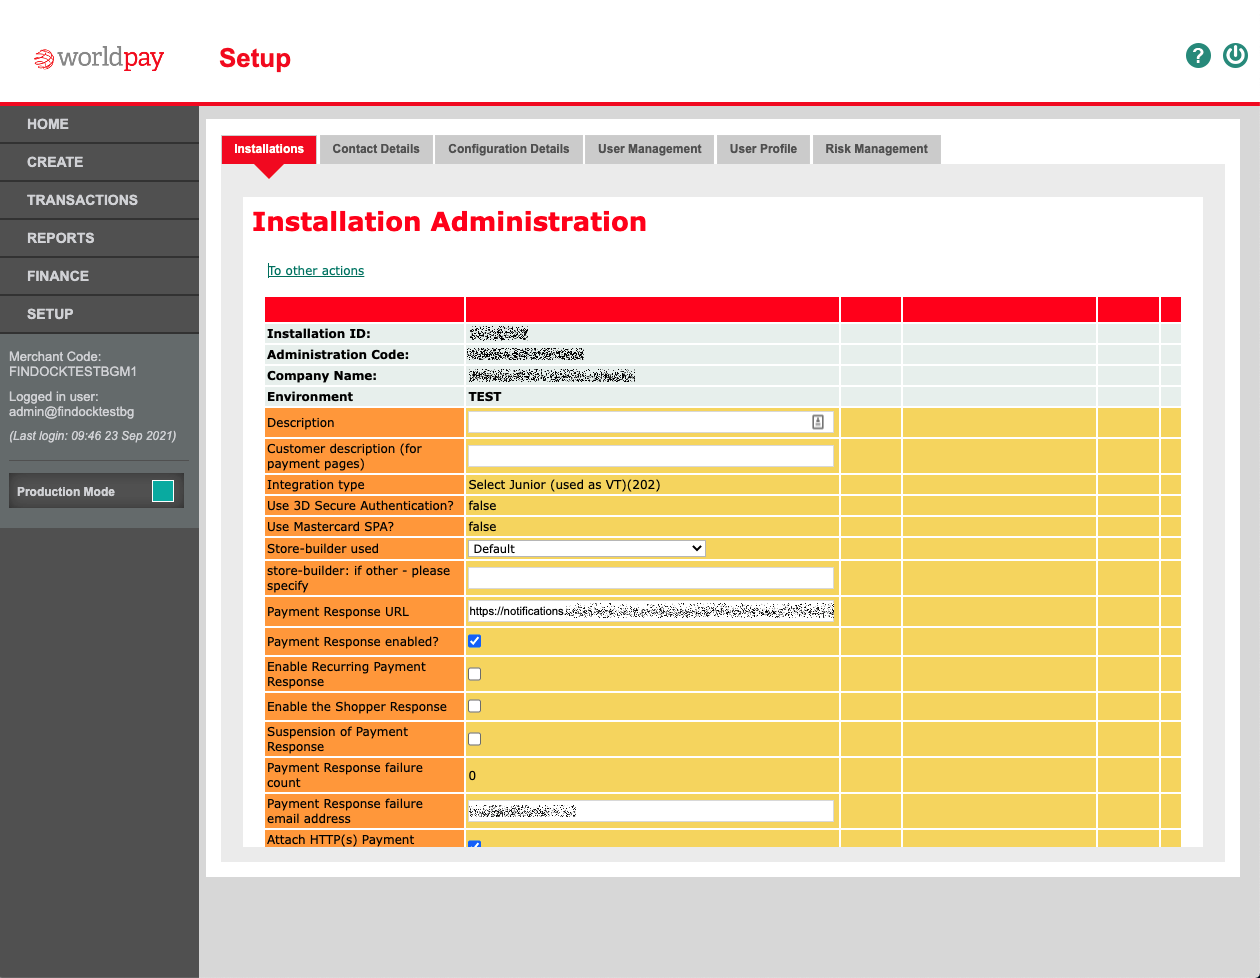
- Click Save Settings when you are done.
Keep the Business Manager portale open while you configure MOTO in FinDock. Some information from your Worldpay account is needed for the FinDock settings.
To configure MOTO in FinDock:
- Launch the FinDock app and click Setup.
- Click on the PaymentHub-Worldpay-BG350 tile under Extensions - PSP.
- Scroll down to the MOTO settings.
- Fill in the settings as described below.
- Merchant Code: enter here your code as shown in the left-hand menu of the Business Manager portal.
- MOTO Installation Id: enter the Installation ID under Setup > Installations > Select Junior (used as VT)) > Integration Setup
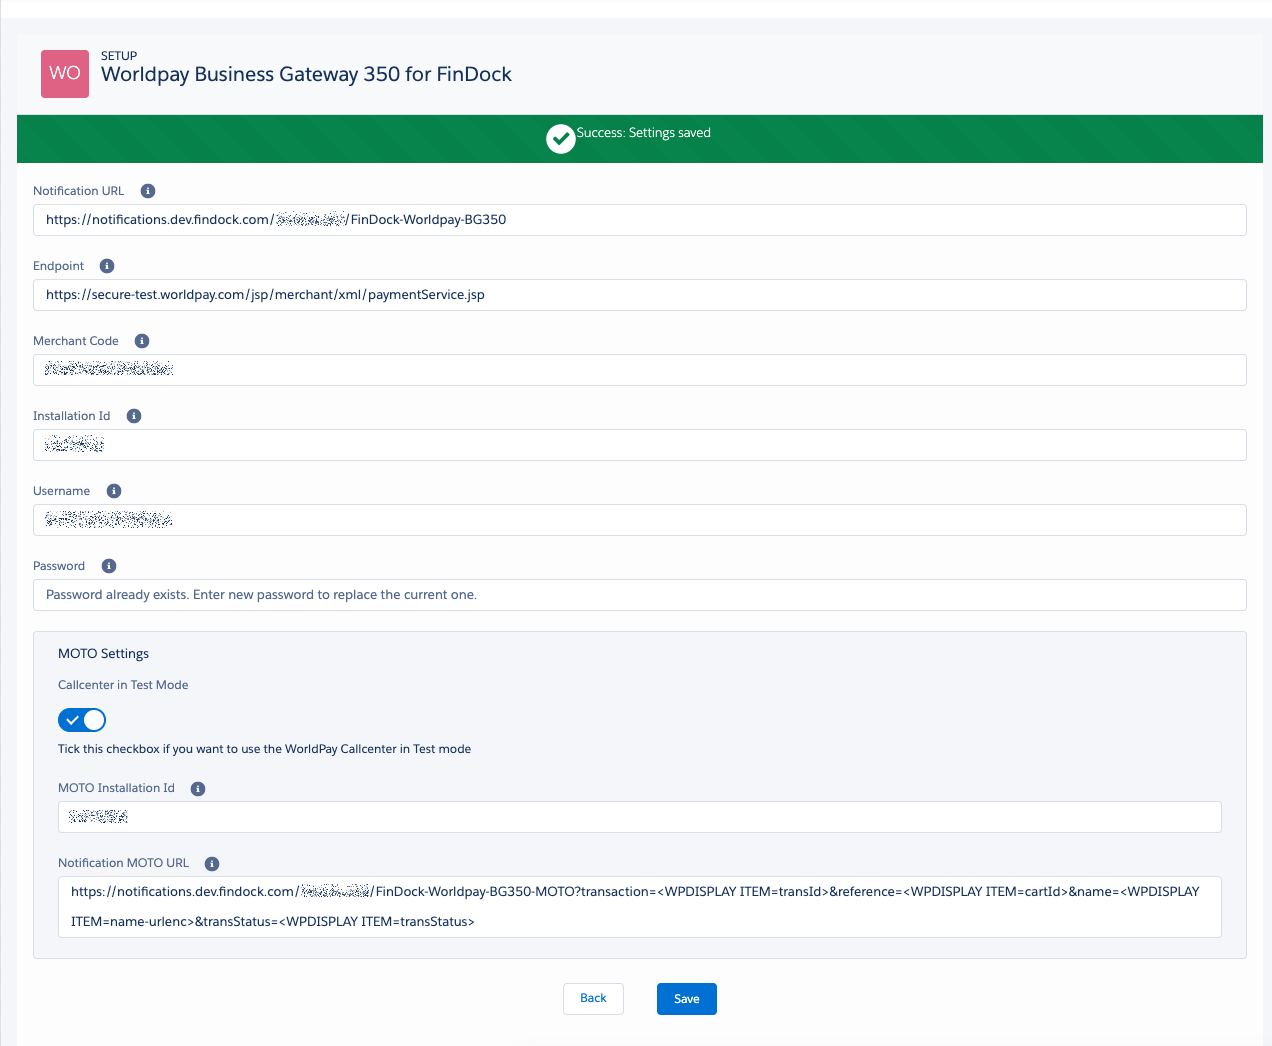
- When you have entered all the details, click Save.
To make Worldpay MOTO available for call center agents:
- Open the Lightning record page where you want the MOTO component.
- Click on the page settings icon and select Edit Page.
- Add the MailAndTelephoneOrder component to the page. You’ll find it in the left sidebar under the section Custom – Managed.
- Drag the MOTO component to the desired place on the page canvas.
- Click Save and activate the page.
Using Worldpay BG350 MOTO
To execute Worldpay MOTO payment:
- Go to an installment, opportunity or invoice with the Worldpay BG350 MOTO component.
- Click Start MOTO Payment.
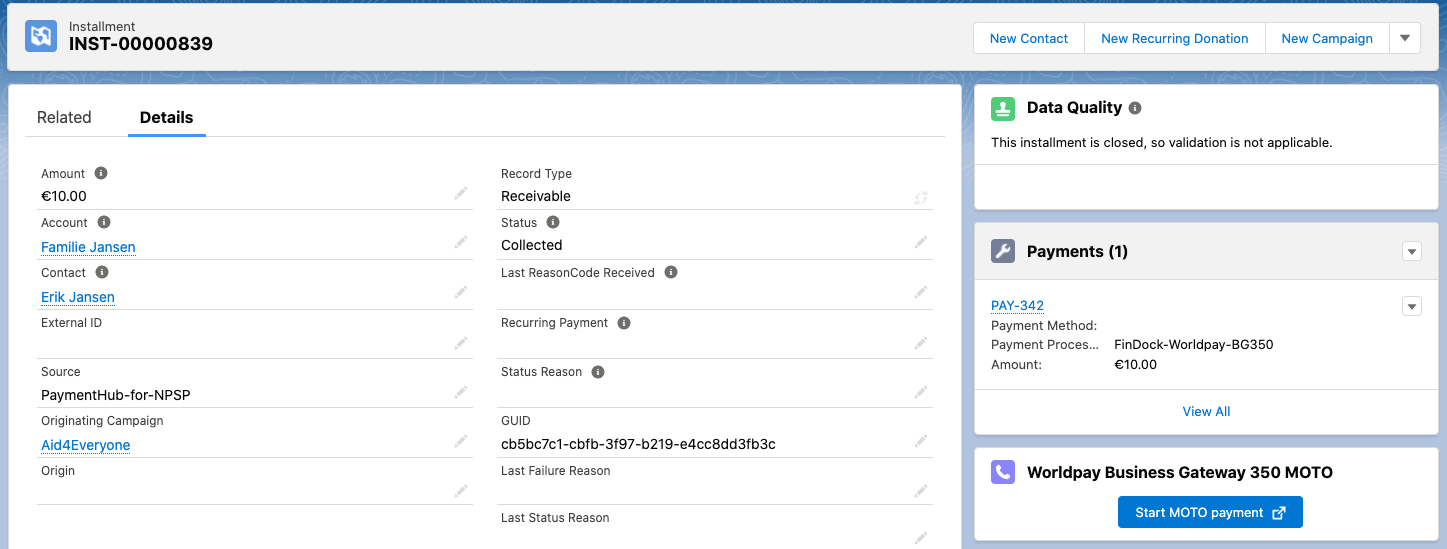
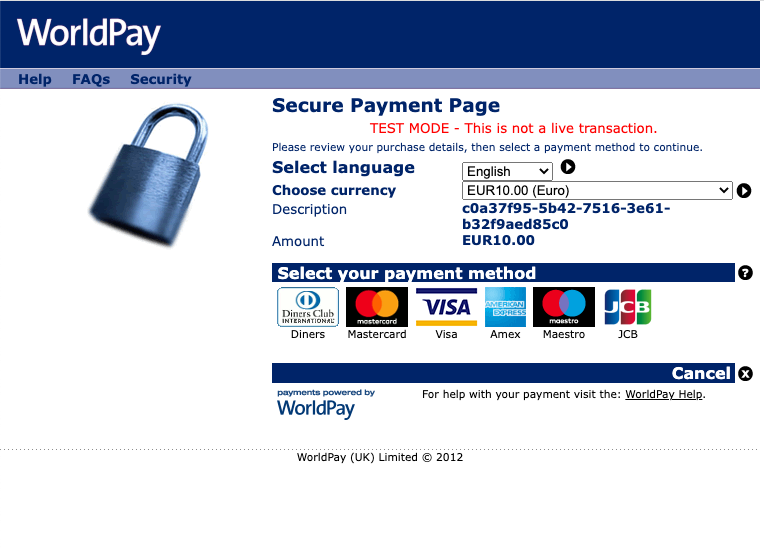
- Follow the steps on the Worldpay payment page.
- FinDock automatically updates Salesforce data.
Refund handling
Worldpay payments can be refunded from the Worldpay dashboard. However, refunds are not automatically processed in FinDock.
Payment API
To test your Worldpay configuration for one-time payments, you can use the following API message.
If your configuration is correct, you should be able to navigate to the RedirectURL provided in the response and pay the amount specified. When a redirect ends in an unexpected error, the error message is stored in the last status reason of the installment.
This request initiates a one-time credit card transaction with Worldpay.
{
    "SuccessURL": "https://www.example.com/success",
    "FailureURL": "https://www.example.com/error",
    "Payer": {
        "Contact": {
            "SalesforceFields": {
                "FirstName": "Eric",
                "LastName": "Johnson",
                "Email": "eric@johnson.com"
            }
        }
    },
    "OneTime": {
        "Amount": "15"
    },
    "PaymentMethod": {
        "Name": "CreditCard",
        "Processor": "PaymentHub-WorldPay"
    },
    "Settings": {
        "SourceConnector": "PaymentHub"
    }
}