FinDock supports initiating refunds from Salesforce in addition to refunds initiated from PSPs Please keep in mind potential impact on existing business processes that are built around initiating refunds from PSP dashboards and portals.
A refund of the same payment initiated from the PSP and from Salesforce should be automatically handled by the PSP. Whichever initiation comes second is blocked. However, it is better to avoid overlapping refund initiation processes and eliminate failure scenarios that are normal and expected.
All integration options require the FinDock Core Refunds Run permission set to be assigned to the user or automated context (e.g. a flow-running user) that triggers Refunds from Salesforce.
The permission set is included in the FinDock Service Agent permission set group.
You have three basic options to integrate Refunds from Salesforce into your business processes. You can trigger both single refunds and, through Salesforce tooling, initiate refunds in bulk. All three options call the same FinDock Initiate Refund invocable Apex action, so validations and processing are identical regardless of which approach you use.
| Option | Best for | Technical level |
|---|---|---|
| Lightning Action component | Point-and-click refunds | No code |
| Salesforce Flow | Guided or automated refunds | Low code |
| Apex or custom LWC | Highly customized refund process | Pro code |
Regardless of the integration option, FinDock handles the refund initiated from Salesforce the same way:
- An Inbound Report record is created to validate the refund parameters and create a Refund record.
- FinDock makes callouts to the PSP to process the refund.
- The Refund record status is updated based on incoming PSP notifications.
- Once processing is successful, a new negative Payment record is created and linked to the Refund record.
The refund-related notifications and actions are handled using inbound reports and Guided Matching.
FinDock provides a custom invocable component for initiating refunds directly from a Lightning record page layout. The component can be added to page layouts for Installment, Gift Transaction (Fundraising), and NPSP Opportunity. This is the quickest way to enable refunds for service agents or support staff who work directly in Salesforce.
When to use this option:
- Your team processes refunds manually, one at a time.
- You want to enable refunds with minimal setup.
- Your refund workflow does not require custom logic.
The Reason picklist on Gift Refund is restricted. When setting up Refunds from Salesforce, you need to modify the Refund Reason picklist on the FinDock Refund object to match the Gift Refund Reason values.
To set up the refund action:
- Open the object in the Salesforce Object Manager and click Buttons, Links, and Actions in the left-hand menu.
- Click New Action to create the Refund component action.
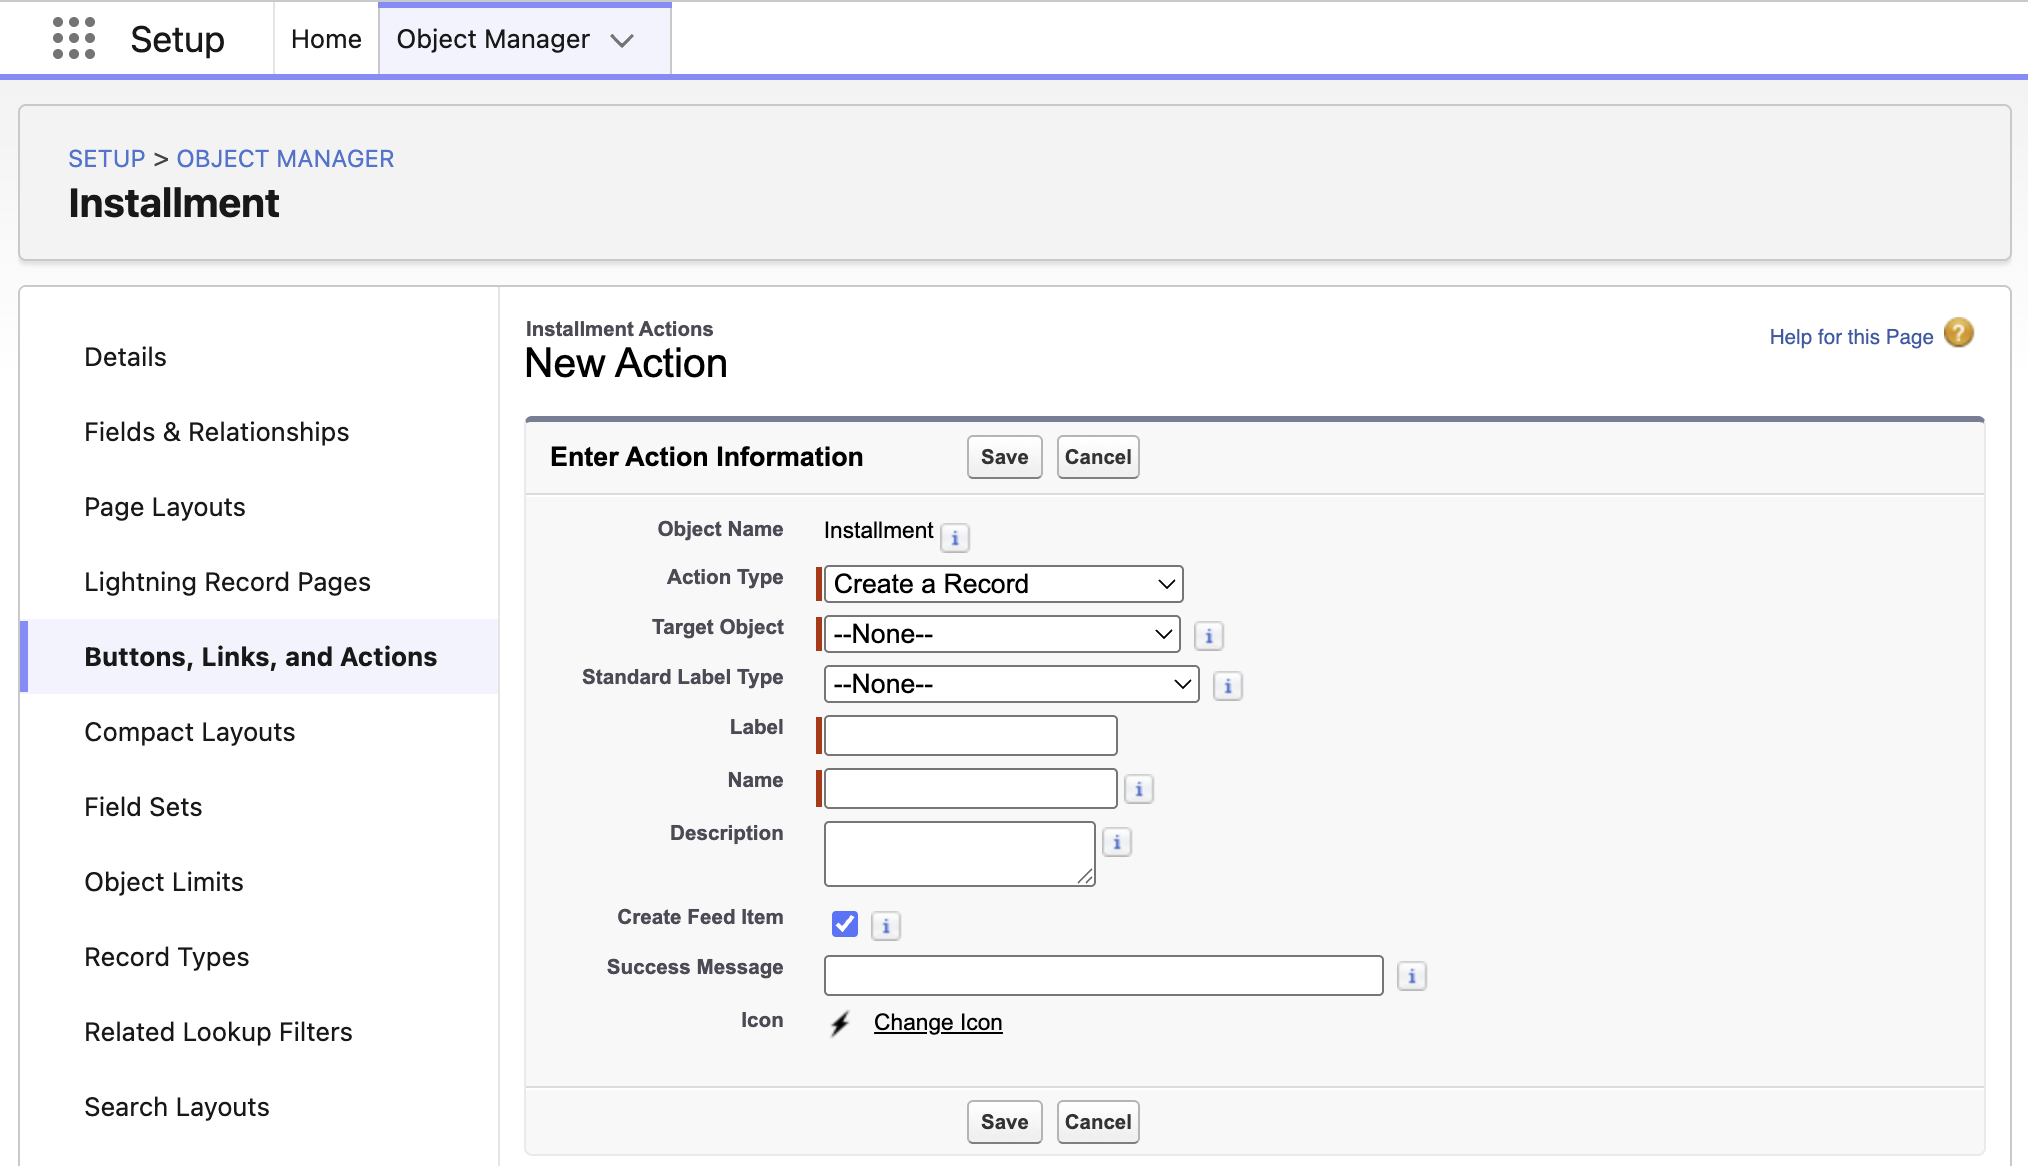
- Fill in the refund action details.
- Action Type: Lightning Web Component
- Lightning Web Component: cpm:refundPayments
- Label: Refund
- Name: Refund
- Description: Initiate refund for one or more payments.
- Click Save.
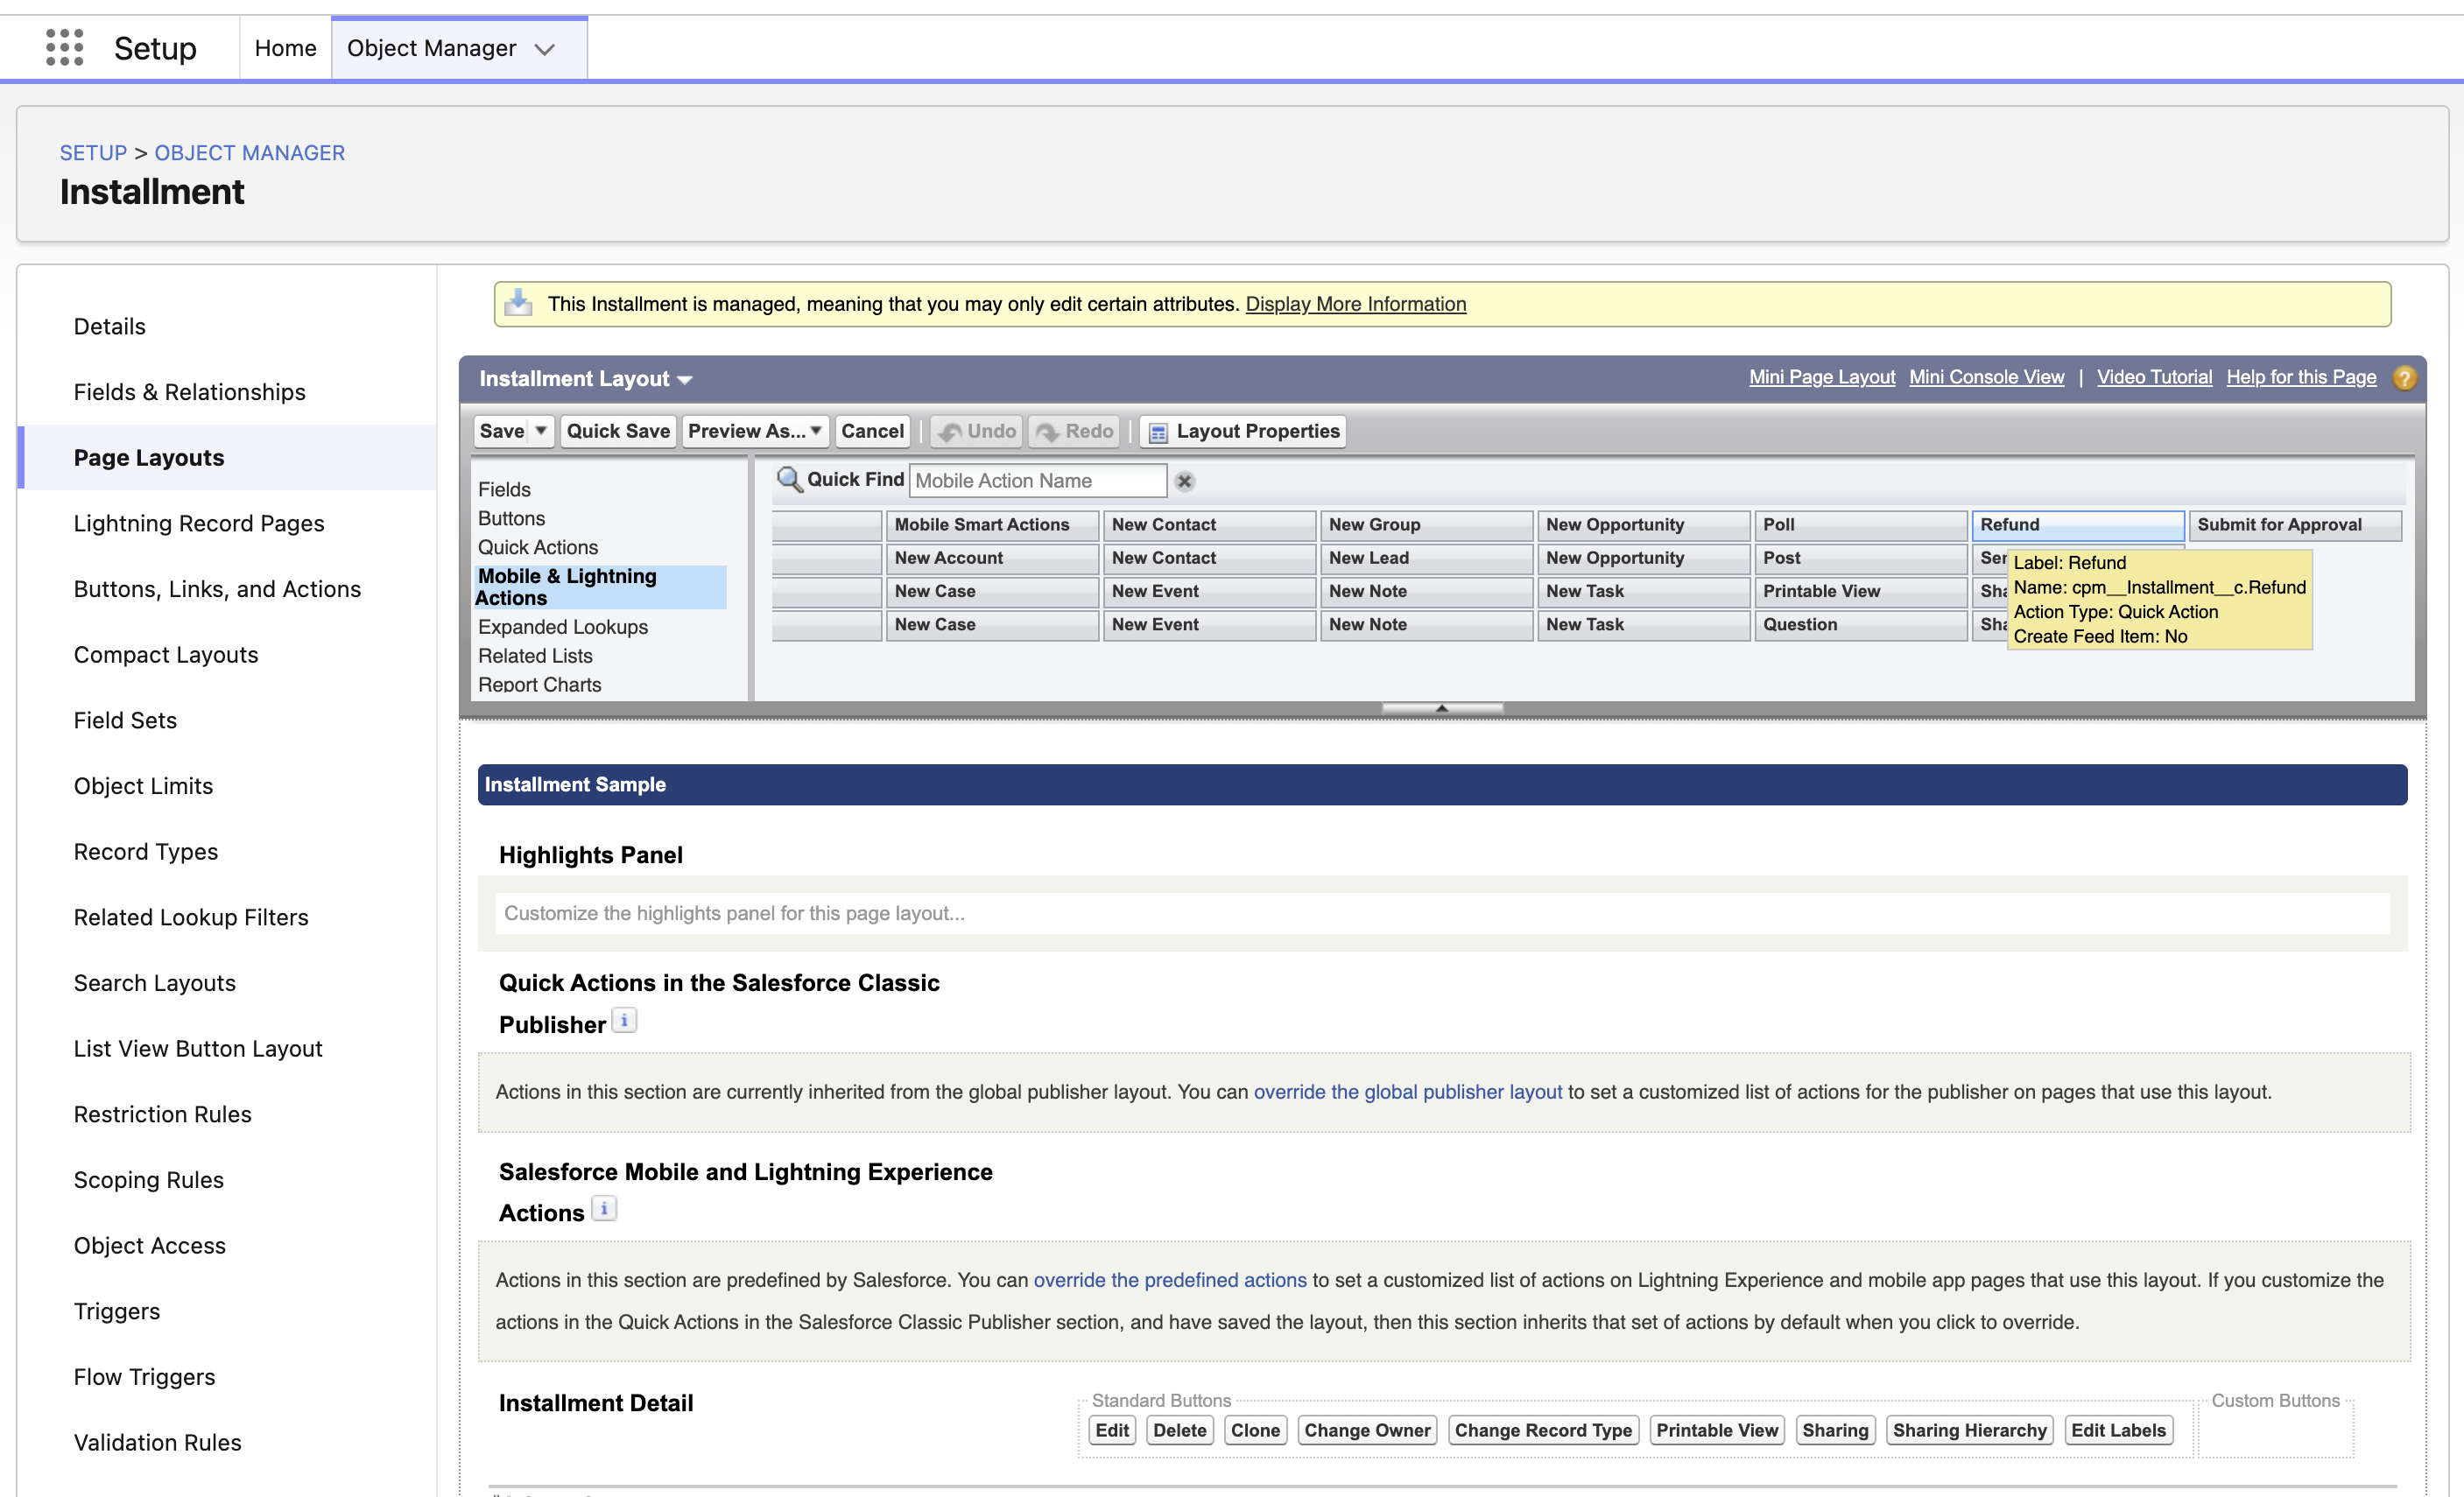
Once the Lightning action is created, you can add it to a page layout, either through the object Page Layouts setup, pictured below, or by using the Dynamic Actions option in the Lightning App Builder.
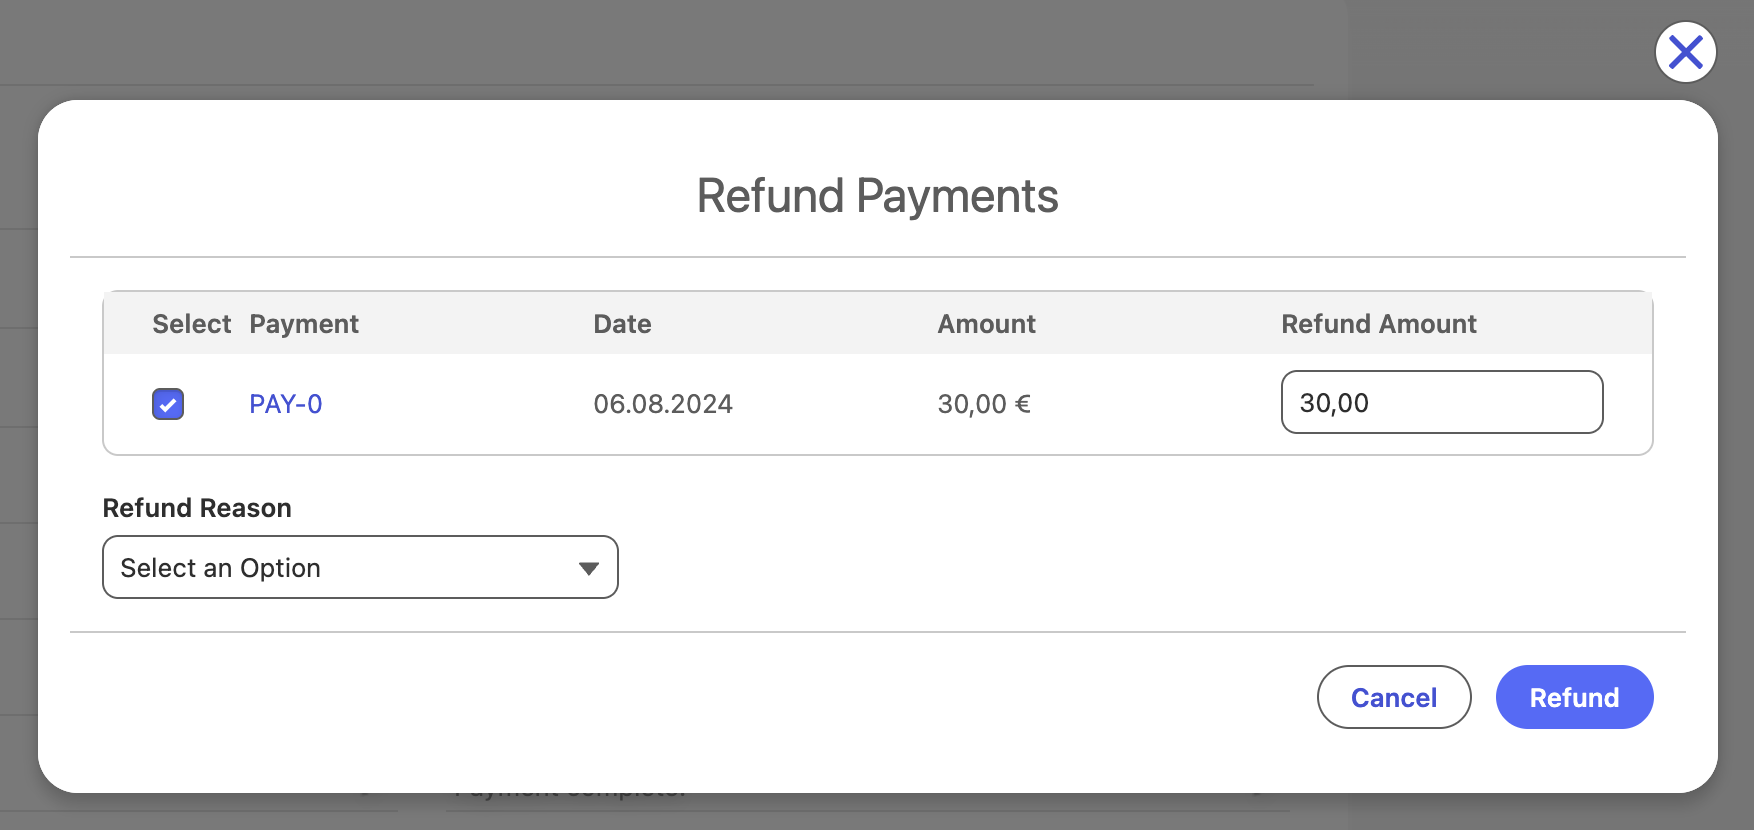
To use the refund component:
- Click the new Refund action button on the record.
- Select the payment(s), set the amount, and select a reason
- Click Refund.
You can use the invocable action FinDock Initiate Refund in custom Flows to initiate refunds according to your specific business processes.
When to use this option:
- You want to guide users through a structured refund process (screen flow).
- You need to trigger refunds automatically based on a schedule or a record change (scheduled or record-triggered flow).
- You need additional business logic based on the refund action, such as sending a confirmation email or updating a case.
To enable refunds:
- Include the invocable action FinDock Initiate Refund in a custom Flow. The class includes the following parameters:
paymentId: Id of the originating Payment record to refundIdempotencyKey: custom-generated idempotency key to prevent duplicate refund requestsamount: decimal amount to be refunded (less than or equal to originating payment amount)refundReason: reason for refund (values of customizable picklist field Refund Reason)refundReference: unique generated reference for tracking the refund payment
- Assign the FinDock Core Refunds Run permission set (included in the FinDock Service Agent permission set group) to Salesforce users who will use the Flow.
Use a screen flow to build a guided, user-initiated refund process. This is useful when the agent needs to confirm the amount, select a (customized) reason, or acknowledge terms before the refund is submitted.
Typical screen flow structure:
- Get the Payment record — use a Get Records element to load the payment and pre-populate refund details.
- Refund input screen — present a screen with fields for amount, reason, and any other required data points.
- Invoke the refund action — call the FinDock Initiate Refund action with the collected values.
- Confirmation screen — display the outcome and confirmation step to the user.
Use an auto-launched flow to process refunds automatically without user interaction. For example:
- Scheduled flow: Batch-process refund requests that have been queued in a staging object overnight.
- Record-triggered flow: Automatically initiate a refund when a related record (such as a case) reaches a certain status.
In these flows, the FinDock Initiate Refund action is called in the same way as with other flows, but all input values are sourced from records or variables rather than user input.
Always populate the IdempotencyKey with a deterministic, unique value (for example, a hash of the Payment Id and request timestamp) in automated flows to safely handle retries without creating duplicate refunds.
For teams that need full control over the user interface or want to integrate refund initiation into a larger programmatic process, you can invoke the FinDock refund action directly from Apex or call it from a custom Lightning Web Component (LWC) via an Apex controller.
When to use this option:
- You are building a custom refund management UI.
- You need to initiate refunds as part of a larger transaction or batch process in Apex.
- You require custom error handling or complex pre- or post-processing logic.
You can call FinDock Initiate Refund from your own Apex classes by wrapping the packaged action in a service class.
public with sharing class MyRefundService {
    public static RefundResult initiateRefund(
            Id paymentId,
            Decimal amount,
            String reason,
            String idempotencyKey) {
        cpm.RefundPaymentAction.RefundRequest request = new cpm.RefundPaymentAction.RefundRequest();
        request.paymentId = paymentId;
        request.amount = amount;
        request.reason = reason;
        request.idempotencyKey = idempotencyKey;

        cpm.RefundPaymentAction.RefundResponse response =
                cpm.RefundPaymentAction.execute(
                        new List<cpm.RefundPaymentAction.RefundRequest> { request }
                )[0];

        RefundResult result = new RefundResult();
        result.success = response.isSuccess;
        result.errorMessage = response.errorMessage;
        result.refundReference = response.refundReference;
        return result;
    }

    public class RefundResult {
        public Boolean success;
        public String errorMessage;
        public String refundReference;
    }
}
Important notes
- Use
cpm.RefundPaymentAction.execute(...)as the package entry point. - The action supports one refund request at a time.
idempotencyKeyis optional, but recommended to prevent duplicate refunds.refundReferenceis generated by FinDock and returned in the response.- The running user must have permission to initiate refunds.
In a custom LWC, expose an Apex controller method that calls your service class (see above), then invoke that controller from the component.
public with sharing class MyRefundController {
    @AuraEnabled
    public static RefundResponse processRefund(
            Id paymentId,
            Decimal amount,
            String reason,
            String idempotencyKey) {
        MyRefundService.RefundResult serviceResult =
                MyRefundService.initiateRefund(paymentId, amount, reason, idempotencyKey);

        RefundResponse response = new RefundResponse();
        response.success = serviceResult.success;
        response.errorMessage = serviceResult.errorMessage;
        response.refundReference = serviceResult.refundReference;
        return response;
    }

    public class RefundResponse {
        @AuraEnabled public Boolean success;
        @AuraEnabled public String errorMessage;
        @AuraEnabled public String refundReference;
    }
}
import { LightningElement, api } from 'lwc';
import processRefund from '@salesforce/apex/MyRefundController.processRefund';
export default class RefundComponent extends LightningElement {
@api paymentId;
async handleRefundSubmit(event) {
const { amount, reason } = event.detail;
try {
const result = await processRefund({
paymentId: this.paymentId,
amount,
reason,
idempotencyKey: crypto.randomUUID()
});
if (result.success) {
// Handle success, for example by showing a toast
// and using result.refundReference if needed
} else {
// Handle business error using result.errorMessage
}
} catch (error) {
// Handle unexpected Apex or network errors
}
}
}This pattern keeps responsibilities separated:
MyRefundControlleris the LWC-facing Apex controller.MyRefundServicecontains the refund logic.cpm.RefundPaymentActionis the FinDock packaged Apex API.
Important note
The packaged RefundPaymentsController is used internally by the FinDock refund component. If you are building your own integration, use the supported packaged refund action and implement the additional UI behavior in your own code.
If you build your own refund flow with Apex and LWC, you can call the FinDock refund action from your custom code. This gives you flexibility, but it also means you are responsible for building part of the refund experience yourself.
For example, in a custom implementation:
- You need to decide which payment the user can refund.
- You need to build the screen logic for entering the refund amount and reason.
- You need to handle validation, error handling, and user feedback in your own component.
- If you want to prevent duplicate submissions, you need to generate and pass your own idempotency key.
- Refund initiation is handled one payment at a time.
FinDock’s packaged refund component includes additional logic that supports the full refund user experience.
It can:
- Find refundable payments for a supported record.
- Show how much has already been refunded.
- Calculate the maximum amount that can still be refunded.
- Exclude payments that are not eligible for refund.
- Handle the packaged refund submission flow.
- Track the asynchronous follow-up processing after the refund is initiated.
In short, the Apex action gives you the refund capability, while the FinDock refund component adds the surrounding UI and business logic needed for a complete refund experience.