Setting up Custom Payment Methods
CRM provides the most value when all relevant data is stored in one central place. This includes payment data. To allow you to store every payment in the FinDock datamodel, even those that have or will not be processed by FinDock, the system allows you to define so called "Custom Payment Methods."
These payment methods allow you to store relevant payments and even recurring payments, both historical and new with payment methods that you define yourself. These payment methods will not be processed by FinDock directly, meaning they are not included in bulk collection runs, mandate management or payment reference management. But you can work with these custom payment method through a bank statement import.
By default, Custom Payment Methods are deployed on any source object, just as any other payment method. However, Custom Payment Methods are not available on the Payment Schedule object, nor through the Payment API.
Configuring Custom Payment Methods
Custom Payment Methods can be configured through the FinDock Setup Screen.
- Navigate to the FinDock setup page by opening the App Launcher (the 3x3 grid button on the top left of the page, just below the Salesforce cloud logo), enter “FinDock” in the search box and click the FinDock app and select Setup in the navigation.
- On the setup screen, click the "Custom Payment Methods" tab to open up the relevant configuration screen.
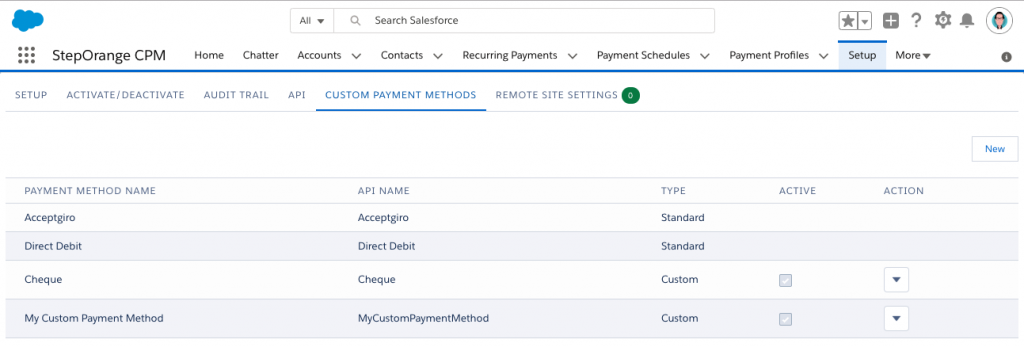
On this screen you will see an overview of all standard and custom payment methods currently defined in your FinDock configuration.
Standard payment methods are those provisioned by Payment Extension packages such as SEPA or Bacs.
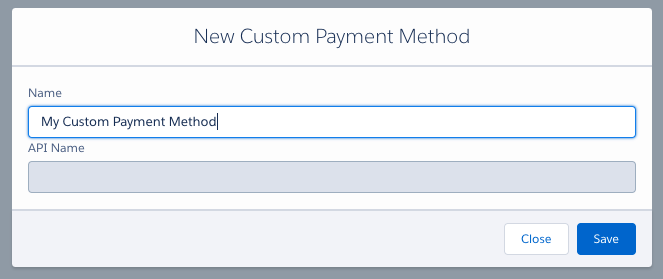
To create a new custom payment method, click the "New" button in the top-right corner. Enter the name of the payment method you wish to add, the api name is automatically determined. Click Save to store the Custom Payment Method. Creating a new Custom Payment Method doesn't automatically make it available for use, you will fist need to activate the Payment method before it is visible to users.
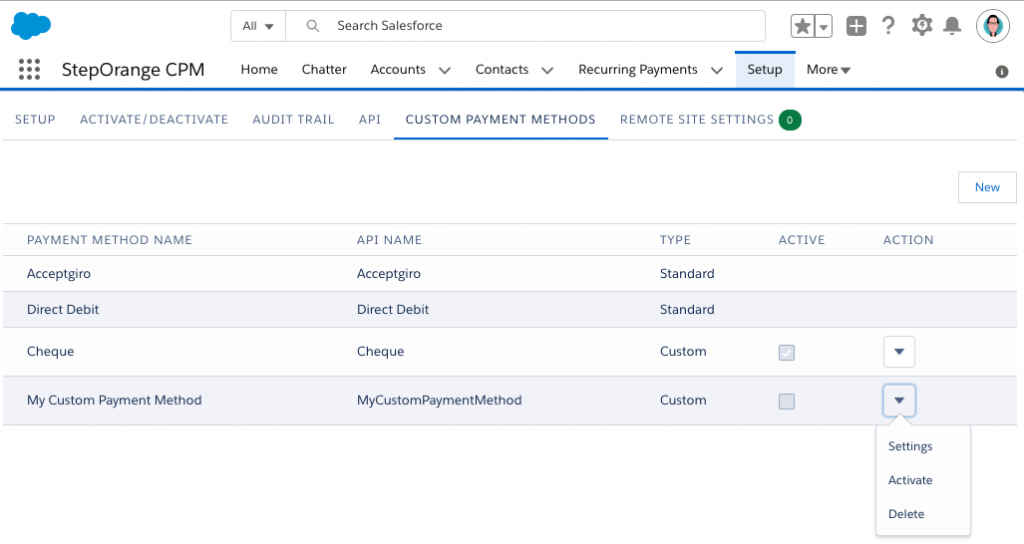
To activate a Custom payment method, on the configuration screen, click the arrow next to the custom payment method you wish to activate, and choose "Activate" from the popup menu.
Activating the Payment Method will automatically deploy it across the various source objects for the activated source connectors. The custom payment method automatically gets linked to both SEPA and BACS (if installed).
Deactivating a Custom Payment Method
To edit or delete a custom payment method, you will need to deactivate it first. Like with activation, navigate to the custom payment method configuration screen and click the arrow next to the Custom Payment Method you would like to de-activate. choose "Deactivate" from the popup menu. This will make the payment method unavailable for all users. Now that the payment method is inactive, you can either edit or delete the payment method.
Editing a Custom Payment Method
To edit a Custom Payment Method, make sure its inactive, and then click the arrow next to it and choose "Edit." You can now change the name of the Custom Payment Method. Be aware that this doesn't affect existing payments or other source records in your org! To update your existing records you will need to update them using a bulk data load via dataloader or equivalent.
Deleting a Custom Payment Method
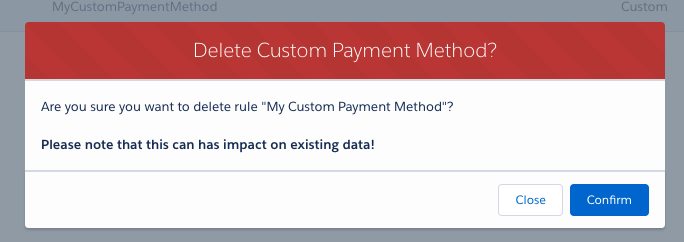
Deleting removes the Custom Payment Method from the configuration page, but doesn't remove the value from any existing records. To delete a custom payment method, make sure its inactive, click the arrow next to the custom payment method and choose "Delete". A confirmation window will appear, click "Confirm" to delete the listing, or "Close" to cancel and return to the configuration screen. Deleted custom payment methods can be re-added by creating a new custom payment method with the exact same name.