(Classic) Tikkie for FinDock
This article describes Tikkie integration with version 1 of the Payment API. The Classic Online Experience with Payment API version 1 will be decommissioned at the end of 2024. All Payment API integrations should migrate to version 2, the Enhanced Online Experience, by January 2025.
The Tikkie for FinDock extension brings the popular Tikkie payment service to Salesforce, fully leveraging FinDock's payment request and reconciliation platform features.
| Multi-merchant | Multi-currency |
|---|---|
| Payment Method | One-time | Recurring | Refunds |
|---|---|---|---|
| Tikkie |
Wildly popular across the entire Dutch market, "Tikkies" are QR codes or URLs that direct users to simple, hassle-free payments. The payment requests can be used in all types of channels for a wide range of purposes. Payment requests can be sent through the Tikkie app, social media apps, email, SMS, printed, etc. They are ideal for campaigns, fundraising drives, or just giving potential givers a really easy way to donate.
You can create Tikkie payment requests from Salesforce through many different tools FinDock offers, such as the Payment Request Generator, Payment API or by using payment schedules. In each case, FinDock stores both a Tikkie QR (image and Base64 string) and a Tikkie URL for the request. Tikkie for FinDock also includes predefined rule sets to make reconciliation Guided Matching simple and right out of the box.
Tikkie for FinDock has a minimum transaction amount limit of 0.10€.
Pre-requisites
- FinDock installed and configured
- A source connector installed and configured
- A Salesforce Site configured
- A Tikkie for Business account
Install and activate Tikkie for FinDock
Follow the standard procedure for installing and activating the Tikkie for Findock payment extension. If you haven’t already, configure a site as explained in Configuring a Salesforce site. For this site, assign the following permission set to the Site Guest user:
- Tikkie Integration
Configure Tikkie for FinDock
Tikkie is currently only available in the Netherlands, so both the Tikkie Business Portal and some configuration steps are partially in Dutch. To configure Tikkie:
- Sign in to your Tikkie Business Portal account: business.tikkie.me or business.sbx.tikkie.me if you have a sandbox account with Tikkie.
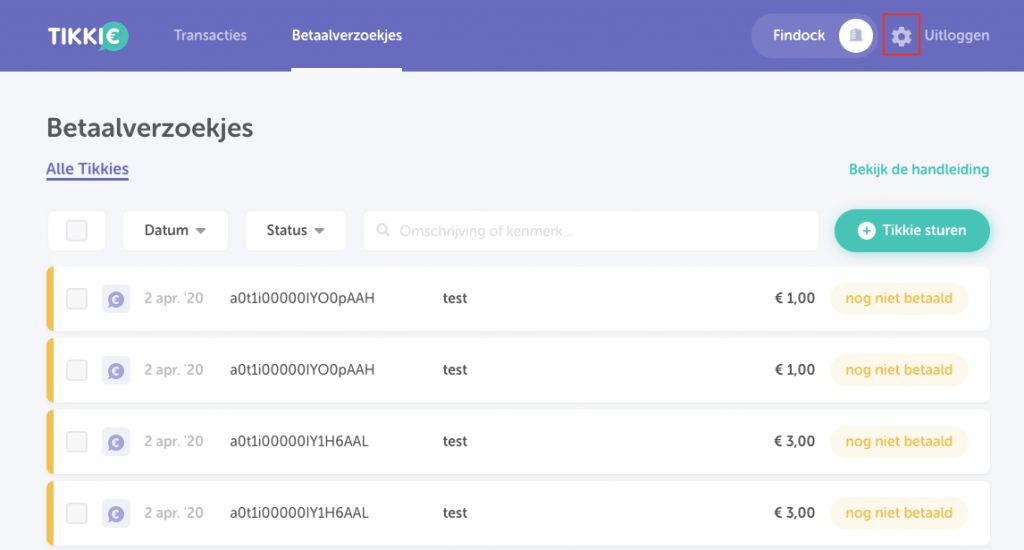
- Click the cog icon in the top right corner to open the settings.
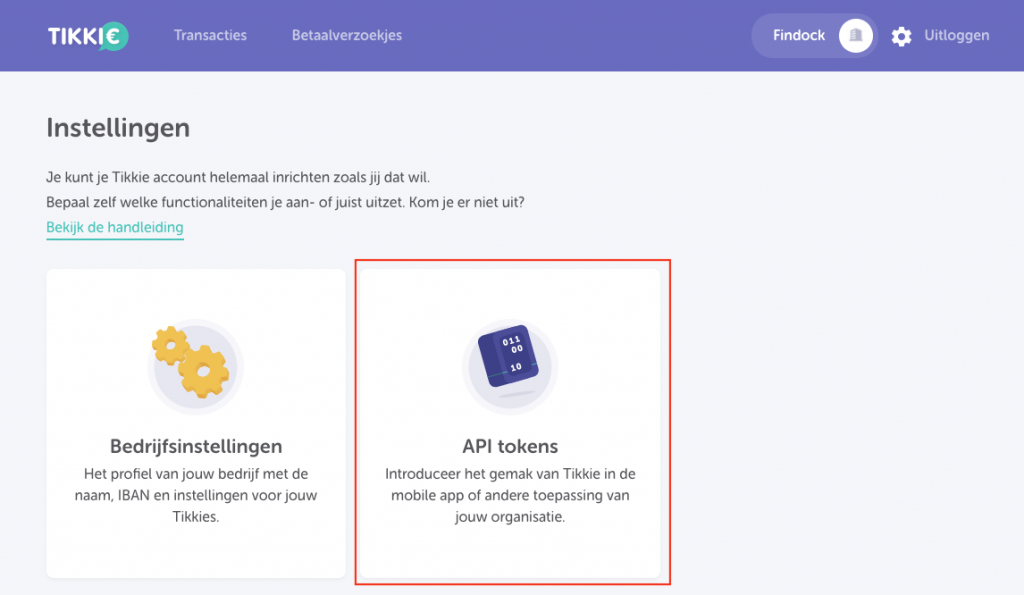
- Click the API tokens tile.
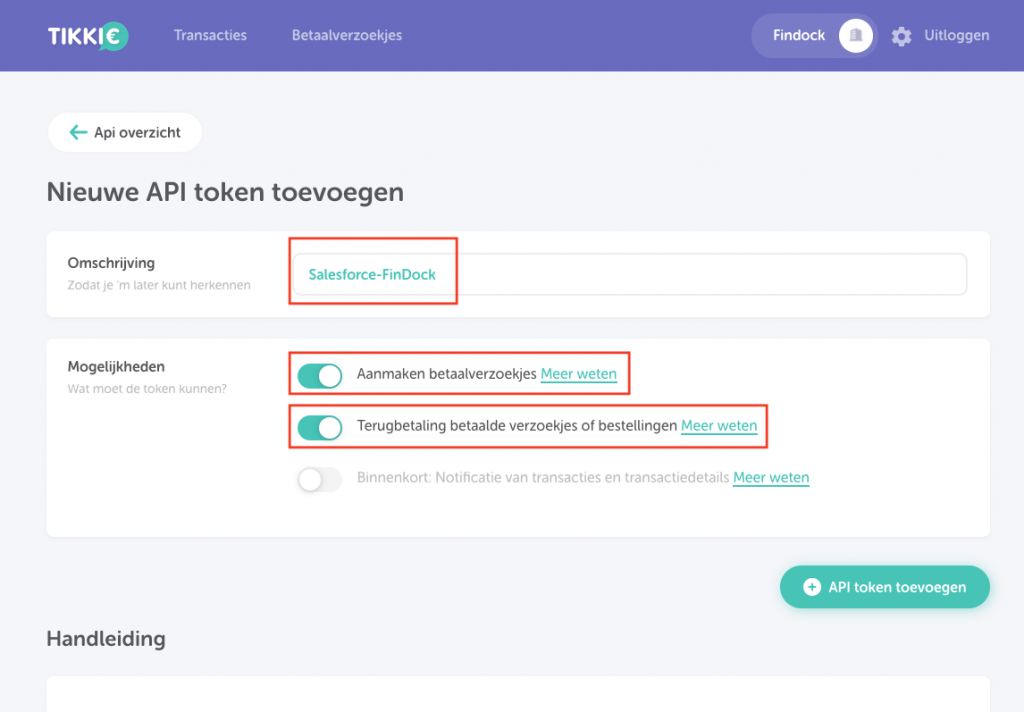
- Click the API token toevoegen button.
 caution
Do not try to re-use existing API tokens that have been used for applications other than FinDock.
- Select ‘Aanmaken betaalverzoekjes’ and ‘Terugbetaling betaalde verzoekjes of bestellingen’ and enter a ‘omschrijving’ that makes it clear this token will be used for FinDock.
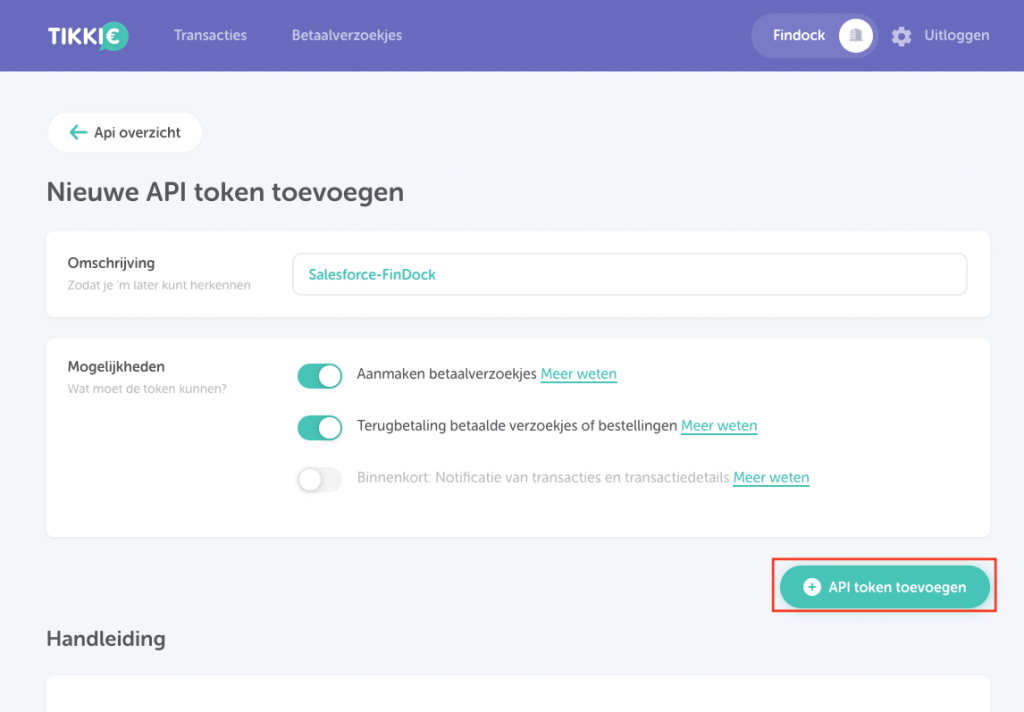
- Click the API token toevoegen button.
- Check if your API token has been added.
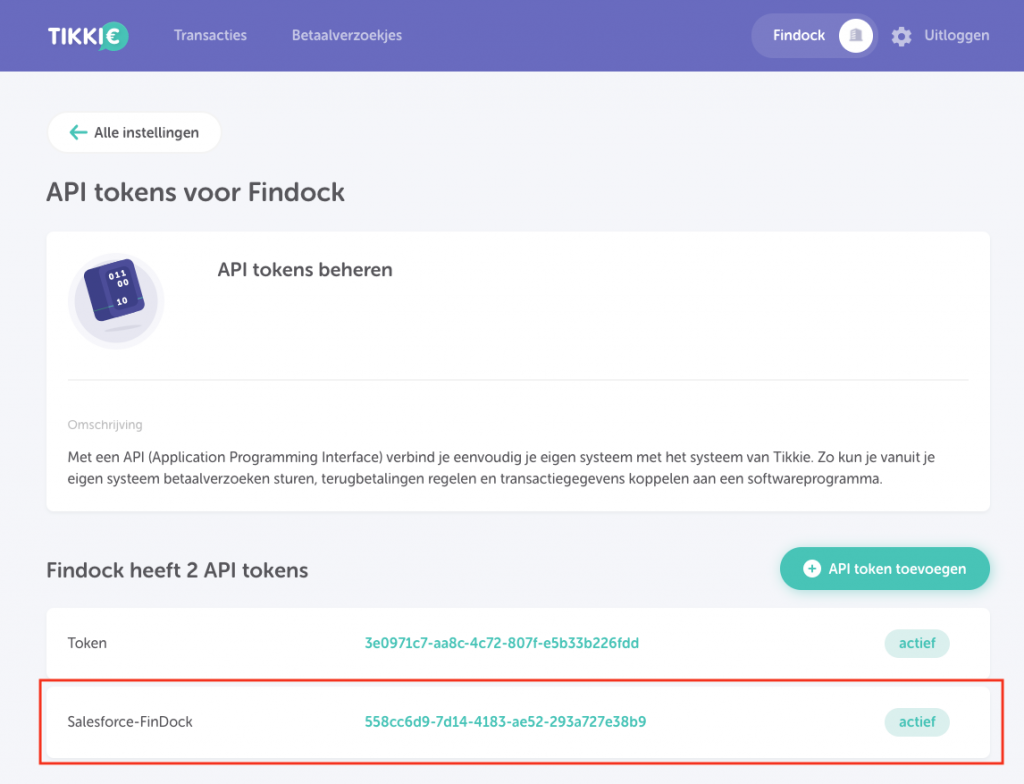
- Click your API token and check if ‘Actief’ has been (automatically) selected.
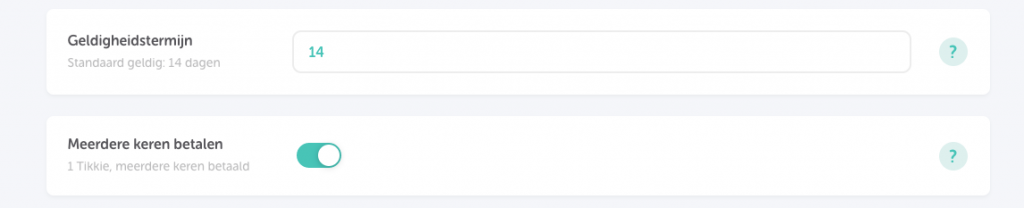
- Click the cog in the top right corner and go to Bedrijfsinstellingen.
- Make sure that ‘Meerdere keren betalen’ has been selected and take note of the standard ‘Geldigheidstermijn’ and adjust according to your business requirements.
- Launch the FinDock app and click Setup. You will see a red mark on the Remote Site Settings tab indicating that the remote site settings for Tikkie are disabled.
- Open the Remote Site Settings tab and, depending on your org, activate the test or production and QR generator endpoint of Tikkie.
- For testing:
https://api-sandbox.abnamro.com - For production:
https://api.abnamro.com - For QR generation (on both test & production):
https://fd-tikkie-qr.herokuapp.com. You should see a notification saying “Success: The remote site setting "NAME" has been activated successfully.
- For testing:
- Go back to the FinDock Setup tab.
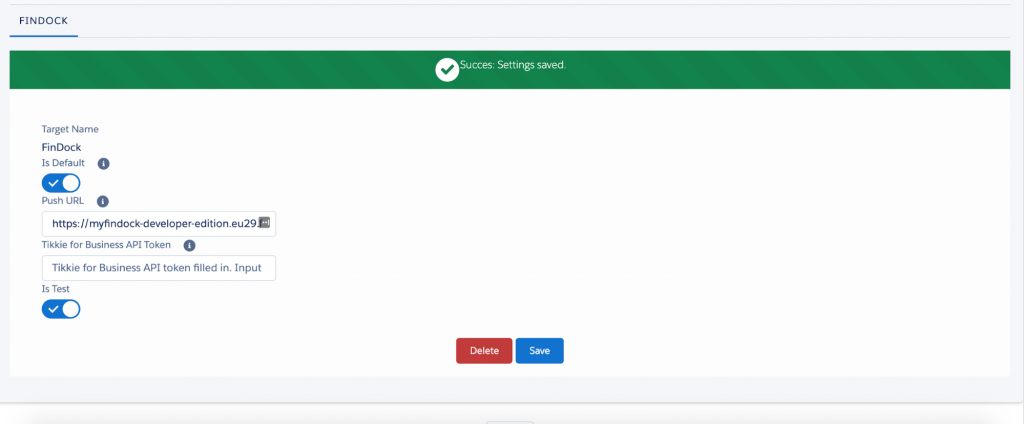
- Click the ‘FinDock-Tikkie’ tile and enter the following values into their corresponding fields:
- Name: your Tikkie account name
- Is Default: selected
- Push URL: enter the configured Salesforce site used for the Callback URL. Make sure you use https:// and end the URL with forward slash /.
- Tikkie for Business API Token: your API token created at step 6. (similar to: 1a2345b6-cd7e-8f91-....)
- Is Test: ONLY select this if you are using a Tikkie for Business Sandbox account from ABN AMRO at business.sbx.tikkie.me
- Click Save.
 If you get a “Unauthorized end-point” error when saving, please make sure you have activated the Tikkie endpoints under: Settings > Remote Site Settings.
 - Deploy your changed by clicking ‘Click here to see the changes’ in the grey bar and then ‘Start Deploy.’
Multiple Tikkie accounts (Multi-Merchant)
If you have more than one Tikkie account, you can add more accounts by clicking the ‘Add Account’ button in the FinDock-Tikke setup page. This creates a new tab for multiple accounts. You can configure the account by following the ‘Configure Tikkie extension’ steps. Make sure you use the right Tokens for the right account. For further information about Multi-Merchant functionality in FinDock, see Multi-Merchant accounts for PSPs.
Configure Quick Tikkie
The FinDock Quick Tikkie feature is implemented as a Salesforce component. All you need to do to be able to use it is add the component to a page layout. To configured Quick Tikkie:
- Go to Salesforce Object Manager.
- Choose the object where you want to use Quick Tikkie, like Opportunity or Case.
- Go to Lightning Record Pages and select a Record Page.
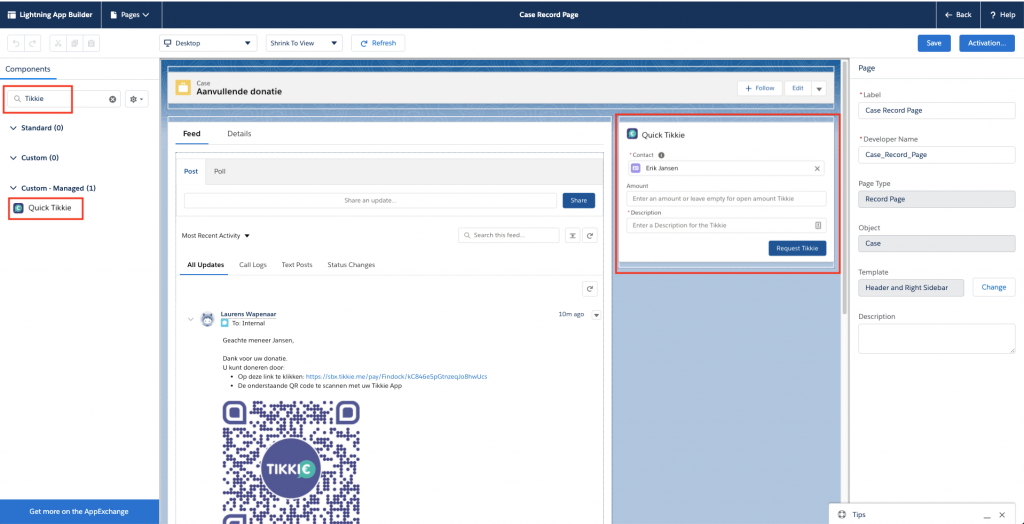
- Search for the ‘Tikkie’ component.
- Drag the component onto the page.
- Click Save , and if necessary, Activate.
Configure Tikkie in Payment Request Generator
If you plan to generate Tikkie references, QRs and URLs with the Payment Request Generator:
- Configure Payment Request Generator
- If you plan on adding the generated references to campaigns, create - preferably Tikkie specific - fields on the Campaign Member object to store the following values:
- Payment Reference: Text(22)
- Payment URL: Url(255)
- QR Base 64: Long text Area(32768)
- and create a Description: Text(35) input field on Campaign, Campaign Member or other, where you provide the description that will be shown to the customer on the Tikkie payment page.
Generate Tikkies for payment requests
There are several ways to create Tikkie payment references with FinDock. You can create single and recurring Tikkie Payment Requests, and in each case you always get both a generated URL and QR code.
- Using FinDock tools:
- Payment Request Generator: with the generator, you can create lots of Tikkies without having to create installments. You can generate both ‘Open amount’ and ‘Closed amount’ Tikkies and store them on any field and object you want in Salesforce. For more information, see What is the Payment Request Generator?
- Payment Schedule: select type ‘Tikkie’ to generate a reference, URL and QR for all recurring and installments that you expect to collect.
- Payment API : use PaymentMethod ‘Tikkie’ and PaymentProcessor ‘FinDock-Tikkie’ to generate a reference, URL and QR for web forms or other external systems. For more information on how to use the Payment API, please visit the API documentation and the API Reference Guide. NOTE: Unlike other payment extensions, the Tikkie method does not return a RedirectURL in the response.
- Quick Tikkie: instantly create a Tikkie URL and QR on any place in Salesforce and use them in your communication with customers and donors. For more information on how to use the Quick Tikkie component, please see the ‘Tikkie payment requests with Quick Tikkie’ section below.
- Directly creating or updating Installments and Recurring Payments: When an Installment is created or updated to the payment method ‘Tikkie,’ FinDock automatically generates a Tikkie URL and Tikkie QR and saves them on the Installment. This can be triggered by:
- updating of existing records with Payment Method = Tikkie
- creating new records with Payment Method = Tikkie. This can be done via any tool that Salesforce offers. In this way you could e.g. create a Tikkie by changing the payment method via a process builder and then send out an email with that Tikkie via another process builder. This works for an Installment, but also on any recurring object supported by FinDock via a source connector.
If you plan to generate a large number of Tikkie records (e.g. 5,000+) at once and need the process to take less than a few hours, please contact our support team in advance. We can temporarily scale our infrastructure to increase performance and reduce the time for generation. Without scaling, FinDock generates 2,500 Tikkies per hour.
Tikkie URL
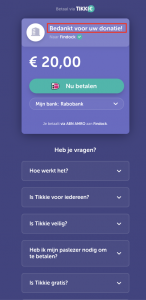
The Payment URL is a URL containing a unique payment reference to a Tikkie payment form that uses Ideal to process payments. Debtors (customers or donors) can select their bank and pay through online banking. If the Tikkie was created with an open amount, the debtor needs to also enter an amount.
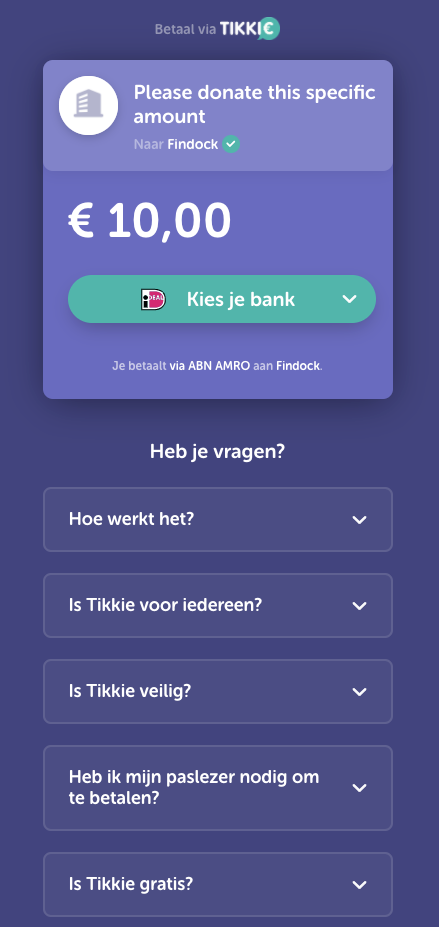
Tikkie QR
The QR is stored both as a file attached to the record (usually Installment) it was generated from and encoded as Base64 in either the Payment QR or Recurring Payment QR field (not standard on the layout). This Base64 string can be converted back into an image, like a QR. The encoded value allows for more flexibility compared to storing an image and allows communication with other systems.
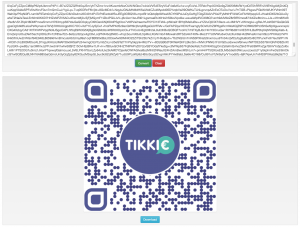
If the QR code is scanned, the debtor is redirected to the same Tikkie Payment page like clicking a Payment URL.
Tikkies with the Payment Request Generator
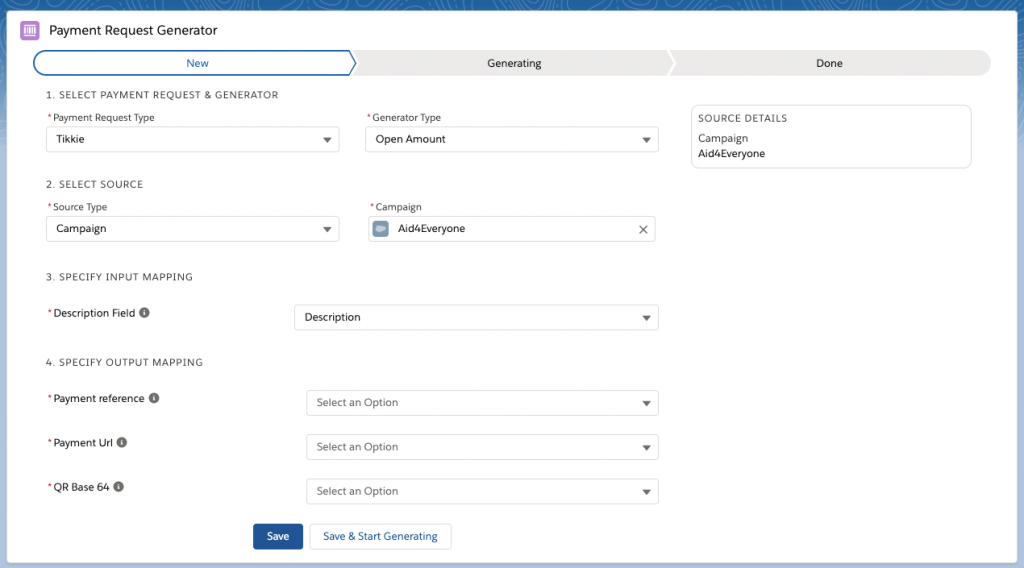
Tikkie Payment Requests can be generated on other objects than Installments, like Campaigns, with the Payment Request Generator. To generate Tikkie payment requests with the generator:
- Go to Payment Request Generator Runs in your FinDock app
- Select Payment Request Type ‘Tikkie’.
- Select Generator Type ‘Open Amount’ or ‘Closed Amount.’
- Select a Source Type where the reference will go, either Report or Campaign.
- Select where FinDock can find the Tikkie Description
- If Source Type is Campaign, select the Campaign Member fields to map the following values to:
- Payment reference
- Payment URL
- QR Base 64
The QR PNG file is usually attached to the record on which the Tikkie is generated. However, since we cannot attach files to a Campaign Member record the file is attached to the related Contact instead.
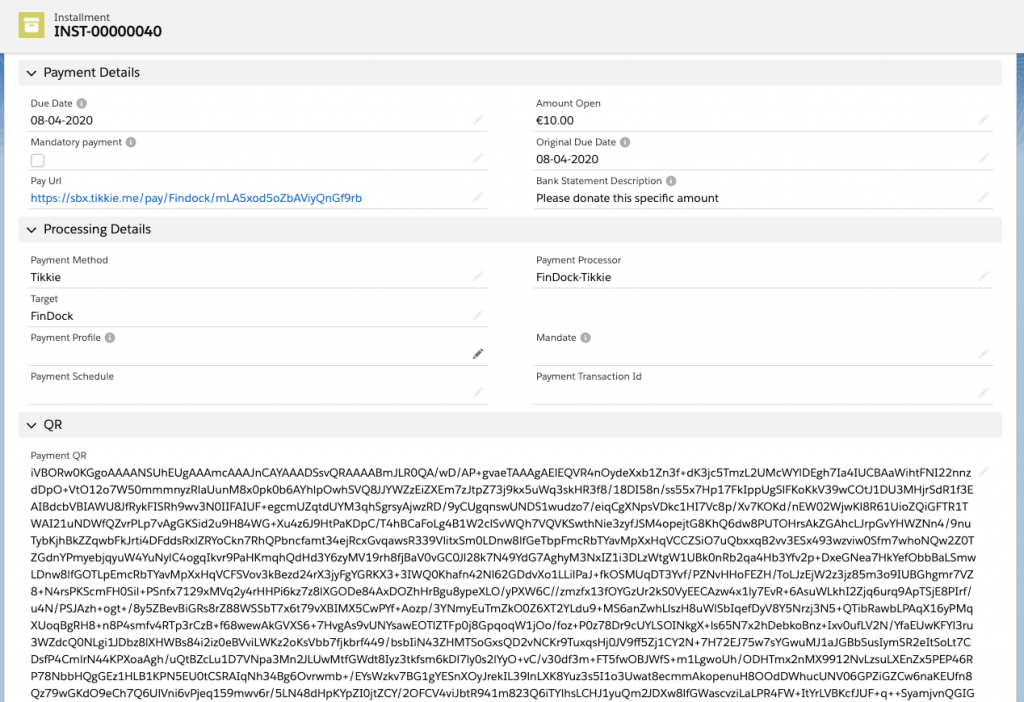
Tikkies on Installments (Payment Schedule and API)
If you generate Tikkies through a Payment Schedule or through the API, FinDock creates an Installment with a payment URL and a QR.
Quick Tikkies
You can generate a Tikkie URL and QR from any object in Salesforce using FinDock Quick Tikkie. This app generates Tikkie URLs and QRs that can be added to any customer or donor communication, such as email or direct message services When a Tikke is generated with a specific amount, FinDock automatically creates an installment. To use Quick Tikkie:
- Go to the object, such as Case or Opportunity, where the Quick Tikkie app is available (see configuration above). The Quick Tikkie app sports the official Tikkie logo.
- If the record you have opened has a related Contact, FinDock pre-selects this contact for the Tikkie.
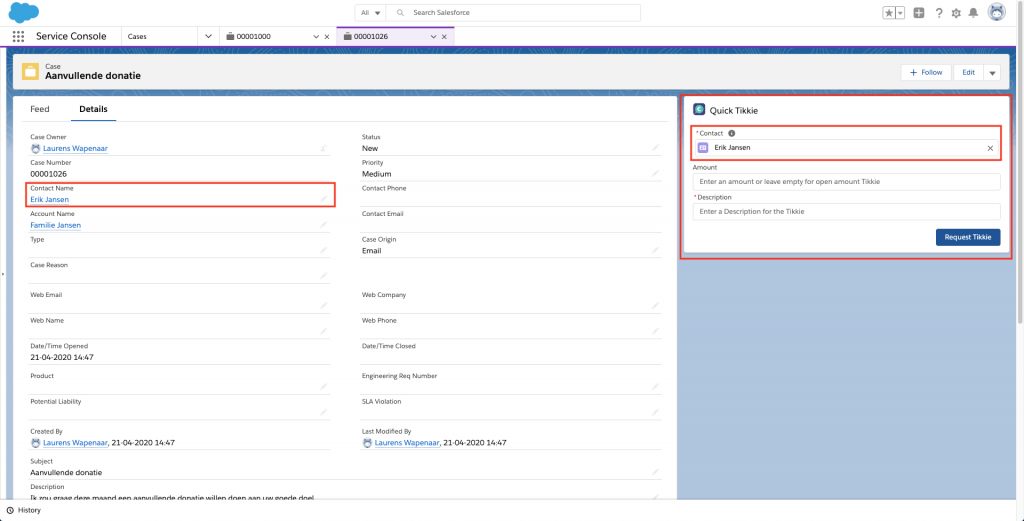
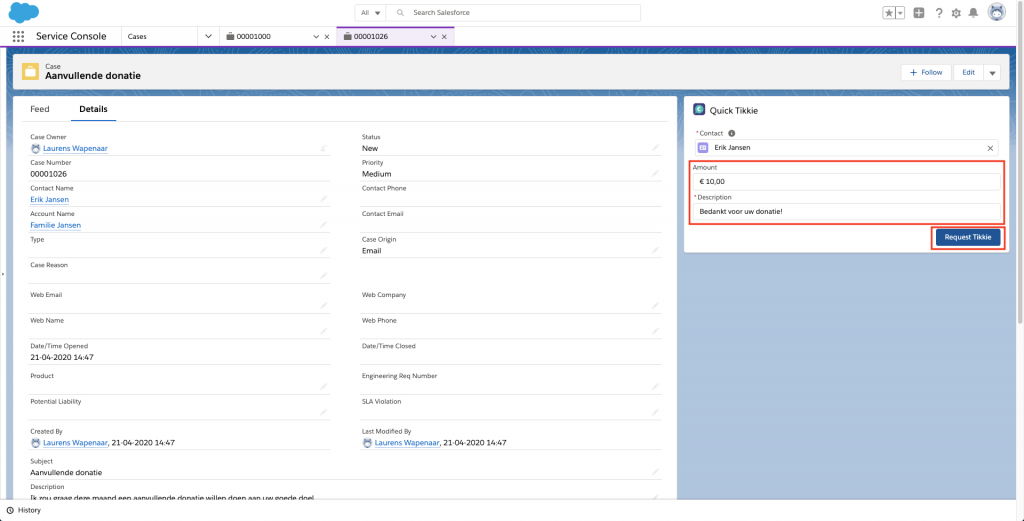
- Enter an amount for the Tikkie or leave the amount field empty to create an open Tikkie and allow the payer to set the amount.
- Enter a description for the Tikkie. This text is shown to the payer on the Tikkie payment page. The maximum length is 35 characters.
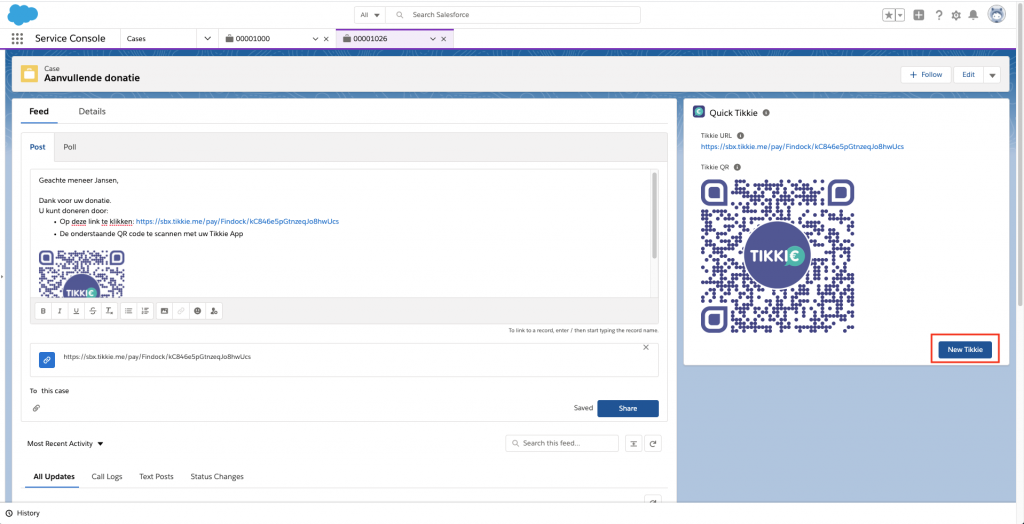
- Click Request Tikkie.
- The app reloads and you should see:
- Green status bar with a link to the created installment record
- Tikkie URL & QR
- PNG file of the Tikkie QR attached to the record
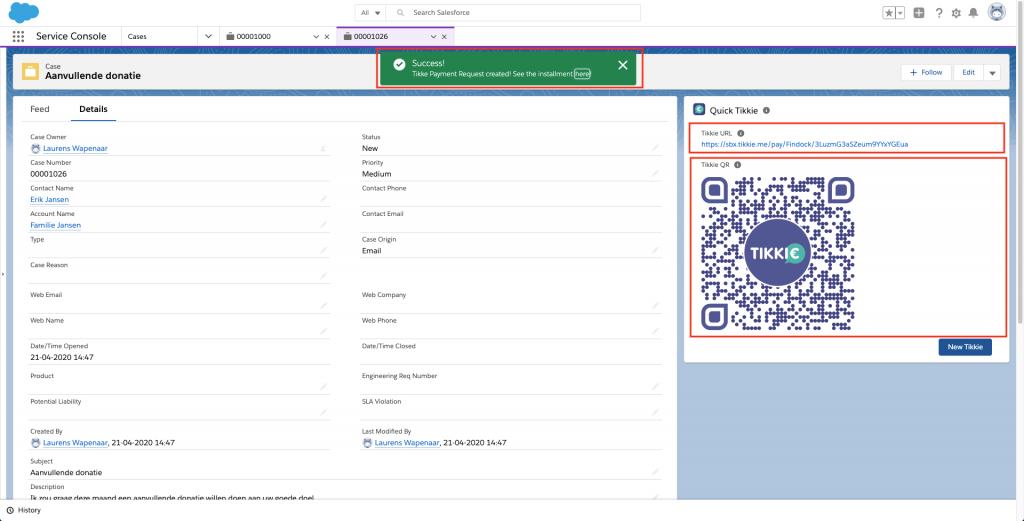
- To preview the generated Tikkie as the payer would see it, click the URL or the QR code.
- To include the Tikkie URL in a Salesforce email, Chatter Post or any communication channel, simply copy and paste the URL.
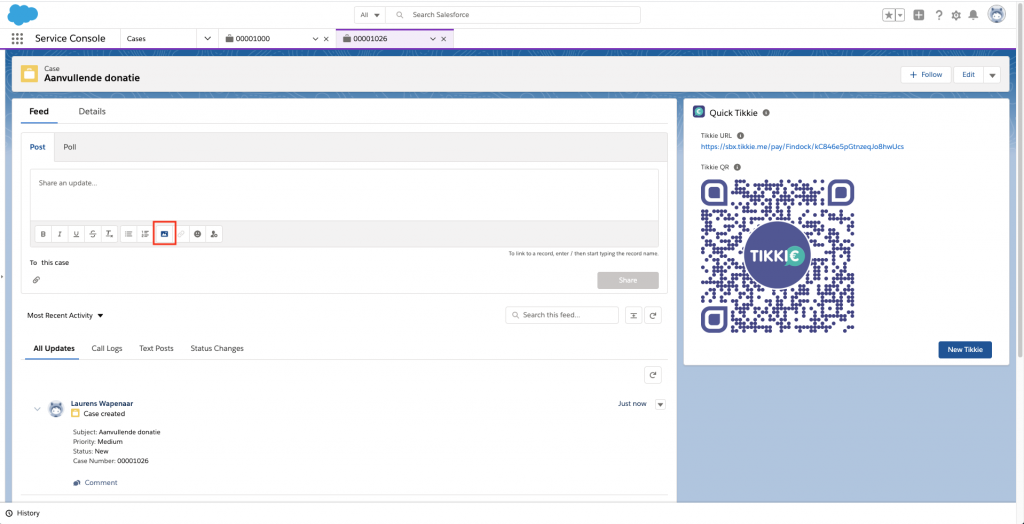
- To include the Tikkie QR code in a Salesforce email or Chatter Post:
- Click the insert image tool.
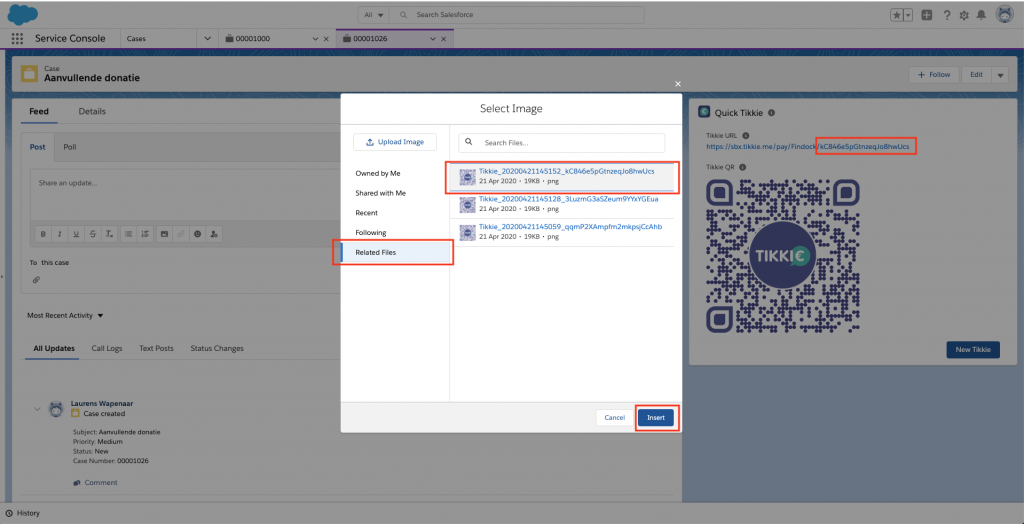
- Go to ‘Related files.’
- Select the Tikkie QR file. If you have generated more than one Tikkie, select the file with the same unique code as the end of the URL.
- Click Insert.
Your Tikkie QR should now be inserted in the Chatter Post or email body.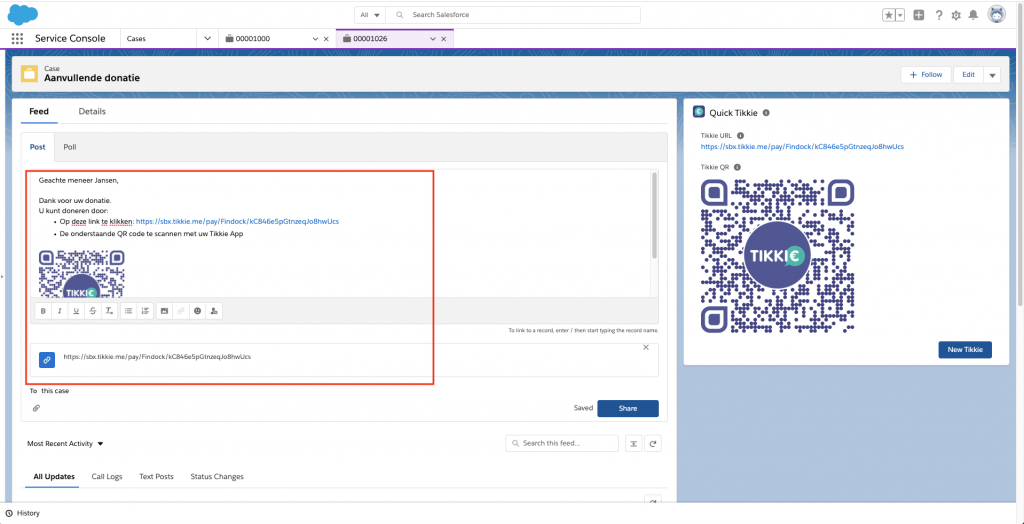
NOTE: For security reasons, Salesforce does not allow direct drag-and-drop or copy-paste of images into Salesforce email or Chatter Posts. If you copy-paste the QR image into an email, it looks correct. However, the image is broken for the message receiver as the file is not actually attached.
- Click the insert image tool.
- To include the Tikkie QR in communication channels outside of Salesforce, simply copy and paste the image.
- If at any point during the process you wish to generate another or different Tikkie, press the Request Tikkie button or refresh the page.
Tikkie reconciliation with Guided Matching
If a Tikkie is paid, FinDock receives a notification from Tikkie. From this notification FinDock creates an Inbound Report record for reconciliation through Guided Matching. Some configuration is needed before you can use Guided Matching. When you install FinDock, you get a set of managed and suggested rules for Guided Matching out-of-the-box to get you started. You can further expand on these rules by adding your own rules. You can view the rules in your Guided Matching Setup screen. Tikkies are special in two ways:
- A Tikkie can, and is often intended to be, paid more than once. If this happens, FinDock creates additional Payment records related to the Installment.
- A Tikkie can be created with an ‘open’ amount. If this happens, FinDock creates an Installment when a Payment comes in.
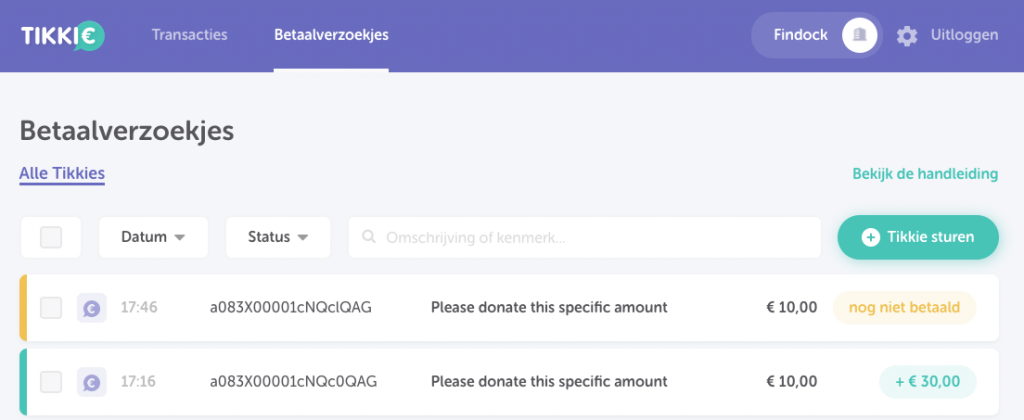
You can also view the status of your Tikkie, including the Ids used for
reconciliation, in your Tikkie for Business
Account:
Testing with the Payment API
You can use the following example message to test if the Tikkie configuration is working as expected.
    {
        "SuccessURL":"http://www.success.nl",
        "FailureURL":"http://www.failure.nl",
        "Payer":{
            "Contact":{
                "FirstName":"Erik",
                "LastName":"Jansen"
                }
            },
        "Payment":{
            "Amount":10
            }
        ,
        "PaymentMethod":{
            "Name":"Tikkie",
        "Processor" :"Findock-Tikkie",
        "ParameterMap": {
                "Description":"Please donate this specific amount"
        }
        },
        "SourceConnector":{
            "Name":"PaymentHub"
        }
    }