FinDock integrates with Paya, an payment service provider that is today part of Nuvei.
The Paya payment extension is in beta and available to all customers for testing.
The FinDock integration with Paya is a work in progress. We are adding features to the payment extension during the pilot phase. Currently, please note the follow limitation(s):
- Recurring payments via API (PayLinks, Giving Pages and Payment API) do not support AVS. New payment intents for recurring payments must exclude billing information
- Refunds from Salesforce support Paya as the payment processor, but only work with FinDock Standalone or Fundraising (NPC, EDU) as source at this time
| Payment Method | Currency | One-time | Recurring | Initial Recurring | Refunds |
|---|---|---|---|---|---|
| ACH Direct Debit | USD, CAD | Required | |||
| Card | Multi | Required |
| Payment Method | Online Flow | API | MOTO | Data Entry | Initiate Refund |
|---|---|---|---|---|---|
| ACH Direct Debit | Redirect | ||||
| Card | Redirect |
- FinDock is installed and configured.
- Working connections to ProcessingHub and WebHub.
- You have at least one Paya account and the associated credentials.
To install the Paya payment extension, the Paya feature pilot needs to be enabled for your org.
To install Paya and activate payment methods:
- Contact FinDock Support and provide your Org Id.
- Wait for confirmation that the Paya feature pilot is enabled.
- Once enabled, go to FinDock Setup and install Paya for FinDock following the standard procedure.
- Activate one or more payment methods following the standard procedure.
- Check and assign the required permissions and FinDock permission set groups.
- If you installed the Paya package prior to the March '26 release, add the FinDock Paya Base permission set to all FinDock permission set groups.
To integrate FinDock with Paya, you need to add a merchant account. The merchant account setup requires your Paya account Merchant Id and Merchant Key. These credentials are only available in the email response from Paya when you set up the account.
For ACH sandbox testing, you need to use Merchant Id 173859436515 and Merchant Key P1J2V8P2Q3D8. You can not perform ACH sandbox tests on your own merchant.
To add a merchant account:
- Go to FinDock Setup and select Processors & Methods.
- On the Installed tab, click the Paya processor entry.
- On the Accounts tab, click Add account.
- Enter your Merchant Id and Merchant Key.
- Set the default Address Verification Services (AVS) requirement for new payment intents for all payment acceptance channels. AVS must be enabled for your account at Paya to use it with FinDock. The options are:
- None: billing information for AVS cannot be included
- Optional: billing information for AVS may be included
- Required: billing information for AVS must be included
- Enable Close with settlement file if you want to set installments to Collected and Refunds to Refunded only after processing the settlement file.
- Adjust other settings as needed and click Save.
FinDock reconciles Paya payments using asynchronous notifications in the form of a CSV file. This requires you to set up file delivery from Paya.
To configuration notifications:
- If you haven't already, go to Salesforce Setup > Email Settings and enable Allow Posts via Email and Allow Attachments via Email.
- If you haven’t already, go to FinDock Setup and configure file exchanges.
- Ensure your FinDock integration user is a member of the Chatter group for file exchanges.
- Note down the Group Email on the Chatter group page for file exchanges.
- Log into the Paya Virtual Terminal with user credentials associated with the merchant account you added above.
- Go to Configuration > Email Notifications > General email settings.
- Adjust the Batch Close Notification Settings:
- Batch Close Email Address: your FinDock integration user email address
- Batch Close Notifications: select the option “Email Me, Generic Export Format”
- Save your changes and go back to your Salesforce org.
- Configure the integration user email to forward emails from
noreply@paya.comto your file exchange Chatter Group Email.
For both credit card and ACH payments, FinDock relies on the Payment Intent Id from FinDock to create the Paya Transaction Order Number value to manage the installments. In the case of recurring ACH payments, FinDock also creates a mandate to capture the payer authorization to collect future installments. However, the mandate itself is controlled by Paya.
You can set up and accept one-time and recurring payments through the following channels:
New one-time payments are automatically processed and collected. For recurring payments, you use payment schedules to collect future installments. When running large payment schedules, please be aware that you may receive multiple email notifications from Paya about transaction updates. (Please contact Nuvei, if needed, regarding the notification settings in your production merchant account batch/settlement configuration.)
Please note that FinDock AVS settings are independent of your account settings at Paya. If you have enabled AVS at Paya, but do not require it in your FinDock setup, Paya payments fail.
Paya supports fraud detection through Address Verification Service (AVS). The option is enabled through your merchant account Paya Exchange settings.
If you are migrating existing payers to FinDock that have AVS in use, please note that in addition to the standard data migration, you there are several AVS-specific fields for Payment Profile to migrate.
If the payer's street address has more than one line (manually entered or pre-filled), FinDock automatically combines the multi-line address into one line with line breaks replaced by commas. This is required as Paya AVS uses only one address line.
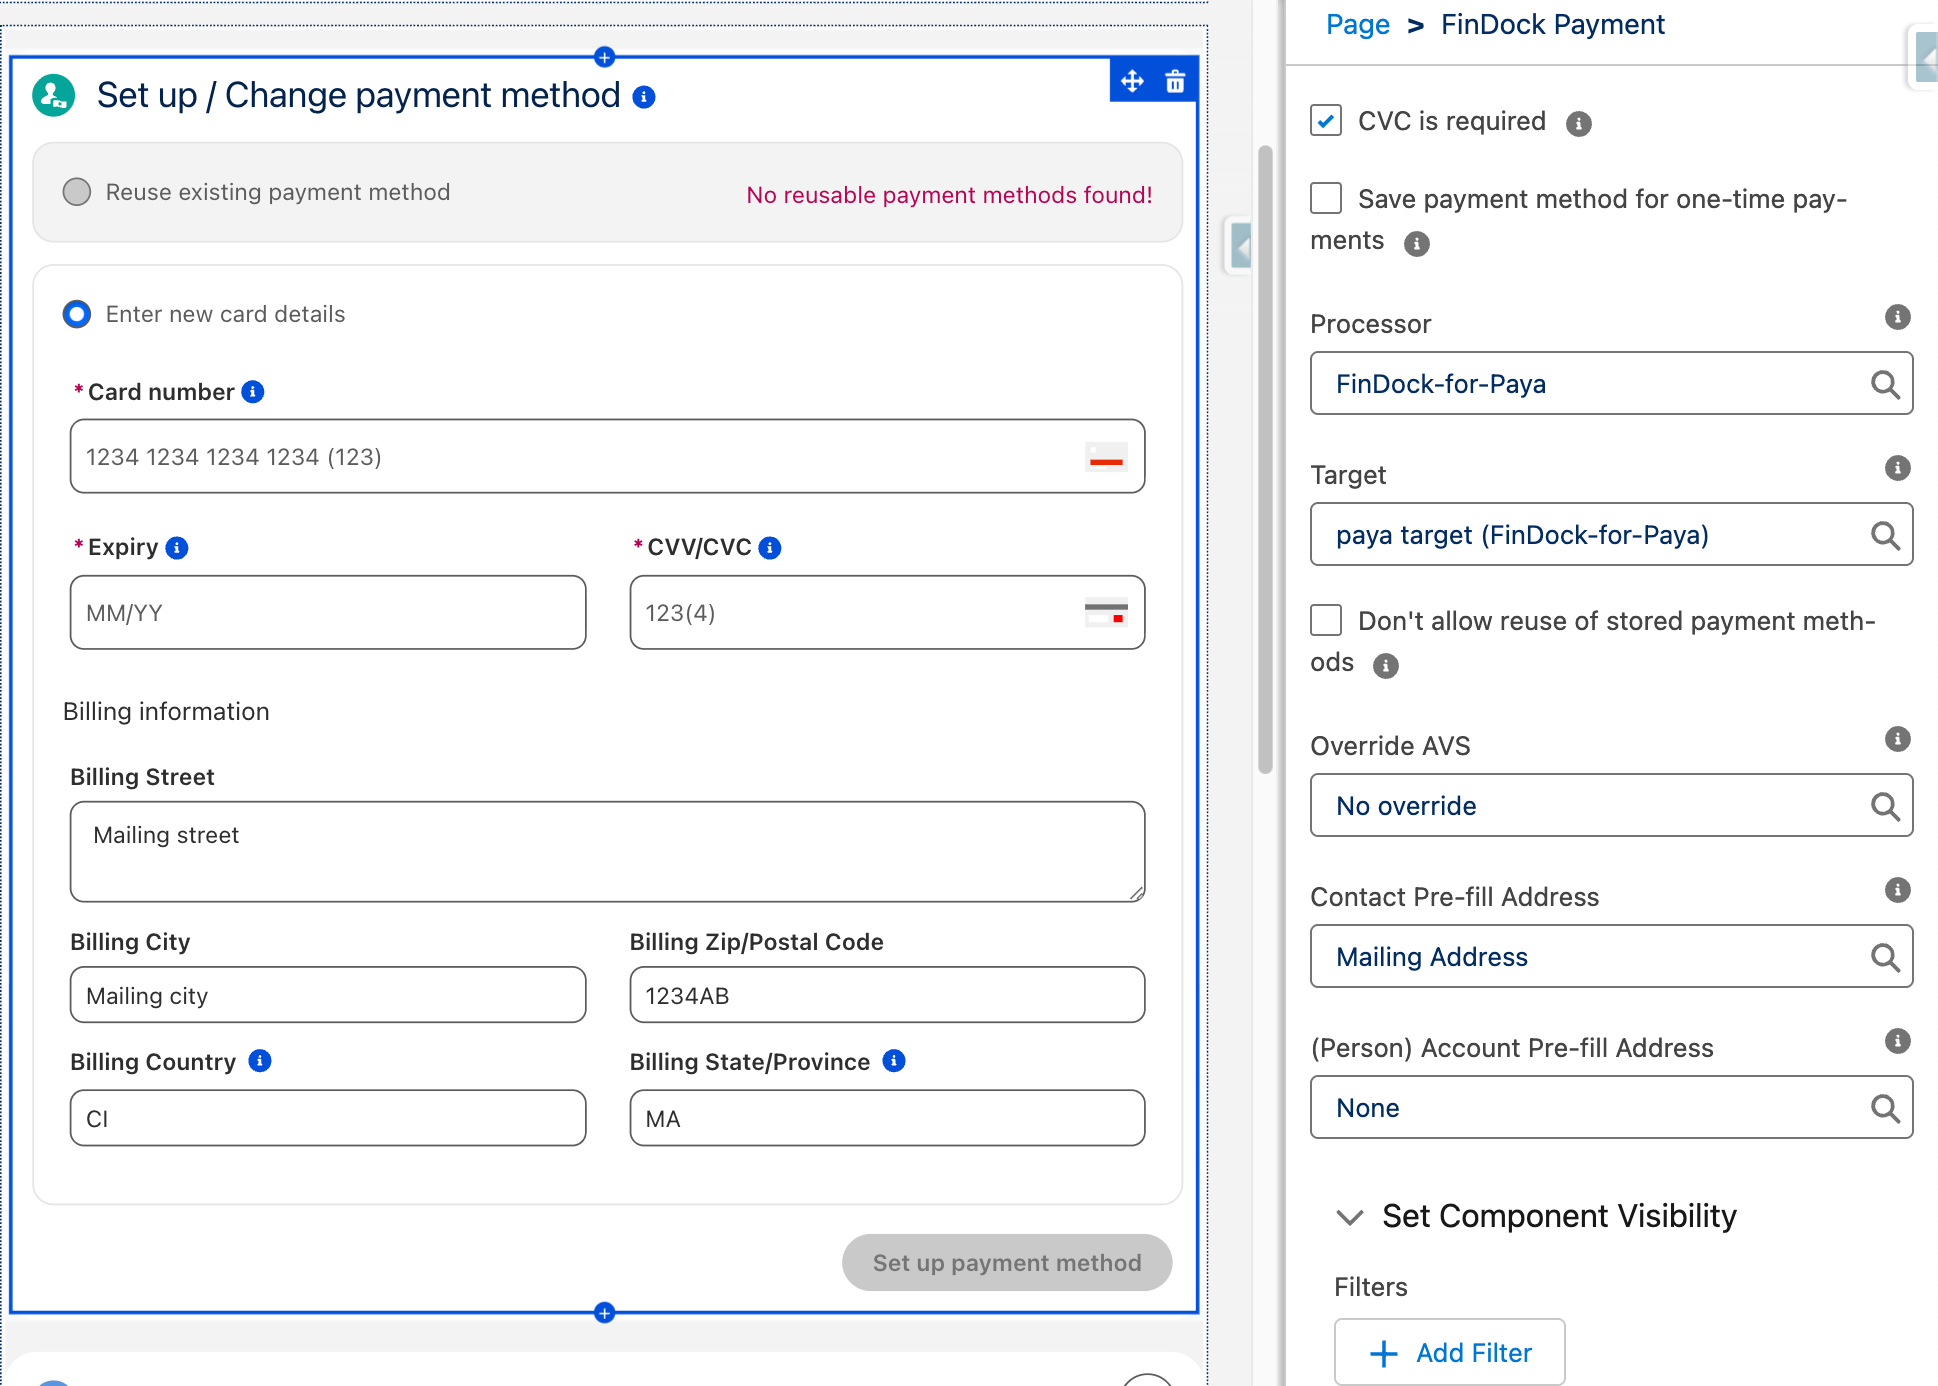
You have two controls for AVS in FinDock. The target-level (merchant account) setting tells FinDock what to do by default for any Paya payment using that target. In addition, specifically for MOTO (virtual terminal) payments, you have an Override AVS setting in the FinDock Payment component.
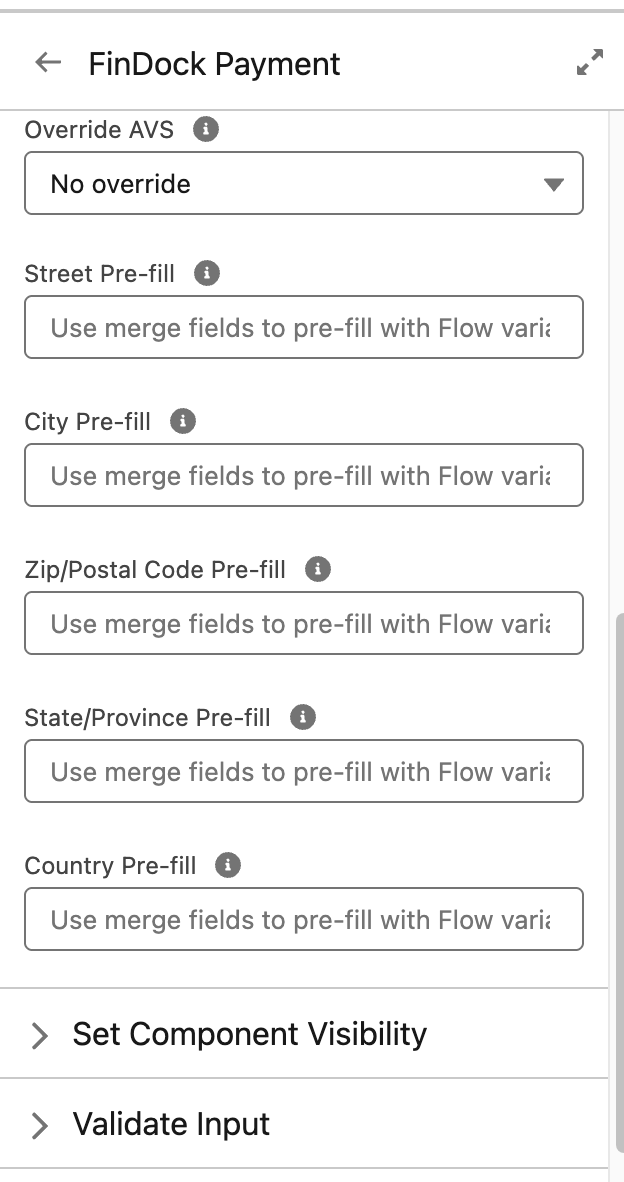
If AVS is required for the target used in the Payment component configuration, the AVS override cannot change that requirement. The component level override can only be stricter, e.g. the target-level setting makes AVS optional, but for the component, you use the override to make AVS required. In addition to the override, you define which Salesforce fields are used to pre-fill address values in the component.
The Payment component can also be used in Flows with AVS enabled. With Flows, merge fields should be used for pre-filling address values.
When AVS is used with online payments (Giving Pages, PayLinks, Payment API), the billing address information is required on the hosted payment page (HPP) from Paya. You can use the following payment method parameters on the payment form (from FinDock or your custom form) to pre-fill the HPP with details already available in Salesforce:
- billingAddressLine1
- billingCity
- billingCountry
- billingPostalCode
- billingState
With the Paya integration, FinDock supports partial and full refunds from Salesforce. You can initiate refunds for individual Payment records for a given (receivable) installment. For further information, see Refunding from Salesforce.
Refunds cannot be initiated on the same day the payment was made. Please ensure refunds are initiated at least one day later, e.g. through custom Flow logic.
Depending on your merchant account settings in FinDock, reconciliation is either immediate or file-based using the settlement file form Paya. Immediate reconciliation means records are closed (Installment status Collected, Refund status Refunded) as soon as payment schedule is closed or refund action is completed.
With file-based reconciliation, records remain in Pending Processing status until the reconciliation process in completed. Inbound Report records are created based on the entries in the settlement file and processed through Guided Matching.
For Paya, the Inbound Report type is Paya-for-FinDock with the following subtypes.
| Inbound Report Subtype | Record Status |
|---|---|
| installment.collect | Collected |
| installment.expired | Failed |
| installment.settled | N/A (status unchanged) |
| installment.voided | Failed |
| transaction.credit.expired | Refunded |
Resolving individual transaction errors, failures and chargebacks require manual action from Paya and/or the merchant account owner. Use the Order ID, equal to the installment Payment Intent Id, to find a transaction in the Paya Virtual Terminal.