Using mandate schedules
FinDock uses mandate schedules to collect mandate records for registration and other actions. New mandates that fit the parameters you define with the schedule are collected into a registration file generated by ProcessingHub. The file format and transfer process depends on the payment method and processor defined by the mandate schedule.
With the July ‘21 release, there is a new default Lightning page for Mandate Schedule. This page includes a Progress Path component and uses dynamic fields. If you have your own page layout that you prefer to use, you can change the default layout for the Mandate Schedule object in your Salesforce settings.
Create a mandate schedule
To create a mandate schedule:
- Launch the FinDock app.
- Click the Mandate Schedules tab and click New.
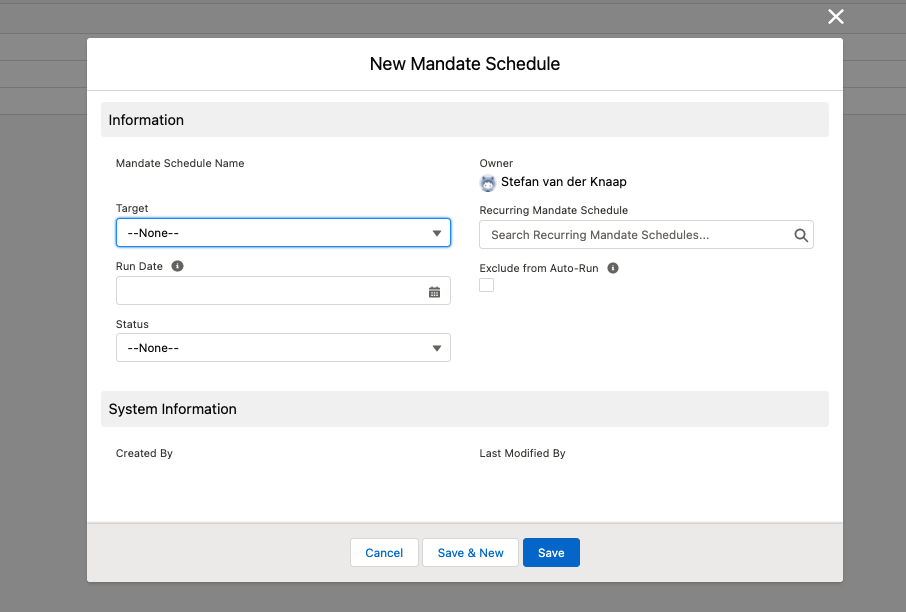
- Fill out the schedule information as needed. Use the tooltips and refer to the Mandate Schedule object field descriptions for guidance.
- Click Save to store the schedule, or click Save & New to save the schedule and open a new one.
Create multiple schedules with recurring mandate schedule
The Recurring Mandate Schedule allows you to easily create multiple mandate schedules over a given period. This helps ensure all mandates in FinDock that need to be registered are registered and active in time for your scheduled payment collection(s).
If you have an existing org that got the July '21 release update, please click the Deploy Config button on the FinDock Setup tab. This is needed to deploy your existing targets to the Target picklist on Recurring Mandate Schedule.
To create a recurring mandate schedule:
- Launch the FinDock app.
- Click the Recurring Mandate Schedules tab and click New.
- Select daily, weekly or monthly frequency, and then click Next.
- Fill out the schedule information as needed. Use the tooltips and refer to the Recurring Mandate Schedule object field descriptions for guidance.
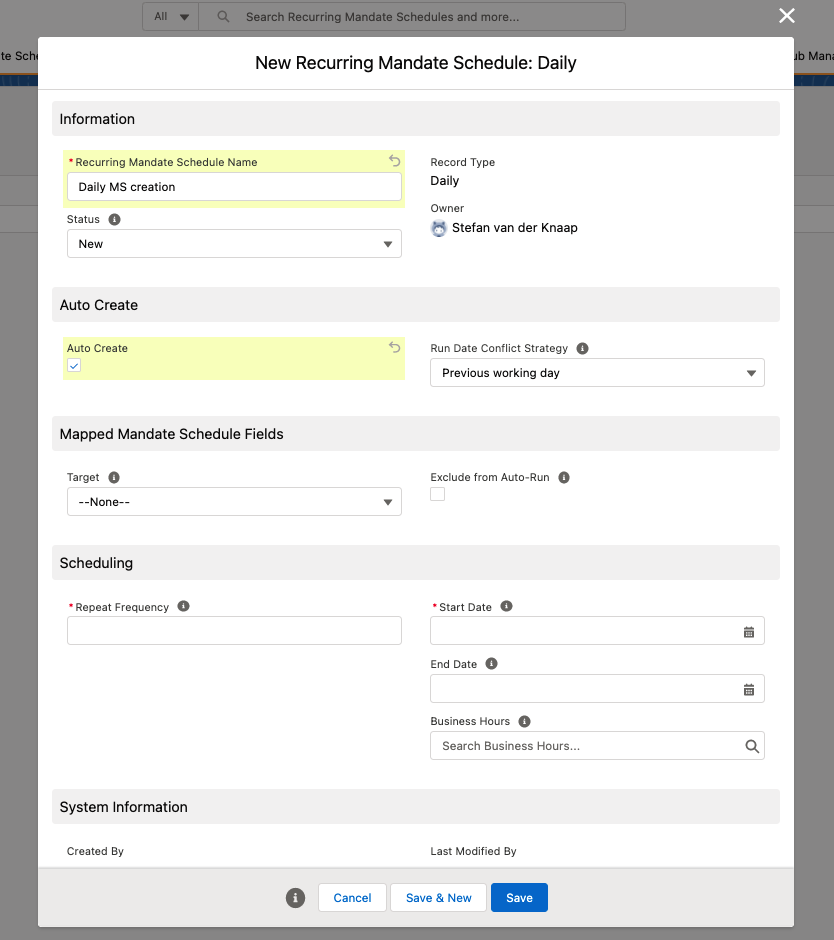
- Click Save to store the schedule, or click Save & New to save the schedule and open a new one.
Once saved, you get a preview that includes a list of the mandate schedules that will be generated at the bottom of the page. You can modify dates or remove schedules directly from the list. Until this point, no changes to Salesforce data are made.
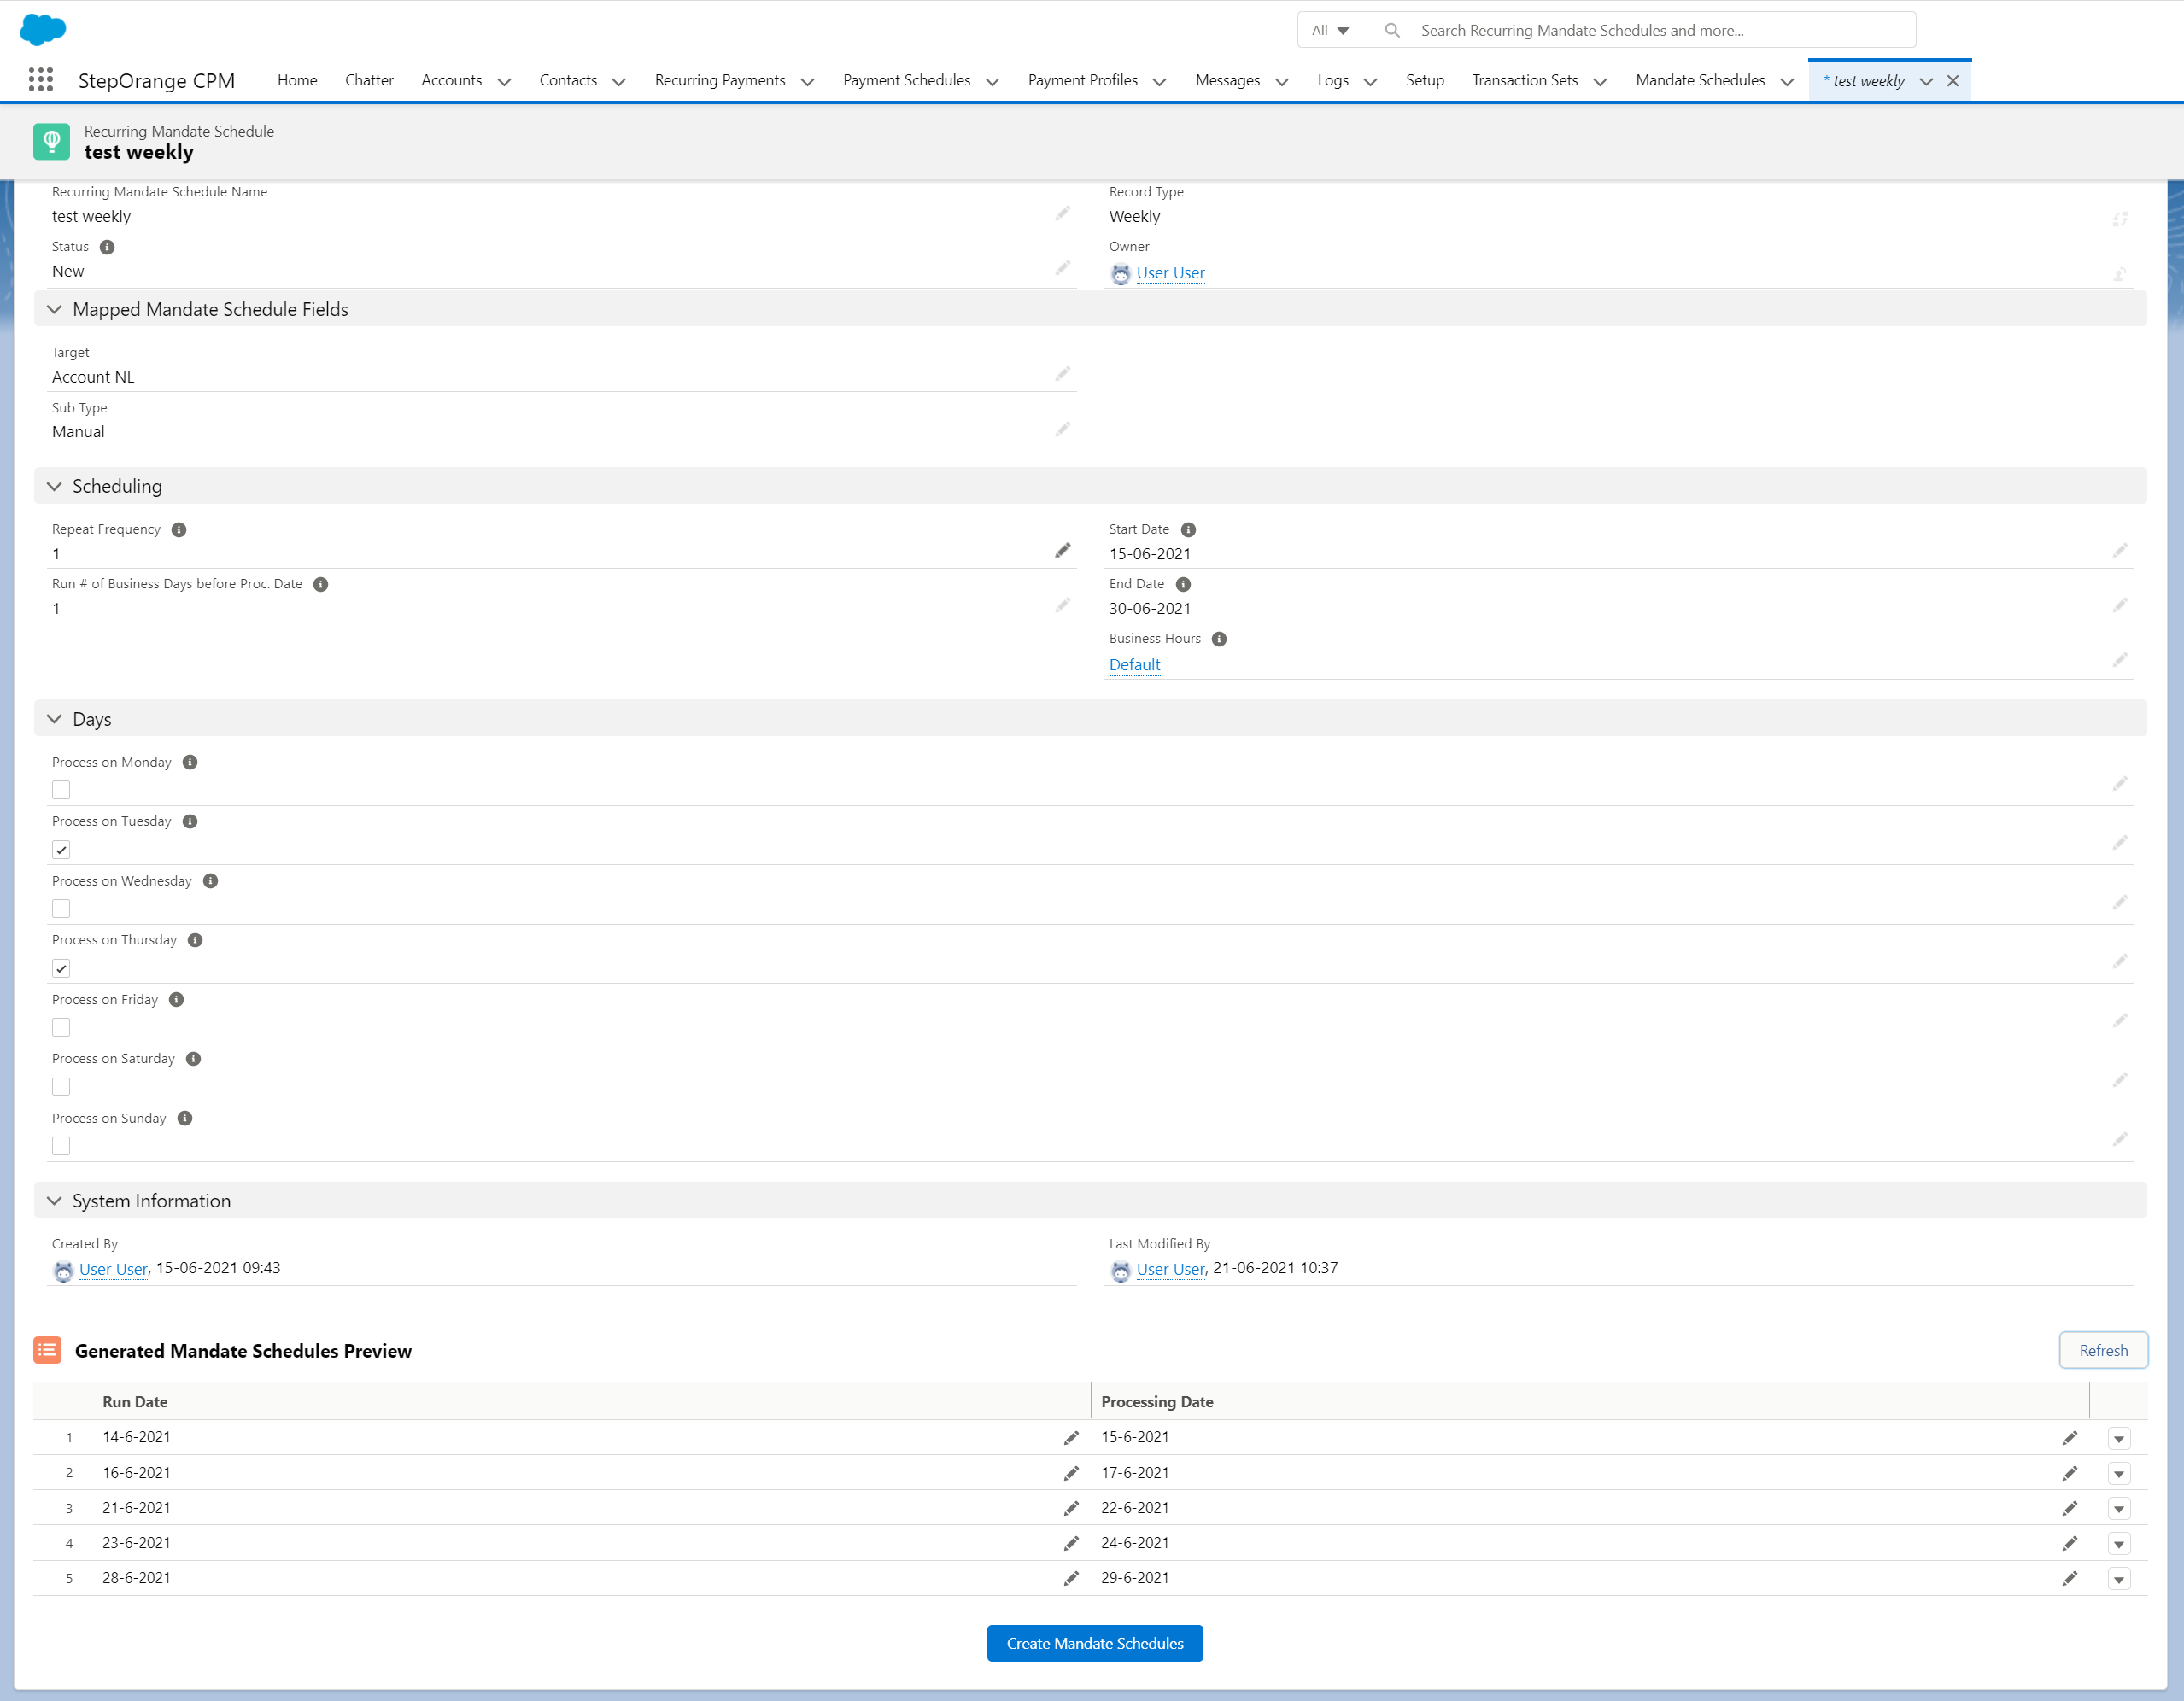
After you are done with your modification in the preview, click Create Mandate Schedules. At this point the mandate schedule records are created in Salesforce.
Manually run a mandate schedule
Whether and how to run a mandate schedule depends on what payment method, scheme and processor you use. Here we present just the basic procudure.
To manually run a mandate schedule:
- Open the mandate schedule record.
- In the Mandate Schedule Path, click Start Generation to start the schedule processing.

- Use the Data Quality component to validate your mandate data.
- Follow the guidance in the dynamic schedule path (and button) to procede with the schedule process.
Completing a mandate management action with mandate schedules depends on the context. See the specific Bacs, SmartDebit or SEDA articles for more detailed mandate management instructions.
Auto-create and run mandate schedules
Through auto-create and auto-run capabilities, you can set up fully automated management of Mandate Schedules to ensure mandates in your org are registered and active in a timely manner.
Automatically create mandate schedules
To automatically create payment schedules, create a recurring mandate schedule and select the auto-create option schedule. This tells FinDock to automatically create mandate schedules according to the parameters you define on the recurring schedule.
Automatically run mandate schedules
The auto-run feature is enabled for a given payment processor and method combination. When enabled, any mandate schedule with that combination is automatically run on the scheduled run date. Both the generate and process phases of the schedule are automatically triggered.
If you create a mandate schedule that you want to run manually, you can select the “Exclude from Auto Run” option on the schedule and run it manually by changing the status on the mandate schedule record.
Prerequisite: FinDock Heart Beat Apex job
To automatically create and run mandate schedules, FinDock requires the Heart Beat job to be scheduled.
Enabling automated mandate schedule runs
Automated mandate management can be configured per payment processor and method.
To enable Auto Run for a certain payment processor and method combination:
- Launch the FinDock app and click the Setup tab.
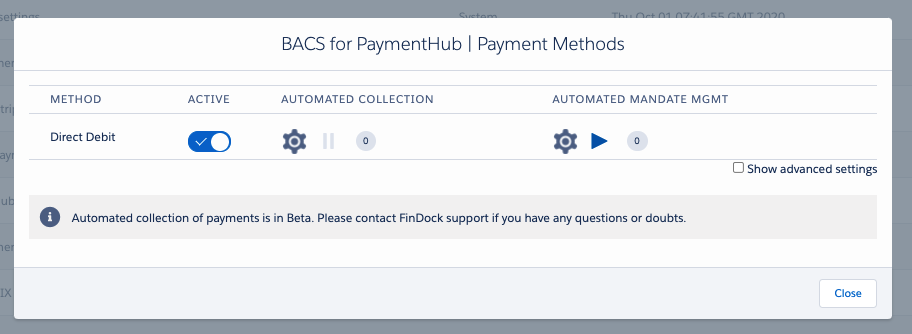
- Go to the ACTIVATE / DEACTIVATE tab and click Payment Method next to the processor you want to configure.

- Click the cog wheel next to the payment method you would like to automatically collect.
- Click the Auto Run toggle and then Close.
- Check if the grey pause icon next to the payment method has turned into a blue play icon.
Once auto-run is enabled, all payment schedules with the given processor and method combination are run automatically unless you explicitly exclude a payment schedule by selecting the “Exclude from Auto Run" checkbox on the schedule.
Enabling automated mandate schedule creation
You can use recurring mandate schedules to generate a fixed number of mandate schedules (normal use) or to create an unlimited number of schedules (automated use).
If you want to use a recurring mandate schedule for automated mandate management, create a new schedule (see above) and select the Auto Create option.
When using auto-create, you also need to define:
- Run Date Conflict Strategy: this determines how FinDock handles a run date that falls outside business hours. The options are:
- Run on previous working day
- Run on next working day (default)
- Processing Date Conflict Strategy: this determines how FinDock handles a processing date that falls outside business hours. This is only used for Bacs Direct Debit with FinDock as processor. The options are:
- Process on previous working day (default)
- Process on next working day
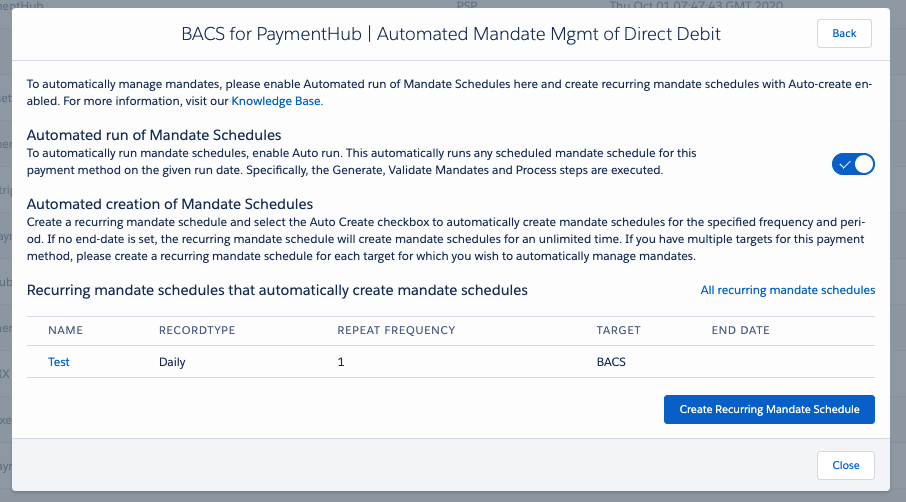
To check whether recurring mandate schedules have been configured for a certain payment processor and method combination:
- Launch the FinDock app and click the Setup tab.
- Go to the ACTIVATE / DEACTIVATE tab and click Payment Method next to the processor you want to configure.
- Check the number in the circle under AUTOMATED MANDATE MGMT. This indicates the number of recurring schedules configured.
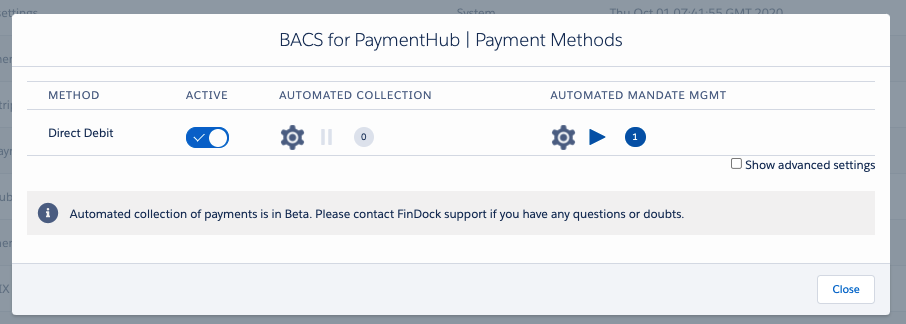
- Click the cog wheel next to the payment method you would like to automatically manage.
- Under Automated Management of Mandate Schedules - Recurring mandate schedules that automatically create mandate schedules, you will find a list of recurring manate schedules configured for this specific payment processor and method combination.