There are several ways to use GoCardless to collect direct debits. Keep in mind that some require a GoCardless Pro or higher subscription. In addition, you may need to get special approval from GoCardless to use certain collection processes, such as taking payments by phone or in writing. Please make sure to contact GoCardless in these cases. FinDock cannot provide these approvals for you.
To enrich the customer profile with payment data and allow for updates to (recurring) payments in GoCardless from Salesforce, FinDock makes sure data is available in both Salesforce and GoCardless. The table below shows the data mapping between FinDock and GoCardless.
| FinDock | GoCardless |
|---|---|
| Contact or Person Account | Customer |
| Payment Profile | Bank account |
| Mandate | Mandate |
| Installment | Payment |
| Recurring Payment | No mapping; only handled on FinDock side |
You can create direct debit payments with the following mechanisms:
- Online
- FinDock Payment API (custom front end or Giving Pages and PayLink)
- FinDock Quick Direct Debit component
- GoCardless Payment Link or Email
- Manual entry
- Create or bulk import data for Salesforce records
For recurring direct debit payments, payment schedules are used to send payment instruction to GoCardless.
Currently unsupported or redundant mechanisms:
- Custom Hosted Payment Pages
- Cancelling single installments from Salesforce
- Setting up a new one-time or recurring direct debit with an existing mandate
- Triggering refunds from Salesforce
- Subscriptions and plans in GoCardless
- Manual entry of mandates in GoCardless
Direct debit mandates are fully managed by GoCardless. The FinDock Core mandate service is not used to auto-create mandates for GoCardless. However, new mandates can be added in Salesforce and registered in bulk using mandate schedules.
You can use your own online payment form or FinDock Giving Pages to create single or recurring direct debits via the FinDock Payment API.
To trigger a direct debit onboarding flow with GoCardless, use PaymentProcessor=GoCardless-FinDock and for PaymentMethod use one of the following options:
ACH Direct DebitAutogiroBACS Direct DebitPADSEPA Direct Debit
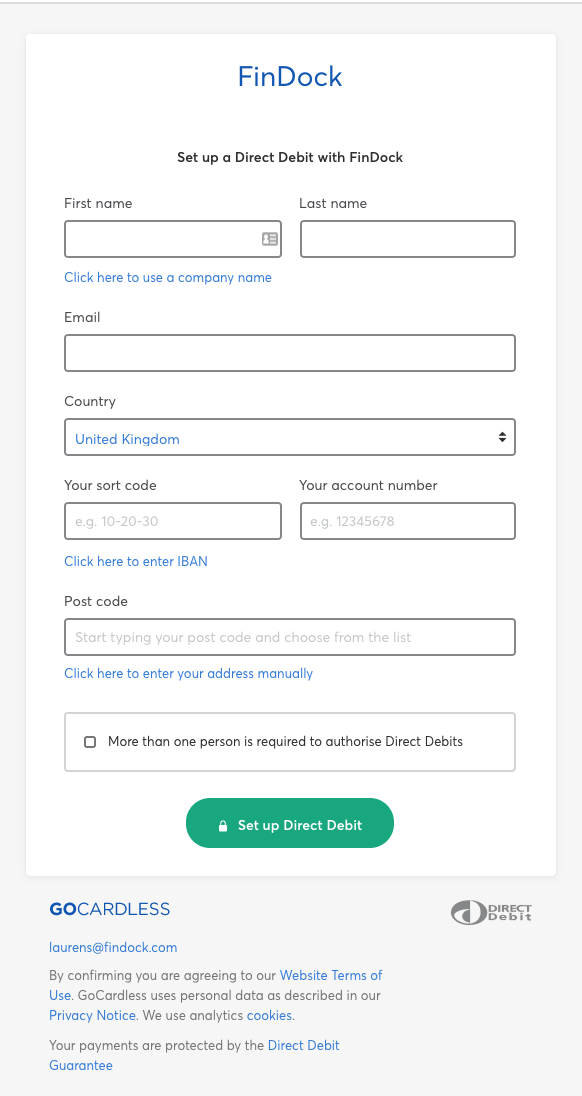
The flow redirects to a GoCardless page for the given payment method. For example, the Bacs Direct Debit redirect goes to a payment setup pages like this:

One-time payments are collected automatically. To generate and collect future payments of recurring direct debits, you need to run a payment schedule.
This option requires GoCardless Pro and separate approval from GoCardless.
You can use the Quick Direct Debit component to manually set up a Bacs Direct Debit payment from a Contact or Person Account record.
To use Quick Direct Debit:
- Go to the record of the payer for whom you want to set up a direct debit payment.

- Make sure the record has both a name and email address for the payer.
- Input the payer's Sort Code and Account Number in the Quick Direct Debit window.
- Select One Time or Recurring payment.
- If Recurring payment was selected, select a Frequency and a Start Date.
- If One Time payment was selected, enter a Description.
- Enter an amount
- Click Submit.
FinDock automatically sets up the direct debit with GoCardless. If successful, you see a green success bar at the top. If not successful, you instead see a red error bar at the top with a suggestion on what needs to be fixed, like “Validation failed: email can't be blank.”
Once successful, FinDock also creates the corresponding records (installment, mandate, payment profile, etc.) for the payment in Salesforce and relates them to the contact or person account. You can later edit these records directly as needed.
Individual payments (Installment records) of a recurring direct debit are generated and collected through payment schedules.
When you run a payment schedule, FinDock compares the due date of the installment with the Next Possible Charge Date on the mandate at GoCardless to determine what should be done.
- If the due date is before Next Possible Charge Date, FinDock does not send a date, but rather lets GoCardless handle the collection date.
- If the due date is after Next Possible Charge Date, FinDock sends the date to GoCardless, and they collect on that date.
Once a payment has been collected, the status and open amount of the installment in Salesforce are updated automatically.
Once you have set up a Bacs or Autogiro payment in FinDock, GoCardless will:
- Register the mandate with the scheme authorities and/or banks as required.
- Send required notifications to the payer. See also Payer notifications.
- Collect payments from payer bank accounts.
- Manage the mandate based on communication with the scheme authorities.
- Send you, the merchant, updates on payments, mandates and payers (customers).

FinDock automatically checks lead-time compliance on mandates and sets next charge dates in accordance with the given scheme requirements.
Please make sure you take timing requirements into account when running a payment schedule.
Mandates used for direct debit always go through a pending registration acceptance phase at GoCardless. However, the mandates may already be used in some direct debit schemes in this phase. To ensure the right payments are selected in a Payment Schedule, FinDock sets the mandate to active as follows:
- ACH Direct Debit
- Status: Pending registration acceptance
- Active: True
- Autogiro
- Status: Pending registration acceptance
- Active: False
- Bacs Direct Debit
- Status: Pending registration acceptance
- Active: False
- PAD Direct Debit
- Status: Pending registration acceptance
- Active: False
- SEPA Direct Debit:
- Status: Pending registration acceptance
- Active: True
Direct debits accepted through online channels (e.g. Payment API) automatically get a Mandate record with the above Status and Active values. When the mandate is authorized, GoCardless sends a notification to FinDock. On the basis of the notification, FinDock updates the Mandate status to Success and, if not already, sets Active to True.
With FinDock you can update and cancel direct debit mandates from Salesforce. However, GoCardless allows for very limited updates to customer details, mandates and payments.
To change the following details, for example, you need to set up a new direct debit:
- Contact (Customer) email
- One-time payment amount
- Cancellation of payments already created in GoCardless
- Bank account details
GoCardless only supports a limited set of updates to existing records. Please refer to the GoCardless documentation for details.
To cancel an individual GoCardless direct debit mandate:
- Go to the specific mandate record.
- Click the Cancel Mandate button.

FinDock automatically sends the cancellation request to GoCardless. If the operation is successful, the mandate is deactivated and the record status in FinDock is updated to Cancelled.
Creating mandates requires GoCardless Pro or Enterprise and explicit approval from GoCardless.
If you need to create (lodge, in Bacs DD terms) or cancel several mandates, you can do this through mandate schedules.
Using mandate schedules allows you to integrate mandate creation or cancellation into custom workflows.
Bulk mandate manage can be used with all direct debit payment methods except PAD.
To create new mandates (one-by-one or in bulk):
- Create a payment profile with payer's direct debit method details.
- For Payment Profile record type, select IBAN for SEPA; for others, select BBAN.
- Fill in the required fields for the given direct debit method.
- Create a mandate for the payer.
- Set the Status to Pending registration.
- Fill in the required fields for the given direct debit method.
- Link the payment profile from step 1.
- Create the recurring payment.
- Fill in the payment details (amount, frequency, payment method, etc.).
- Link the mandate and payment profile from steps 1 and 2.
- Verify your data using the Data Quality component and fix any issues flagged by the component.
- Run a mandate schedule for the given direct debit payment method with GoCardless as processor.
Once the mandate schedule is run, the status of mandates included in the schedule changes to Pending registration acceptance. FinDock automatically updates the mandates based on notifications from GoCardless. If authorization is successful, the mandate status changes to Success and Active is set to True.
To cancel mandates:
- Set the status of Mandate records to be cancelled to Pending cancellation.
- Run a mandate schedule for the given direct debit payment method with GoCardless as processor.
Direct debit schemes have different information requirements for mandate registration. When manually entering Mandate and Payment Profile records, check that you have the minimum required information based on the data quality requirements for GoCardless.
For ACH direct debit mandates, for example, the following fields are required in addition to the standard information:
- Mandate
- Authorization Method: the SEC code indicating how the authorization was communicated (paper, telephone, online)
- Payment Profile
- Bank Account Type: the payer's account type, checking or savings
- Address Line: the payer’s full street address
- City: the payer’s city of residence
- Zip/Postal Code: the payer’s residence postal code
- State/Province: the payer’s state of residence
- Country: the payer’s country of residence (2-letter ISO code)
If a GoCardless direct debit is paid, FinDock receives a notification from GoCardless. From this notification FinDock creates an Inbound Report record for reconciliation through Guided Matching.
When you install FinDock, you get a set of managed and suggested rules for Guided Matching out-of-the-box to get you started. You can further expand on these rules by adding your own matching rules.
The refund process starts from the GoCardless end. Refunds cannot be triggered from Salesforce. For information on how to process refunds with GoCardless, please visit the GoCardless support site.
When a refund is initiated with GoCardless, FinDock receives notifications about the refund actions and automatically updates payment data in Salesforce accordingly.