FinDock integrates with Authorize.net, an global provider of payment services and subsidiary of Visa.
| Payment Method | Currency | One-time | Recurring | Initial Recurring | Refunds |
|---|---|---|---|---|---|
| ACH Direct Debit | USD, CAD | Optional | |||
| Card | Multi | Optional |
| Payment Method | Online Flow | API | MOTO | Data Entry | Initiate Refund |
|---|---|---|---|---|---|
| ACH Direct Debit | Redirect | ||||
| Card | Redirect |
- FinDock is installed and configured.
- WebHub is connected.
- You have an Authorize.net merchant account.
To integrate FinDock with an Authorize.net merchant account, you'll need API credentials and a webhook endpoint for notifications. You create the credentials through the Authorize.net portal.
To create API credentials:
- Log in to your Authorize.net account.
- If you are setting up an org for testing, create a sandbox account.
- Follow the Authorize.net instructions to create new Transaction Key and Signature Key credentials.
- Copy your API Login ID and Transaction Key values and save them in a temporary location. They are needed for the FinDock setup. (The Signature Key is for webhook notifications to FinDock.)
After the FinDock configuration, you'll need to go back to the Authorize.net portal to complete the integration, so you can leave it open in a separate browser tab or window.
Follow the standard procedure for installing and activating the Authorize.net for FinDock payment extension.
Check and assign the required permissions. If you are using custom permission set groups, ensure the package-specific permission sets are assigned.
To integrate with Authorize.net, you need to add a merchant account in FinDock that defines named credentials and other details related to your customer account with Authorize.net. Details may vary depending on whether you are configuring a test or production setup.
To add a merchant account for Authorize.net:
- Launch the FinDock app and go to the FinDock Setup tab.
- Click Processors & Methods in the left-hand menu.
- On the Installed tab, click the Authorize.net processor entry.
- On the Accounts tab, click Add account and fill in the settings as described below.
- If not done already, on the Payment Methods, click the toggle next to the payment methods you want to activate and use.
- Merchant Account Name (Target): This is the value that you see in Target picklists. The name does not need to match the name of your account in the Authorize.net portal, however, make sure it easily distinguishable from other accounts in the org. If you use multiple currencies, we recommend including the currency identifier in the name.
- Test Account: If you are configuring a test integration, mark this checkbox. The If checked the test endpoint will be used.
- Default Account: Toggle this setting on if you want this account to be used for new Authorize.net payments that do not include a specific target in the payment intent.
- Log Requests: Toggle this setting on if you want to capture all API requests between FinDock and Authorize.net. The requests are stored in Log object records.
- Notification URL: This is the webhook URL used by Authorize.net to notify FinDock of payment events. Copy-paste the URL generated by FinDock into the Webhooks configuration of your Authorize.net portal under Notification Settings > Webhooks.
- Currency: Select the currency used by your Authorize.net account. Each merchant account at Authorize.net supports a single currency. If you use multiple currencies, you need separate merchant accounts at Authorize.net (and in FinDock) for each currency.
- API Login ID: Copy-paste the unique API Login ID associated with the account you are integrating with FinDock. If you do not have the original email from Authorize.net with this information, you can find the ID in your account portal under General Security Settings > API Credentials & Keys.
- Transaction Key: Copy-paste the unique Transaction Key for the API Login ID you entered above. If you don't have the original email, you can generate a key under General Security Settings > API Credentials & Keys.
- Address Verification Services (AVS): set the default AVS requirement for new payment intents for all payment acceptance channels. AVS must be enabled for your account at Authorize.net to use it with FinDock. The options are:
- None: billing information for AVS cannot be included
- Optional: billing information for AVS may be included
- Required: billing information for AVS must be included
The Notification URL from your target setup above needs to be added to your Authorize.net account so FinDock can receive webhook events from Authorize.net.
To add the Notification URL to Authorize.net:
- Log in to your Authorize.net account.
- Follow the Authorize.net instructions to add a new endpoint for FinDock.
- For the new FinDock endpoint:
- Enter a name for the endpoint.
- Copy-paste the Notification URL from FinDock into the Endpoint URL field.
- Set status to Active.
- Select All events for the endpoint.
- Click Save when you are done.
For both credit card and ACH payments, FinDock relies on the Transaction Id from Authorize.net to manage the installments. In the case of recurring ACH payments, FinDock also creates a mandate to capture the payer authorization for future installments of recurring payment.
You can set up and accept one-time and recurring payments through any of the following channels:
- Giving Pages: accept payments through Givings Pages configured to use Authorize.net for card payments
- PayLinks: create and share PayLinks for one-time or recurring payments
- Payment API: custom front-end integration to the Payment API to accept new payments and update existing commitments
- Virtual Terminal - MOTO: FinDock component for agents to setup payments with the payer present
New one-time payments are automatically processed, collected and reconciled like normal online payments.
When a new recurring payment is set up, the Authorize.net integration supports an optional initial payment. If not initial payment is included, payers are redirected to a hosted page to confirm the details and authorize the recurring payment without being immediately charged. Once authorized, you can collect the first installment, and future installments, through payment schedules.
New recurring payments through PayLinks or a Giving Page with the initial payment toggle set to true include an initial payment for the full amount of the recurring payment.
The FinDock integration with Authorize.net also supports both full and partial refunds. You can issue a refund with the Authorize.net Quick Refund feature as well as initiate refunds from Salesforce.
The refund process sends notifications to FinDock for updating the impacted installments and creating negative Payment records. In the case of full refunds, the installment status is changed to Refunded. If the refund is a partial refund, the installment status is updated to Partially paid.
FinDock also handles notifications of transactions that are voided after they have been captured. In the voiding scenario, the transactions are captured but not yet settled, so they are not technically refundable. Instead, a void action is used by Authorize.net. FinDock uses this void notification uses to update the related installment status to Refunded (and create a negative Payment record to cancel out the initial positive payment). In addition, FinDock adds a Last Status Reason value to the installment that refers to the voiding action.
FinDock supports the IP-Shipping Address Mismatch Filter fraud detection option which needs to be enabled in your merchant account.
Once enabled, FinDock uses two fields for IP address fraud detection:
- Customer IP Address (
aufd__Customer_Ip__c) on Mandate to store the payer's IPv4/IPv6 address - Country (
cpm__Country_PL__c) on Payment Profile to store the 2-letter ISO code of the payer's country
For a new (recurring) payers, the customer IP address is captured from the incoming Authorization.net notification (in an inbound report). All subsequent collections for that same recurring payment use the IP address. If for some reason FinDock does not have an IP address, e.g. for existing Authorize.net payers, new collections do not include an IP addresses. The payer either needs to create a new recurring payment, or the merchant can manually add the IP address. If no IP address is available, FinDock uses 0.0.0.0 as the Customer IP Address value.
The Country can be set with the countryCode parameter in the PaymentMethod block of the payment intent. For Giving Pages or PayLinks, enable the countryCode parameter for the credit card payment method configuration. You can use merge fields from address input fields to prefill the country code.
If fraud is detected, Authorize.net sends FinDock fraud-related notifications which are handled as follows:
payment.fraud.held- Installment Status = Pending
- Last Status Reason = 252 - The transaction was accepted, but is being held for merchant review.
payment.fraud.declined- Installment Status = Failed
- Last Status Reason = 251 - The transaction was declined as a result of triggering a Fraud Detection Suite Filter.
payment.fraud.approved- Processed as a normal successful payment intent (same as
payment.authcapture.created)
- Processed as a normal successful payment intent (same as
Please note that FinDock AVS settings are independent of your account settings at Authorize.net. If you have enabled AVS at Authorize.net, but do not require it in your FinDock setup, payments fail.
Authorize.net supports fraud detection through Address Verification Service (AVS). The option is enabled through your account settings.
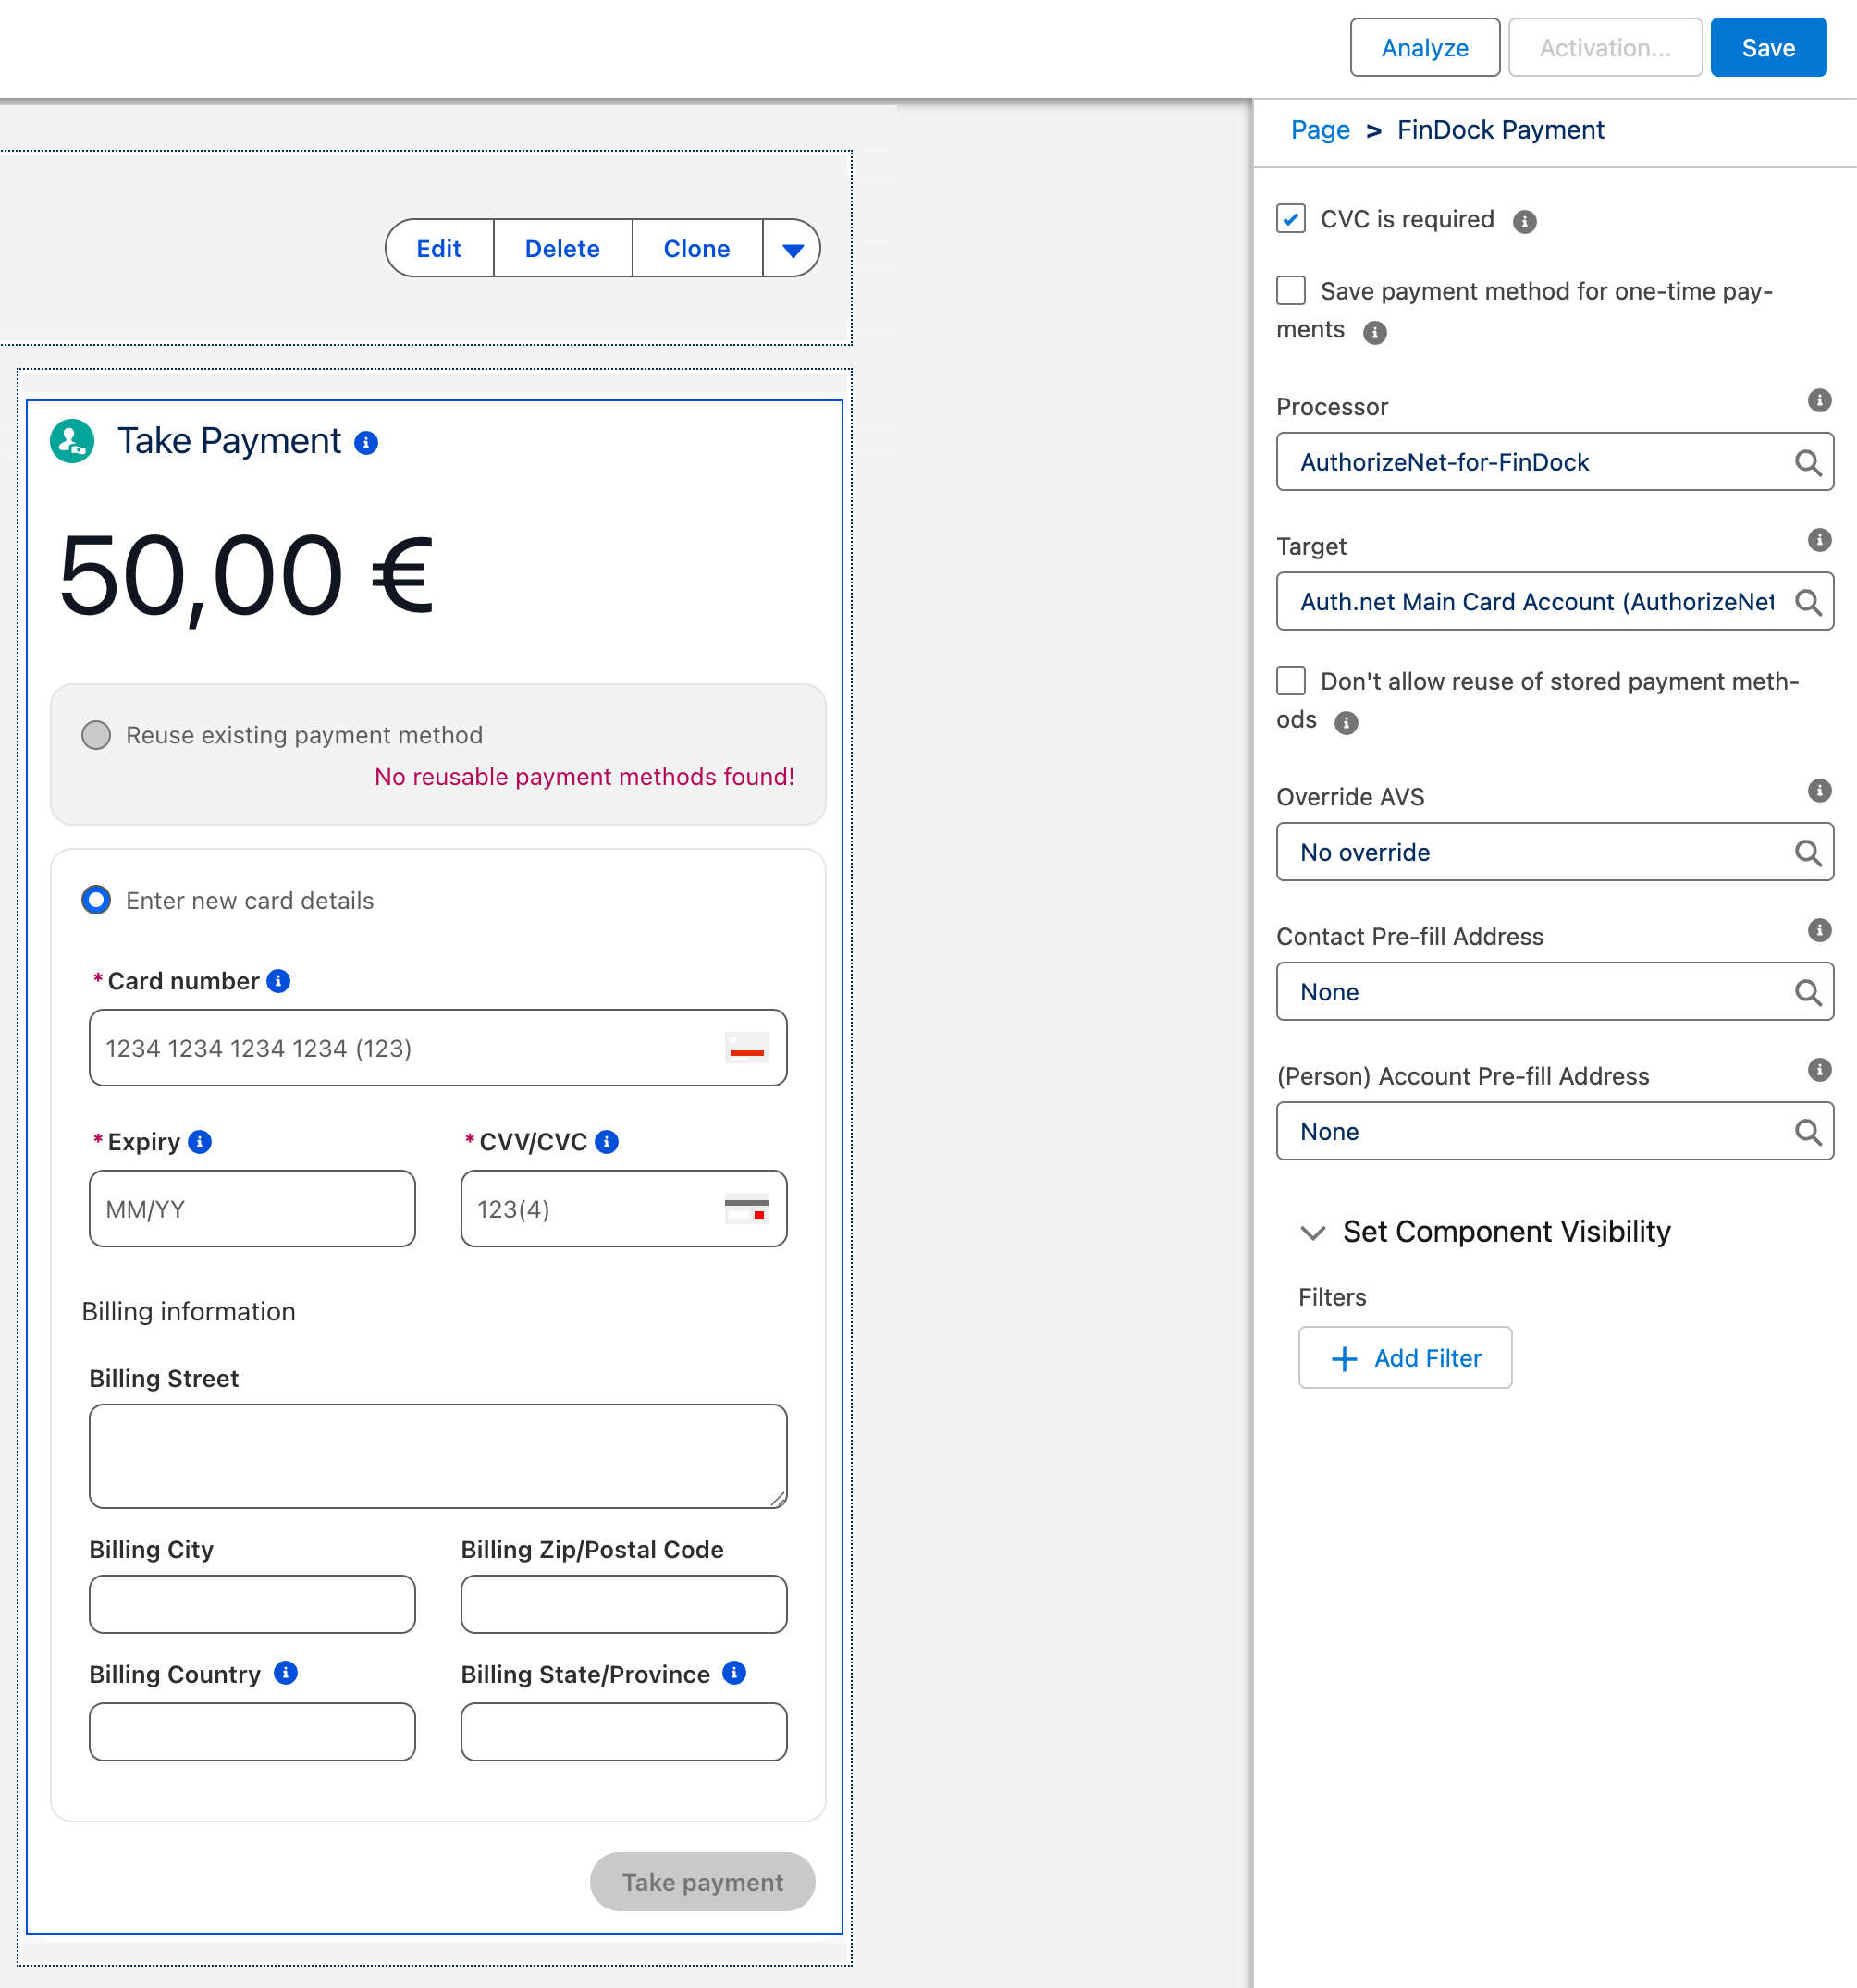
You have two controls for AVS in FinDock. The target-level (merchant account) setting tells FinDock what to do by default for any Authorize.net payment using that target. In addition, specifically for MOTO (virtual terminal) payments, you have an Override AVS setting in the FinDock Payment component.
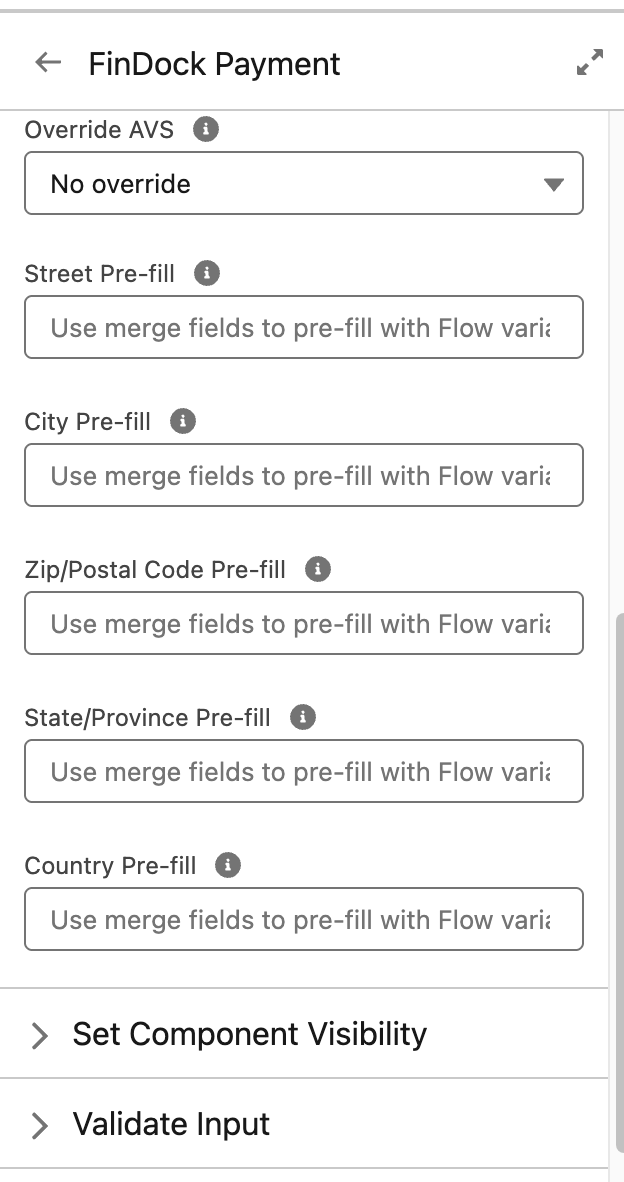
If AVS is required for the target used in the Payment component configuration, the AVS override cannot change that requirement. The component level override can only be stricter, e.g. the target-level setting makes AVS optional, but for the component, you use the override to make AVS required. In addition to the override, you define which Salesforce fields are used to pre-fill address values in the component.
The Payment component can also be used in Flows with AVS enabled. With Flows, merge fields should be used for pre-filling address values.
When AVS is used with online payments (Giving Pages, PayLinks, Payment API), the billing address information is required on the hosted payment page (HPP) from Authorize.net. The online payment AVS requirement is determined by your merchant account (target) settings.
The following are example payment intent messages for one-time and recurring card payments set up via the Payment API (with FinDock as source).
If you are passing several parameters in a payment intent, the redirect URL may get very long. The Description in particular, can be long (max. 255 characters). A very long URL can break the payment flow with Authorize.net, leading to a "page isn't working" redirect error.
{
    "SuccessURL": "https://www.example.com/success",
    "FailureURL": "https://www.example.com/error",
    "Payer": {
        "Contact": {
            "SalesforceFields": {
                "FirstName": "Test",
                "LastName": "Payment",
                "Email": "testpayment@findock.com"
            }
        }
    },
    "OneTime": {
        "Amount": "100"
    },
    "PaymentMethod": {
        "Name": "Creditcard",
        "Processor": "AuthorizeNet-for-FinDock"
    },
    "Settings": {
        "SourceConnector": "PaymentHub"
    }
}{
"SuccessURL": "https://www.example.com/success",
"FailureURL": "https://www.example.com/error",
"Payer": {
"Contact": {
"SalesforceFields": {
"FirstName": "Test",
"LastName": "Payment",
"Email": "testpayment@findock.com"
}
}
},
"OneTime": {
"Amount": "25",
},
"Recurring": {
"Amount": "25",
"Frequency": "Monthly",
"StartDate": "2025-04-01"
},
"PaymentMethod": {
"Name": "CreditCard",
"Processor": "AuthorizeNet-for-FinDock"
},
"Settings": {
"SourceConnector": "PaymentHub"
}
}